


6 Pro Tips to Upgrade Any Salad with the Right Dressing
March 14, 2025
Top 5 Trendy Cuisines That Are Dominating the U.S. Market
March 14, 2025
Did you know that baklava has been a beloved dessert for over 500 years? Originating in the Ottoman Empire, this sweet treat has stood the test of time, captivating taste buds with its rich layers of phyllo dough, nuts, and syrup. Whether you’ve tasted it in a bustling Istanbul bazaar or at a local bakery, there’s something magical about its buttery, crunchy texture and sweet aroma.
In this guide, you’ll discover how to recreate this iconic dessert at home. We’ll walk you through every step, from selecting the finest ingredients like paper-thin phyllo dough and authentic Turkish pistachios to mastering the art of layering and baking. You’ll also learn the secrets behind the perfect syrup—a blend of sugar and lemon that ties everything together.
Drawing from traditional recipes and personal experiences in Istanbul, this guide is designed to help you achieve bakery-quality results. Even if you’re a beginner, our expert tips and troubleshooting advice will ensure your dessert turns out impressive every time. Ready to impress your friends and family with a crowd-pleasing masterpiece? Let’s get started!
Key Takeaways
- Learn the history and cultural significance of this iconic dessert.
- Discover the essential ingredients, including phyllo dough and Turkish pistachios.
- Master the step-by-step process of layering, baking, and finishing with syrup.
- Gain expert tips to troubleshoot common baking challenges.
- Create a dessert that’s as impressive as it is delicious.
Introduction to Turkish Baklava
The story of baklava is as layered as the dessert itself. This iconic treat has been a staple in Middle Eastern and Mediterranean cultures for centuries. Its origins trace back to the Ottoman Empire, where it became a symbol of celebration and luxury. Today, it’s enjoyed worldwide, but its roots remain deeply tied to Turkey and Greece.
Baklava’s Rich History and Cultural Ties
Baklava’s history is a fascinating blend of cultures. While it’s often associated with Turkey, its origins are shared with neighboring regions like Greece and Armenia. The dessert’s evolution reflects centuries of trade, migration, and cultural exchange. In Turkey, it became a centerpiece of royal feasts and religious celebrations, symbolizing prosperity and hospitality.
Greek and Turkish baklava share similarities but also have distinct differences. Greek versions often use honey and walnuts, while Turkish recipes favor sugar syrup and pistachios. These variations highlight the creativity and regional influences that have shaped this beloved dessert.
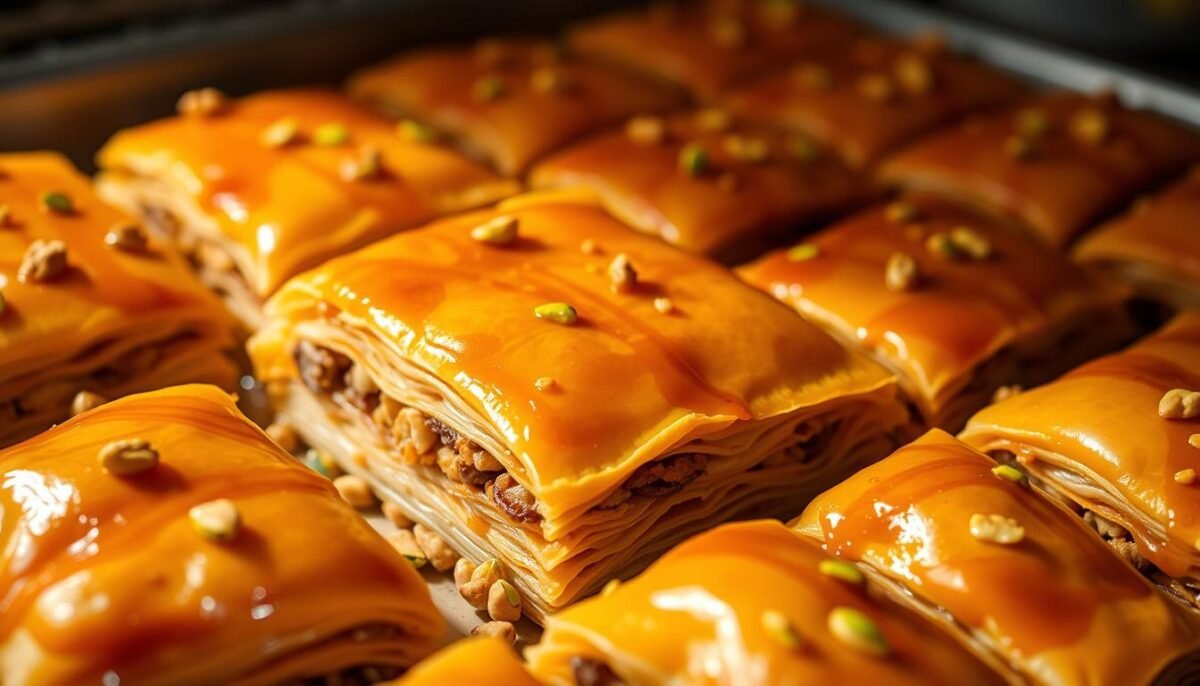
What Makes Turkish Baklava Unique
Turkish baklava stands out for its use of pistachios and sugar syrup, which give it a unique flavor and texture. The layers of phyllo dough are meticulously brushed with butter, creating a crispy yet tender bite. The syrup, made with sugar and a hint of lemon, ensures the dessert stays moist without becoming soggy.
Traveling through Istanbul, you’ll find baklava shops that have perfected this recipe over generations. These experiences highlight the dessert’s authenticity and the pride Turks take in their culinary heritage. Understanding these cultural ties not only enhances your appreciation for the dessert but also connects you to its rich history.
As you dive into making your own baklava, remember that each layer and ingredient carries a piece of this tradition. The next sections will guide you through the process, blending historical insights with practical steps to create a dessert that’s both delicious and meaningful.
Essential Ingredients and Tools
Crafting an authentic dessert starts with the right ingredients and tools. Each component plays a crucial role in achieving the desired texture and flavor. Let’s break down what you’ll need to create this iconic treat.
Phyllo Dough, Butter, and Nuts
The foundation of this dessert is phyllo dough. These thin sheets are layered to create a crispy, flaky texture. Quality matters here—opt for fresh or properly thawed dough for the best results. Thaw it overnight in the refrigerator to prevent tearing.
Next, you’ll need clarified butter. It’s brushed between each layer to add richness and ensure even baking. Avoid substitutes, as they can alter the flavor and texture.
For the filling, finely chopped nuts are essential. While pistachios are traditional, walnuts can be a great alternative. Choose high-quality nuts for a richer taste and crunch.
Syrup Essentials and Kitchen Equipment
The syrup is what ties everything together. It’s made from sugar, water, and a hint of lemon juice. This combination ensures the dessert stays moist without becoming soggy. Precision is key—measure your ingredients carefully.
For tools, you’ll need a pastry brush to apply the butter evenly. A sharp knife is essential for cutting the layers cleanly. Use a 9×13-inch pan for even baking and easy serving.
If you’re making dough from scratch, an oklava (a thin rolling pin) can be helpful. While not mandatory, it ensures the dough is rolled out evenly and thinly.
- Key Ingredients: Phyllo dough, clarified butter, pistachios or walnuts, sugar-lemon syrup.
- Tools: Pastry brush, sharp knife, 9×13-inch pan, oklava (optional).
- Tips: Thaw phyllo dough overnight, use quality nuts, and measure syrup ingredients precisely.
Remember, the quality of your ingredients and tools directly impacts the final result. Take your time to gather everything you need, and you’ll be one step closer to creating a dessert that’s both delicious and authentic.
Preparation and Dough Techniques
The key to flaky, layered baklava lies in the preparation process. Whether you’re using ready-made sheets or rolling out your own, handling the dough correctly is essential. Let’s dive into the steps to ensure your dessert turns out just right.
Rolling Out Phyllo and Clarifying Butter
If you’re using ready-made phyllo dough, ensure it’s properly thawed. Keep the sheets covered with a damp cloth to prevent them from drying out. This step is crucial for maintaining their thin, pliable texture.
For those making dough from scratch, roll it out as thinly as possible. Use a lightly floured surface and a rolling pin to achieve the desired thinness. Repeat the process gently, adding starch between layers to prevent sticking.

Clarifying butter is another critical step. Melt unsalted butter slowly over low heat, skimming off the foam that rises to the top. This removes the milk solids, leaving you with pure, golden butterfat. It’s this clarified butter that gives the dessert its rich flavor and crisp texture.
Take your time with each step. Properly handling the dough and butter sets the foundation for a dessert that’s both crispy and tender. These techniques are designed to help home cooks recreate an authentic experience with ease.
Creating Perfect Turkish Baklava: Step-by-Step Instructions
Mastering the art of creating this iconic dessert requires precision and patience. Follow these detailed steps to achieve a dessert that’s crispy, sweet, and visually stunning. Let’s break it down into manageable parts.
Layering, Assembling, and Cutting Your Baklava
Start by laying a base of 8-10 sheets of phyllo dough in your pan. Brush each sheet generously with melted clarified butter to ensure even crispiness. Repeat this process for the next layers, adding a sprinkle of finely chopped pistachios or walnuts between every few sheets.
Once you’ve built up the layers, use a sharp knife to cut the assembled dessert into clean, geometric shapes. Make sure to cut all the way through to the bottom for even baking. This step ensures each piece is easy to serve and looks professional.

Baking, Syrup Pouring, and Finishing Touches
Preheat your oven to 350°F (175°C) and bake the dessert for about 45-50 minutes. Check every 15 minutes to ensure it turns a golden brown without burning. Adjust the temperature if needed.
While the dessert bakes, prepare the syrup by combining sugar, water, and a hint of lemon juice. Simmer until the sugar dissolves, then let it cool completely. Once the dessert is out of the oven, pour the cold syrup over the hot layers. This temperature difference prevents sogginess and enhances the texture.
Let it rest for a few hours to absorb the syrup fully. Garnish with crushed nuts or a dusting of powdered sugar for a final touch. Your masterpiece is now ready to impress!
Expert Tips and Troubleshooting
Creating this dessert at home can be rewarding, but it comes with its own set of challenges. Even small mistakes can affect the final result. Here are some expert tips to help you avoid common pitfalls and achieve the best outcome.
Avoiding Common Pitfalls
One of the most common issues is soggy layers. To prevent this, make sure your syrup is completely cooled before pouring it over the hot dessert. This temperature difference ensures the layers stay crisp.
Another thing to watch out for is uneven baking. Rotate your pan halfway through the baking process to ensure even browning. If the bottom layers aren’t baking through, try lowering the oven temperature slightly and extending the baking time.
Enhancing Crunch and Preventing Sogginess
To maintain the crunch of the delicate phyllo layers, keep your workspace at room temperature. Cold dough can tear easily, while warm butter ensures even application. Use a second brush of clarified butter between layers for better adhesion.
If your dessert appears too wet at any stage, let it sit uncovered for a few hours. This allows excess moisture to evaporate, restoring the desired texture.
Adjusting Techniques for Home Cooks
Every oven is different, so adjust baking time and temperature based on your specific appliance. Start checking for doneness 10 minutes before the recommended time to avoid overbaking.
For home cooks, using a little extra starch between layers can prevent sticking. Experiment with these techniques while staying true to the core methods for the best results.
- Key Tips: Cool syrup before pouring, rotate pan for even baking, and adjust oven settings as needed.
- Tools: Use a pastry brush for even butter application and a sharp knife for clean cuts.
- Adjustments: Lower oven temperature if bottom layers aren’t baking through and let the dessert sit to evaporate excess moisture.
With these tips, you’ll feel confident tackling this dessert at home. Remember, practice makes perfect, and each attempt brings you closer to mastering this iconic treat.
Conclusion
Creating this iconic dessert at home is a rewarding experience. By selecting quality ingredients like phyllo dough, pistachios, and clarified butter, you set the stage for success. The careful layering, precise baking, and final syrup pour ensure a balanced, sweet treat every time.
This recipe connects you to a rich culinary tradition. The process may seem detailed, but each step is worth the effort. From the first bite, you’ll taste the authenticity and care that goes into making this dessert.
Feel free to experiment slightly to match your kitchen setup. Share your results online and join a community of enthusiasts who appreciate this timeless treat. With patience and attention, you’ll master a dessert that’s both delicious and deeply meaningful.
FAQ
What is the best way to handle phyllo dough?
Keep it covered with a damp cloth to prevent drying. Work quickly and handle it gently to avoid tearing.
Can I use other nuts besides walnuts or pistachios?
Yes, almonds or hazelnuts work well too. Just make sure they’re finely chopped for even layering.
How do I prevent my dessert from becoming soggy?
Ensure the syrup is at room temperature when pouring it over the freshly baked layers. This helps maintain the crunch.
What’s the ideal oven temperature for baking?
Preheat your oven to 350°F (175°C) for even cooking and a golden finish.
Can I make the syrup ahead of time?
Absolutely! Prepare the syrup a day in advance and store it at room temperature. It’ll save you time on the day of baking.
How do I cut the layers cleanly?
Use a sharp knife and make precise, even cuts before baking. This ensures neat, professional-looking pieces.
Can I substitute honey for sugar in the syrup?
Yes, honey adds a rich flavor. Just adjust the quantity to balance sweetness and consistency.
How long should I let it cool before serving?
Allow it to cool completely, ideally for 2-3 hours, to let the syrup soak in and the layers set properly.
What’s the best way to store leftovers?
Keep it in an airtight container at room temperature for up to a week. Avoid refrigeration to maintain texture.
Can I freeze it for later?
Yes, wrap it tightly in plastic wrap and freeze for up to 3 months. Thaw at room temperature before serving.


