


How to Prepare Lobster Tails for Grilling in 4 Easy Steps
February 24, 2025
How to Roast Whole Sardines for a Mediterranean-Style Meal
February 24, 2025
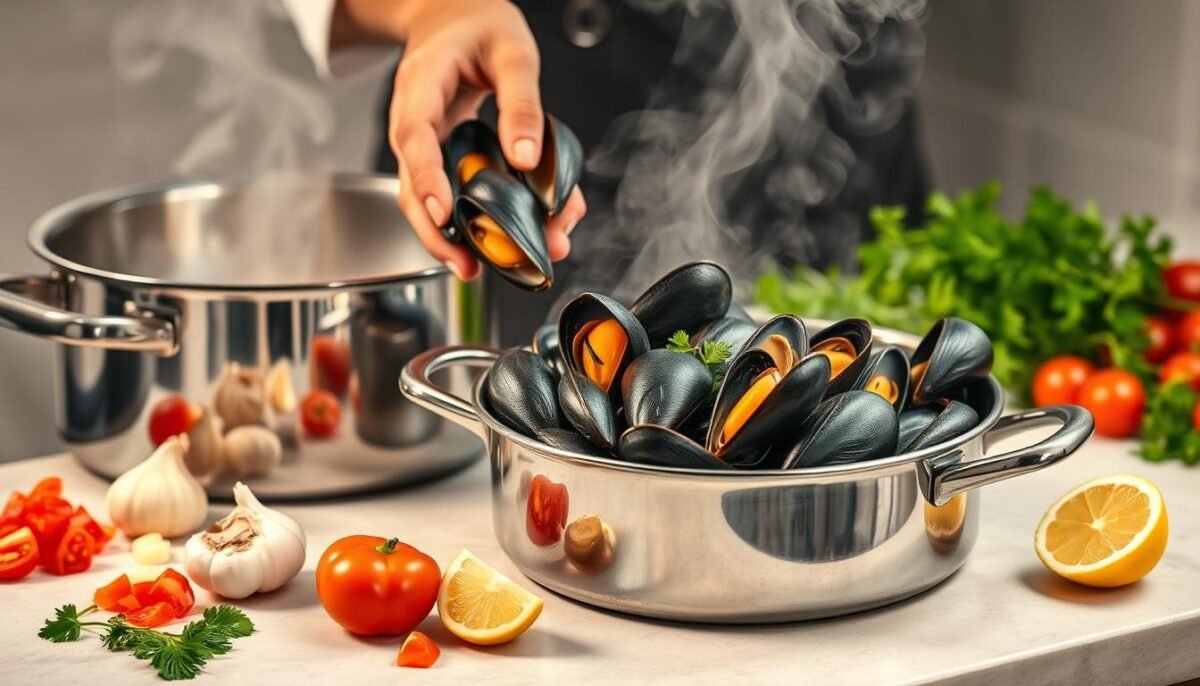
I still remember the first time I tried making mussels at home. I was nervous, thinking it would be complicated, but to my surprise, it turned out to be one of the easiest and most rewarding dishes I’ve ever prepared. The aroma of garlic and white wine filled my kitchen, and the rich broth was perfect for dipping crusty bread. That’s when I realized: cooking mussels can be both simple and gourmet when done right.
Did you know that mussels have been enjoyed for over 20,000 years? These little shellfish are not only packed with flavor but also incredibly nutritious. A single serving provides about 20 grams of protein and heart-healthy omega-3 fatty acids. Plus, they’re sustainable and affordable, often costing just $3 to $6 per pound.
In this guide, I’ll share four expert methods to help you master the art of preparing mussels. Whether you’re steaming, grilling, or baking, each technique promises maximum flavor in every shell. With fresh ingredients, the right tools (like a trusty pot), and a few pro tips, you’ll elevate your seafood dinner to restaurant-quality in no time.
Key Takeaways
- Mussels are simple to prepare and packed with flavor.
- They are a sustainable and affordable seafood option.
- Proper technique and fresh ingredients are key to success.
- Steaming, grilling, and baking are excellent methods to try.
- Pair mussels with crusty bread for a complete meal.
Introduction: My Mussel Journey
My fascination with mussels began unexpectedly during a family vacation. We were dining at a small coastal restaurant, and the aroma of garlic and shallots wafted through the air. When the steaming pot of mussels arrived, I was captivated by their briny scent and the rich broth that accompanied them. That meal sparked a lifelong love for these delicate shellfish.
How I Fell in Love with Mussels
What struck me most was the simplicity of the dish. The mussels were steamed to perfection, their shells slightly open, revealing tender meat inside. The combination of garlic, shallots, and a splash of white wine created a flavor that was both light and deeply satisfying. I knew I had to recreate this at home.
Back in my kitchen, I followed a trusted recipe, ensuring I had the right tools: a sturdy pot, a bowl for soaking, and fresh ingredients. The process was surprisingly easy. I learned to drain the water properly and store the mussels in a bowl with a damp towel to keep them fresh. The result was a dish that reminded me of that unforgettable vacation.
What Makes Mussels So Special?
Mussels are more than just a delicious meal; they’re a sensory experience. The briny aroma, the tender texture, and the way they pair so well with garlic and shallots make them a standout ingredient. Plus, they’re incredibly nutritious, packed with protein, omega-3s, and essential minerals.
Here’s a quick breakdown of why mussels are a must-try:
| Feature | Benefit |
|---|---|
| Rich in Protein | Provides about 20g per serving |
| High in Omega-3s | Supports heart health |
| Sustainable | Eco-friendly seafood option |
| Affordable | Costs just $3 to $6 per pound |
Whether you’re a seafood enthusiast or a curious beginner, mussels are a dish worth exploring. With the right recipe and a little practice, you can bring the flavors of the coast to your own kitchen.
Selecting Fresh Mussels and Essential Prep Tips
The key to a perfect mussel recipe starts with choosing the right ingredients. Freshness is crucial, and knowing how to identify and prepare them properly can make all the difference. Here’s how to ensure you’re working with the best quality mussels and setting yourself up for success.
Identifying the Freshest Mussels
When selecting mussels, always look for shells that are intact and closed. If a shell is slightly open, gently tap it. If it closes, the mussel is still alive and fresh. Discard any that remain open or have cracked shells, as they may be unsafe to eat.
Another tip is to check for a briny, ocean-like scent. Avoid mussels that smell overly fishy or unpleasant. Freshness is your best friend when it comes to creating a flavorful dish.
Cleaning and Storing Techniques
Once you’ve selected your mussels, it’s time to clean them. Start by rinsing them under cold water to remove any sand or debris. Use a stiff brush to scrub the shells gently. Next, remove the beard—the fibrous strand attached to the shell—by pulling it firmly with a towel.
For storage, place the mussels in a mesh bag or colander over a bowl. Cover them with a damp towel to keep them moist but not submerged in water. This method helps preserve their freshness until you’re ready to cook.
Remember, mussels are best used within a day of purchase. Discard any that show signs of damage or fail to close when tapped. With these steps, you’ll ensure your mussels are ready to shine in your recipe.
Expert Techniques for Cooking mussels
The secret to elevating mussels lies in the harmony of wine, garlic, and heat. These ingredients, when combined with the right technique, create a dish that’s both simple and luxurious. Let’s dive into the methods that make this possible.
Enhancing Flavor with White Wine and Garlic
Start by gently sautéing garlic and shallots in butter. This creates a fragrant base that infuses the dish with depth. The aroma alone is enough to make your kitchen feel like a gourmet restaurant.
Next, add a dry white wine to the pot. The wine not only adds acidity but also helps to deglaze the pan, capturing all the flavorful bits. A splash of chicken broth enhances the richness, creating a luscious cooking liquid.
Creating a Rich, Savory Broth
Once the liquid is simmering, add the mussels to the pot. Cover and let them steam for 5 to 7 minutes. As they cook, they release their juices, which blend with the wine and broth to form a savory broth.
Keep the heat at a steady simmer, around 185°F to 205°F. This ensures the mussels cook evenly without becoming tough. Once most shells have opened, remove the pot from the heat. Discard any that remain closed, as they may be unsafe to eat.
Here’s a quick guide to the process:
| Step | Key Details |
|---|---|
| Sauté Aromatics | Garlic and shallots in butter |
| Add Liquids | White wine and chicken broth |
| Steam Mussels | 5-7 minutes at a steady simmer |
| Finish | Remove from heat once shells open |
With these techniques, you’ll create a dish that’s bursting with flavor. The balance of wine, garlic, and broth ensures every bite is a delight. Whether you’re hosting a dinner party or enjoying a quiet meal, this recipe is sure to impress.
Alternative Cooking Methods: Steamed, Baked, and More
I decided to experiment with different ways to prepare shellfish, and it opened up a world of flavor possibilities. Whether you’re looking for a light, delicate dish or something richer and more aromatic, there’s a method to suit your taste. Let’s explore two standout techniques: steaming and baking.
Steaming for a Delicate, Light Flavor
Steaming is my go-to method when I want a quick yet flavorful dish. It’s perfect for preserving the natural briny taste of the shellfish. Start by heating a splash of white wine and broth in a pot. Add aromatics like garlic and shallots for depth.
Once the liquid is simmering, add the shellfish and cover the pot. Steam for about 5 to 7 minutes, or until the shells open. Keep the heat steady, around 185°F to 205°F, to ensure even cooking. The result is a light, savory broth that pairs beautifully with crusty bread.

Baking with Herbs and a Splash of Wine
Baking offers a richer, more aromatic experience. Preheat your oven to 375°F and arrange the shellfish in a baking dish. Drizzle with olive oil, sprinkle fresh herbs like thyme or parsley, and add a splash of white wine for acidity.
Bake for 10 to 12 minutes, or until the shells open. The heat intensifies the flavors, creating a dish that’s both hearty and elegant. This method is ideal for a family dinner or an impressive appetizer for guests.
| Method | Flavor Profile | Cooking Time |
|---|---|---|
| Steaming | Light, delicate | 5-7 minutes |
| Baking | Rich, aromatic | 10-12 minutes |
Both methods are simple yet yield impressive results. Whether you prefer the lightness of steaming or the depth of baking, these techniques are sure to elevate your next meal. Don’t be afraid to experiment—just keep an eye on the clock to avoid overcooking.
Accompaniments and Serving Suggestions
There’s something magical about pairing the right sides with a seafood dish. The right accompaniments can enhance the flavors and create a complete meal experience. Whether you’re serving a casual dinner or hosting a dinner party, the sides you choose can make all the difference.
Pairing with Crusty Bread
No seafood meal is complete without a loaf of crusty bread. It’s perfect for soaking up every drop of that savory broth made with garlic and white wine. The contrast of the soft interior and crispy crust adds texture to your meal. I always keep a fresh baguette on hand when preparing this recipe.
Innovative Side Dishes
For a refreshing touch, try a simple cup of mixed greens or a quinoa salad. These light options balance the richness of the dish. If you’re looking for something heartier, air-fried potatoes or lemon rice are excellent choices. The cooking liquid from the pot can even be repurposed as a sauce for pasta or risotto.
| Side Dish | Flavor Profile | Preparation |
|---|---|---|
| Crusty Bread | Savory, Textured | Serve Fresh |
| Mixed Greens | Light, Refreshing | Toss with Vinaigrette |
| Air-Fried Potatoes | Crispy, Hearty | Cook at 400°F for 10 mins |
| Lemon Rice | Zesty, Aromatic | Simmer with Lemon Zest |
With these ideas, you can create a balanced and memorable meal. The key is to choose sides that complement the flavors without overpowering them. Whether it’s a simple appetizer or a hearty side, the right pairing will elevate your dish to the next level.
Troubleshooting Common Mussel Cooking Issues
Ever faced a pot of mussels that just wouldn’t cooperate? I’ve been there too. Cooking shellfish can sometimes feel like a guessing game, but with a few expert tips, you can avoid common pitfalls and achieve perfect results every time.
Handling Open Shells and Discarding Problematic Mussels
One of the most common issues is dealing with shells that don’t open. If a shell doesn’t open during cooking, it’s best to discard it. This ensures safety and prevents spoiling the dish. Before cooking, make sure to tap each shell gently on the counter. If it doesn’t close, it’s already dead and should be discarded.
Proper storage is also key. Keep your shellfish in a mesh bag or colander, covered with a damp towel. This helps maintain freshness and prevents them from drying out. Always cook them within a day or two of purchase for the best flavor.
Preventing Overcooking and Other Pitfalls
Overcooking can lead to a rubbery texture, so timing is crucial. Cook them just until the shells open, usually 5 to 7 minutes. Keep the heat at a steady simmer, around 185°F to 205°F, to ensure even cooking. Monitor the pot closely to avoid overcooking.
For added flavor, use a mix of chicken or clam broth with a splash of wine. This creates a rich, savory broth that enhances the dish. Here’s a quick guide to troubleshooting common issues:
| Issue | Solution |
|---|---|
| Unopened Shells | Discard any that remain closed after cooking. |
| Overcooking | Cook for 5 to 7 minutes at a steady simmer. |
| Rubbery Texture | Monitor heat and timing closely. |
| Bland Flavor | Use a mix of broth and wine for depth. |
With these tips, you’ll be able to handle any cooking challenge with confidence. Remember, a little patience and attention to detail go a long way in creating a delicious dish.
Conclusion
Mastering the art of preparing shellfish is easier than you think. By following the four expert methods—steaming, baking, grilling, and sautéing—you can unlock maximum flavor in every dish. Remember, the key lies in using fresh ingredients like garlic, shallots, and a splash of white wine to create a rich, savory broth.
Proper cleaning and storage are essential. Always check for closed shells before cooking and discard any that remain open. Timing is crucial—cook for just 5 to 7 minutes to avoid a rubbery texture. Pair your meal with crusty bread or a light salad for a complete dining experience.
Don’t be afraid to experiment with different techniques and accompaniments. Whether it’s a quick weeknight dinner or an impressive appetizer, these tips will help you elevate your seafood game. For more quick tips on perfecting seafood dishes, check out this guide on how to cook perfect shrimp.
With these insights, you’re ready to create a memorable meal that’s both simple and gourmet. Happy cooking!
FAQ
How do I know if mussels are fresh?
Fresh ones should have tightly closed shells or close when tapped. Avoid any with cracked or broken shells or a strong fishy smell.
What’s the best way to clean mussels before cooking?
Rinse them under cold water and scrub off any debris. Remove the beard by pulling it toward the hinge. Discard any that don’t close when tapped.
Can I use white wine in my mussel recipe?
Absolutely! White wine adds a bright, tangy flavor to the broth. I love using a dry variety like Sauvignon Blanc or Pinot Grigio.
How long does it take to steam mussels?
It usually takes about 5-7 minutes over medium-high heat. They’re ready when the shells open fully.
What should I serve with mussels?
Crusty bread is a must for soaking up the broth. You can also pair them with a side salad or roasted vegetables for a complete meal.
What do I do if some mussels don’t open while cooking?
Discard any that remain closed after cooking. They may not be safe to eat.
Can I bake mussels instead of steaming them?
Yes! Baking with herbs, garlic, and a splash of wine creates a delicious, aromatic dish. Just keep an eye on the cooking time to avoid overcooking.
How do I store leftover mussels?
Store them in an airtight container in the fridge for up to two days. Reheat gently to avoid toughening the meat.


