


Crafting Traditional Turkish Baklava with Layers of Pistachio and Syrup
May 6, 2025
How to Cook Brazil’s Famous Feijoada Black Bean Stew
May 7, 2025
Did you know that a single bite of well-crafted moussaka contains over 200 years of Mediterranean culinary tradition? This iconic dish isn’t just food—it’s a cultural heirloom passed through generations. And today, I’m sharing my tried-and-true method to bring that magic to your kitchen.
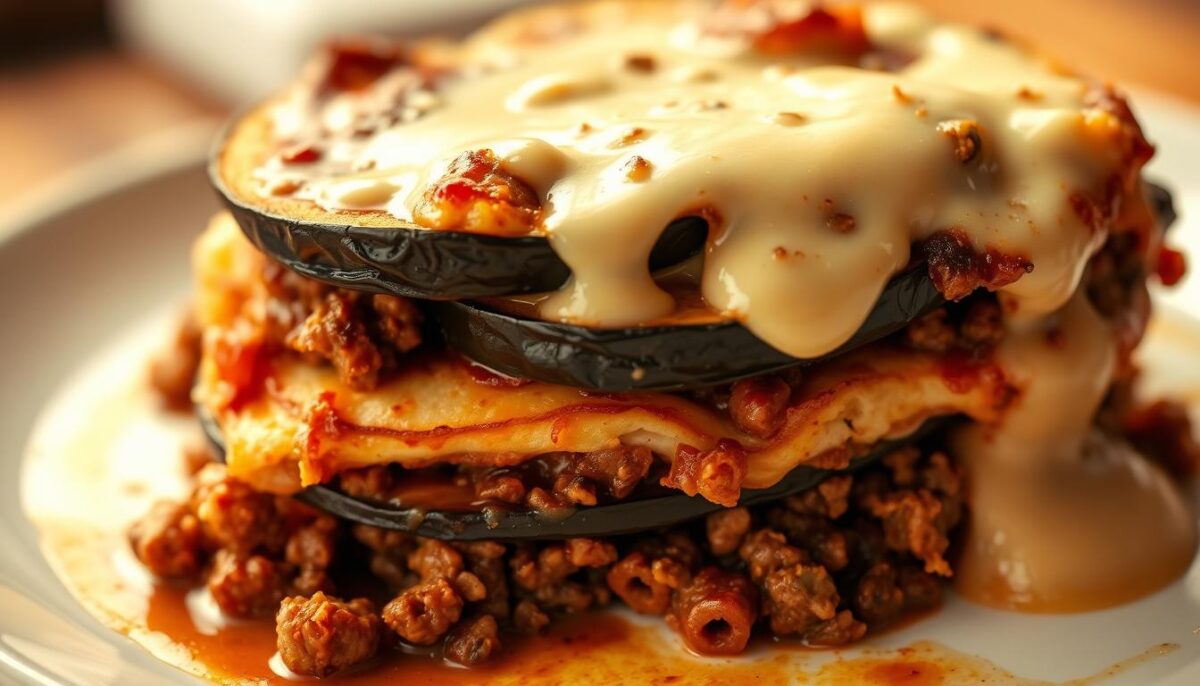
I still remember the first time I tasted this layered masterpiece at a family gathering. The creamy béchamel, savory meat sauce, and tender eggplant created a harmony I’ve spent years perfecting. Now, I want you to experience that same joy without the guesswork.
In this guide, I’ll walk you through selecting the freshest ingredients—like glossy eggplant and rich ground beef—and reveal how to build those signature layers in your baking dish. We’ll explore traditional techniques alongside modern shortcuts, so you can tailor the process to your schedule.
From achieving that golden-brown crust to balancing spices for maximum flavor, every detail matters. I’ve even included step-by-step photos to make each stage crystal clear. Whether you’re a novice or a seasoned cook, this recipe will become your new comfort-food favorite.
Key Takeaways
- Learn to create authentic layers using fresh eggplant and seasoned ground beef
- Discover the secret to achieving a perfectly crisp top layer in your baking dish
- Compare traditional preparation methods with time-saving modern variations
- Master the art of balancing spices for rich, complex flavors
- Get visual guidance through detailed process shots and layering diagrams
Introduction to Greek Moussaka
What if I told you the secret to perfect moussaka lies in a 19th-century culinary revolution? This layered wonder didn’t always feature its signature creamy crown. Early versions from Ottoman kitchens used leftover meats and vegetables—a practical peasant dish transformed into something extraordinary.
History and Tradition
Food historian Aglaia Kremezi notes the modern iteration emerged when chef Nikolas Tselementes added French-inspired béchamel in the 1920s. “He wanted to elevate traditional fare,” a Athenian cook once told me, explaining why some purists initially resisted the change. Today, this velvety sauce defines the dish as much as the spiced meat and roasted eggplant.
Regional twists keep things interesting. Cretans layer potatoes beneath the eggplant, while island versions might add zucchini. My friend Maria from Thessaloniki insists her family’s recipe—passed down through six generations—uses cinnamon-spiked lamb instead of beef.
Why I Love This Classic Dish
I discovered moussaka during a rainy afternoon in Nafplio. A grandmotherly chef served me a steaming portion that tasted like a hug. The way the crisp top layer yields to tender vegetables and rich meat still mesmerizes me.
What makes it timeless? Balance. Each ingredient has purpose: eggplant absorbs flavors, tomatoes add brightness, and nutmeg-infused béchamel ties everything together. It’s celebration food that feels like home—whether served at weddings or Tuesday dinners.
Essential Ingredients for Authentic Greek Moussaka
Ingredient quality isn’t just a detail—it’s the difference between good and unforgettable. Through trial and error, I’ve learned every component plays a starring role. Let’s break down what truly matters.
Selecting Fresh Produce and Meats
Glossy, firm eggplant with taut skin makes all the difference. I hunt for medium-sized ones—they’re less bitter than larger specimens. Potatoes should feel heavy, and zucchini needs vibrant green stems.
For the meat, 80/20 ground beef delivers ideal richness. While lamb adds depth, beef blends better with spices. Always pat meats dry before browning—this creates better texture.
Unique Spices and Seasonings
Cinnamon isn’t just for sweets here. A pinch in the meat sauce adds warmth without sweetness. Freshly grated nutmeg transforms béchamel from bland to complex.
Don’t skip salting eggplant slices! Thirty minutes of resting time pulls out bitterness. Rinsing and drying them thoroughly ensures they absorb oil evenly during roasting.
| Ingredient | Purpose | Preparation Time |
|---|---|---|
| Eggplant | Base layer texture | 40 minutes |
| Ground Beef | Savory foundation | 20 minutes |
| Béchamel | Creamy topping | 15 minutes |
Extra virgin olive oil matters more than you’d think. Cheap oils smoke at high temps, while quality versions add fruity notes. Time each layer’s cooking precisely—overdone vegetables turn mushy fast.
Preparing Key Vegetables: Eggplant, Potatoes, and Zucchini
Your dish’s success starts with how you handle these three vegetables. I’ve ruined enough batches to know that rushing this step leads to a soggy mess. Let’s nail the basics first.
Tips for Slicing and Salting Eggplant
Uniform ¼-inch slices are non-negotiable. Too thin, and they’ll vanish under the meat. Too thick, and they’ll resist softening. I use a mandoline for precision, but a sharp knife works if you’re careful.
Salt generously and let slices sweat for 30 minutes. This draws out bitterness and collapses air pockets so they absorb less oil. Rinse thoroughly, then press between towels to remove excess moisture. Dry surfaces mean crisp edges later!
Baking vs Frying Techniques
Frying at 375°F creates that golden crunch we all crave. But watch the oil temperature—too low makes greasy slices, too high burns them. I use a candy thermometer for accuracy.
Baking at 425°F offers a lighter option. Brush slices with olive oil and flip halfway through. They’ll still caramelize beautifully without absorbing cups of oil. For zucchini and potatoes, baking works better to maintain their delicate textures.
| Method | Texture | Time |
|---|---|---|
| Pan-Frying | Crispy edges | 8-10 minutes |
| Oven Baking | Firm & tender | 20-25 minutes |
Pat vegetables dry again after cooking. Those paper towels are your best friends here. A sturdy base layer means your meat and sauce won’t sink into a vegetable swamp during baking.
Mastering the Greek moussaka cooking steps
Building a memorable dish requires precision stacking – like constructing a flavor skyscraper where every floor serves a purpose. Through years of trial (and some comical errors), I’ve discovered three non-negotiable rules: overlapping vegetables create stability, sauce distribution prevents dryness, and that final smoothing motion makes all the difference.

Building Your Foundation
Start with roasted eggplant slices laid like shingles on a roof. Overlap each piece by ¼ inch – this prevents gaps where sauce could pool. Pat them dry again before placing; moisture is the enemy of distinct strata.
Next comes the meat mixture. Spread it with the back of a spoon, leaving a half-inch border. This keeps edges clean during baking. For the crowning touch, pour béchamel slowly from the center outward. My grandmother’s trick? Tilt the dish to help the sauce flow evenly.
When smoothing the top, run your spatula under cold water first. The metal won’t stick, giving you that flawless finish. Let each tier set slightly before adding the next – rushing causes layers to bleed together.
Finally, tap the dish firmly on your countertop. This settles ingredients without compacting them. Those air pockets? They’re secret flavor channels that develop during baking.
Crafting the Perfect Meat Sauce
The soul of any great layered dish lives in its foundation. For this recipe, that means building a meat sauce so flavorful it could stand alone. Let me show you how to layer spices, textures, and techniques for maximum impact.
Protein Power: Beef or Lamb?
I reach for 85% lean beef nine times out of ten. Its fat content carries spices beautifully without overwhelming other ingredients. Lamb offers a gamier depth, but requires careful balancing with cinnamon and allspice. Serious Eats recommends combining meats for complexity, but I prefer single-protein simplicity.
| Protein | Flavor Profile | Best For | Cooking Time |
|---|---|---|---|
| Ground Beef | Rich & Savory | Spice-forward versions | 18-20 minutes |
| Ground Lamb | Earthy & Bold | Herb-heavy recipes | 15-18 minutes |
Aromatics Alchemy
Start with diced yellow onions sizzling in olive oil. When they turn translucent, add minced garlic. Wait until you smell that nutty aroma—about 90 seconds—before adding meat. Break it into pea-sized crumbles using a wooden spoon for even browning.
Deglaze with dry red wine, scraping up those flavorful browned bits. Stir in tomato paste until it coats every morsel. Canned tomatoes come next—crush them by hand for better texture control. A pinch of sugar tames acidity without sweetening.
Here’s my secret: add black pepper twice. First during sautéing to bloom flavors, then again before simmering. Let the sauce reduce until it coats the back of a spoon. If it feels too loose, a teaspoon of flour mixed with broth creates perfect layering consistency.
Creating a Creamy and Thick Béchamel Sauce
What separates good béchamel from great? It’s all in the wrist action. I’ve learned through countless batches that patience and precision turn simple ingredients into velvet magic. Let me walk you through my foolproof method.
First, melt butter over medium-low heat. Add flour gradually—I use a 1:1 ratio for ideal thickness. Whisk nonstop for 2 minutes until it smells like toasted biscuits. This roux forms the sauce’s backbone.
Next, pour warm milk in thin streams while whisking vigorously. Serious Eats recommends whole milk for its fat content, and I agree. Keep the heat gentle—bubbles should barely break the surface. A simmer here prevents lumps better than any strainer.
Using Egg Yolks for a Custardy Texture
Here’s where many versions differ. Some skip yolks, but they’re essential for that rich mouthfeel. Temper them with a cup of warm sauce first to prevent scrambling. Fold this mixture back into the pot slowly, stirring until it coats your spoon.
Season with freshly grated nutmeg and white pepper. These spices add warmth without overpowering other layers. My trick? Taste as you go—the sauce should whisper flavor, not shout.
If your béchamel feels thin, let it reduce 2-3 more minutes. Proper consistency holds its shape when layered. Too runny, and it’ll sink into the meat. Too thick, and it won’t spread smoothly. Find that sweet spot where it drapes like heavy cream.
Layering the Moussaka: Assembling Flavors and Textures
Assembling this dish is like composing a symphony—every instrument must enter at the right moment. I start by buttering my baking dish thoroughly, ensuring the side walls get equal attention. This prevents sticking and creates golden edges that lift beautifully when sliced.
The Importance of Even Layers
Begin with a base of thinly sliced potatoes. They act as a raft, supporting the other ingredients without absorbing excess moisture. Arrange them like puzzle pieces—no gaps allowed. Next, add roasted eggplant slices in overlapping rows. I press them gently with my palms to create a flat surface.
Spread the meat sauce edge-to-edge using a flexible spatula. Aim for a ½-inch thickness—too thin and flavors get lost, too thick and it overwhelms the vegetables. Repeat the eggplant and meat sauce layers once more, finishing with a final eggplant tier.
| Layer Order | Component | Key Tip |
|---|---|---|
| 1 | Potato Base | Slice ¼” thick |
| 2 | Eggplant | Overlap by ½” |
| 3 | Meat Sauce | Spread evenly |
| 4 | Béchamel | Seal edges |
The crowning touch? A velvety béchamel poured slowly from the center outward. Tilt the dish to help it flow toward the sides. For a flawless finish, dip your spatula in cold water before smoothing the top. This prevents sticking and creates that iconic golden crust when baked.
Remember: each press of the palm matters. Gentle compression binds layers without crushing them. Balanced distribution of onion-infused meat sauce ensures every forkful delivers harmony—savory, creamy, and subtly sweet in one bite.
Cooking and Baking to Golden Perfection
That moment when your dish emerges from the oven with a crackling golden crown? Pure kitchen triumph. Let me show you how heat transforms layered ingredients into something greater than the sum of their parts.

The Science of Temperature Control
Preheat your oven to 375°F—the sweet spot for even cooking without drying. If you’ve fried eggplant slices, reduce baking time by 10 minutes. Baked vegetables need full 45 minutes to meld flavors. Always start with a room-temperature dish to prevent thermal shock.
Three timing secrets I swear by:
- First 30 minutes uncovered for crust formation
- Foil tent for next 15 minutes to prevent burning
- Final 5 minutes under broiler for caramelized finish
| Method | Oven Temp | Duration |
|---|---|---|
| Fried Vegetables | 375°F | 35-40 mins |
| Baked Vegetables | 375°F | 45-50 mins |
Insert a kitchen thermometer into the center—165°F signals doneness. Let it rest 25 minutes before slicing. This cooling period lets layers solidify, ensuring clean cuts. For extra crispness, brush eggplant slices with olive oil before baking.
Pro tip: If you’ve mastered grilling vegetables without losing flavor, try charring zucchini for smoky depth. Just adjust baking time downward by 8 minutes.
Tips for Prep-Ahead and Storage Options
Meal prep magic happens when you nail the timing. I’ve learned through countless family dinners that this dish actually improves when components are prepped in advance. Let me share my battle-tested strategies for keeping flavors vibrant and textures intact.
Smart Make-Ahead Strategies
Roast eggplants and potatoes up to three days early—store them layered between parchment in airtight containers. The meat sauce freezes beautifully for two months. Just melt butter in your pan when reheating to revive its richness.
For assembled-but-unbaked portions, refrigerate up to 24 hours. Always let it sit at room temperature 45 minutes before baking. Cold dishes create uneven heat zones—your enemy for that perfect golden crust.
- Freeze individual slices flat on baking sheets before transferring to freezer bags
- Label containers with dates—béchamel stays creamy best within 3 months
- Add a sprinkle of black pepper when reheating to brighten flavors
My favorite hack? Use oven-safe glass containers for both prepping and baking. You’ll skip the messy transfer step and preserve every crispy edge.
Reviving Leftovers Like a Pro
Reheat slices at 325°F on a wire rack—this circulates air underneath to prevent sogginess. For single servings, the air fryer works wonders at 300°F for 8 minutes. Always finish with a dusting of black pepper and fresh herbs to wake up the flavors.
Portion leftovers before freezing. I cut mine into squares and wrap each in foil—thaw overnight in the fridge for stress-free meals. Remember: gently melt butter into reheated béchamel if it separates, whisking until silky again.
Variations and Substitutions for Dietary Preferences

Why limit tradition when flavors can adapt? Through testing dozens of versions, I’ve found smart swaps that honor the dish’s essence while accommodating modern needs. Chef Diane Kochilas once told me: “The best recipes evolve with their makers.”
Meat lovers might blend ground lamb with beef for deeper flavor—use 70/30 ratios for optimal juiciness. For plant-based diets, brown lentils mimic meat’s texture beautifully. Simmer them with smoked paprika and olive oil until tender.
- Cheese choices: Kefalotyri adds saltiness, while Pecorino Romano brings nutty notes
- Lighter fat options: Swap béchamel’s butter with avocado oil
- Gluten-free: Use cornstarch instead of flour for thickening
Roasting vegetables with olive oil spray cuts calories without sacrificing crispness. My vegan trick? Layer grilled portobello mushrooms with cashew cream sauce. The umami depth rivals traditional versions.
| Diet Need | Protein Swap | Dairy Alternative |
|---|---|---|
| Vegetarian | Textured vegetable protein | Nutritional yeast béchamel |
| Low-Carb | Ground turkey | Almond milk sauce |
Adjust layers based on preferences—add extra zucchini for crunch or reduce potato thickness. Remember: balancing textures matters more than strict ingredient rules. Your fork should still find that signature harmony in every bite.
Nutritional Insights and Serving Suggestions
Ever wondered how each slice of this layered delight fuels your body while delighting your taste buds? Let’s break down the numbers and explore pairings that elevate your dining experience.
Calorie Breakdown and Portion Ideas
A typical serving contains 380-420 calories, with macros balanced for satisfaction. Here’s what you’re getting per slice:
| Nutrient | Amount | Daily Value% |
|---|---|---|
| Protein | 18g | 36% |
| Carbs | 22g | 7% |
| Fats | 24g | 37% |
Opt for 2”x3” portions if serving as an appetizer. For main courses, pair a 3” square with lighter sides. Baking instead of frying saves 70 calories per serving while keeping veggies tender.
Pairing With Sides for a Complete Meal
The warm spices in this dish love company. Try these combinations:
- Crusty whole-grain bread to soak up sauces
- Tangy yogurt dip with minced garlic
- Shaved fennel salad with lemon dressing
Cinnamon isn’t just for flavor—studies show it helps regulate blood sugar. Tomatoes contribute lycopene, while garlic offers immune-boosting properties. For lighter meals, serve over arugula with roasted cherry tomatoes.
Pro tip: Use a cast iron pan when reheating leftovers. It crisps the edges while keeping centers creamy. Balance rich portions with acidic elements—think pickled vegetables or a squeeze of lemon.
Conclusion
There’s something magical about pulling a bubbling dish from the oven that carries centuries of tradition. Every slice represents patience—from salting eggplant to balancing spices. When you layer ingredients with care, you’re not just making dinner. You’re preserving history.
Remember: nutmeg in the béchamel isn’t optional. It’s the whisper of warmth that ties everything together. Those paper-thin vegetable slices? They ensure each bite holds its structure without becoming heavy. Whether you follow the recipe exactly or add your twist, respect the fundamentals.
I’d love to hear how yours turns out! Tag me in photos of your golden masterpiece or share stories about family adaptations. Did your nutmeg measurement spark debate? Did scribbling notes on paper help perfect your technique? Those details matter—they’re what make this dish endlessly fascinating.
Now it’s your turn. Preheat that oven, gather your ingredients, and let the layers work their magic. When you slice into that first perfect square, you’ll taste more than flavors. You’ll savor accomplishment.
FAQ
How do I prevent my eggplant from becoming too oily?
I salt the slices and let them sit for 20 minutes to draw out moisture. Patting them dry before baking on parchment paper reduces oil absorption while keeping them tender.
Can I swap ground beef for another protein?
Absolutely! Lamb adds a richer flavor, but I’ve used plant-based crumbles or lentils for a vegetarian twist. Just adjust spices like cinnamon and nutmeg to match your choice.
What’s the secret to a custardy béchamel sauce?
Whisking egg yolks into warm (not hot) milk before mixing with a roux creates that silky texture. A pinch of nutmeg and real butter elevate the sauce’s depth.
Can I assemble the dish ahead of time?
Yes! Layer everything in the baking dish, cover tightly, and refrigerate for up to 24 hours. Add 10-15 minutes to the bake time if starting cold.
Why does my meat sauce taste bland?
Blooming spices like oregano and garlic in olive oil first boosts their flavor. A splash of red wine or tomato paste adds acidity and richness to balance the beef.
How do I freeze leftovers without sogginess?
Portion cooled moussaka in airtight containers with a layer of parchment between slices. Reheat in the oven at 350°F (175°C) to preserve the crispy top.
Do I need to peel the eggplant?
I keep the skin on for texture, but if yours is thick or bitter, peeling works. Younger, smaller eggplants often have sweeter, more tender skin.
What sides pair well with this casserole?
A crisp Horiatiki salad or roasted lemon potatoes complement the richness. For a lighter meal, try steamed green beans with garlic and olive oil.


