


How to Make Chinese Dim Sum and Steamed Dumplings from Scratch
May 6, 2025
A Step-by-Step Guide to Making Greek Moussaka at Home
May 7, 2025
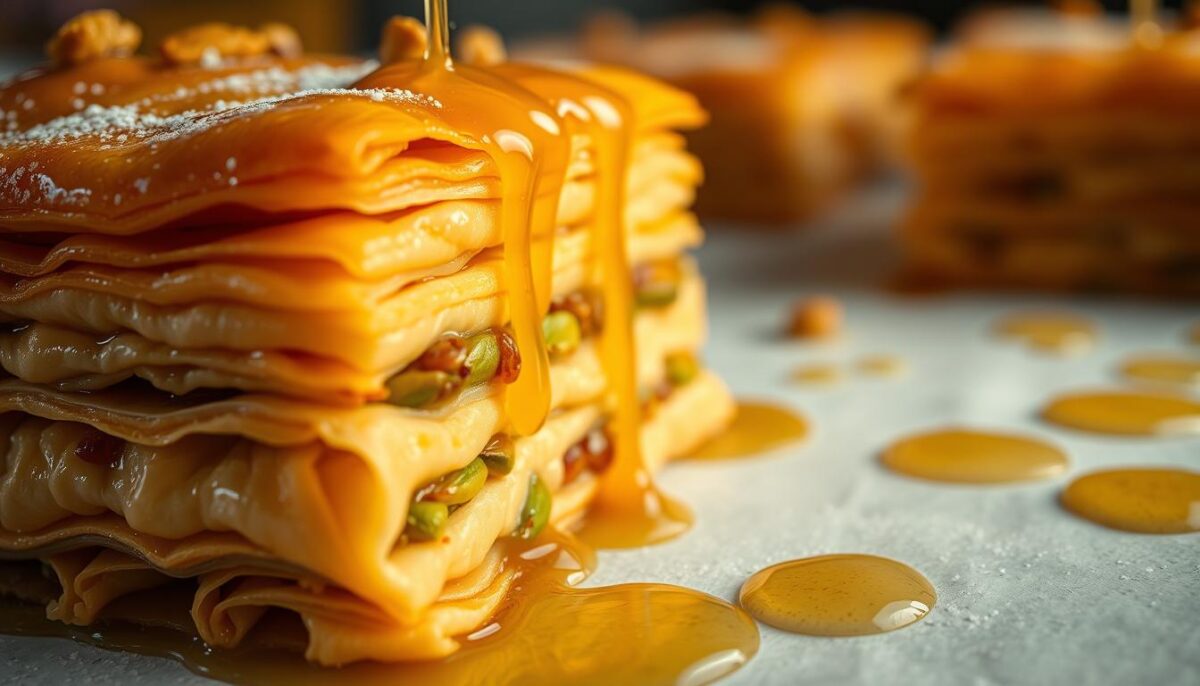
Did you know the average baklava contains 40 delicate layers? That’s more than most wedding cakes! For me, mastering this dessert wasn’t just about technique—it was reconnecting with my grandmother’s hands patiently guiding mine, her laughter mixing with the crunch of phyllo.
Every golden slice tells a story. Growing up, our kitchen smelled like melted butter and toasted nuts during holidays. Now, I chase that same magic in my own home. The secret? Clarified butter whispers through each paper-thin sheet, while lemon-kissed syrup transforms crisp layers into melt-in-your-mouth bliss.
This guide isn’t just measurements and oven temps. It’s about preserving tradition—one buttery, nut-filled layer at a time. Whether you’re new to phyllo dough or a seasoned baker, we’ll walk through every step together. From selecting the freshest pistachios to achieving that signature crunch, you’ll discover why this dessert has dazzled taste buds for centuries.
Key Takeaways
- Authentic versions use clarified butter for unmatched flavor and texture
- Fresh phyllo dough creates the ideal flaky foundation
- Lemon-infused syrup balances the rich nut filling perfectly
- Proper layering techniques ensure that signature crispness
- Cultural traditions elevate baking into meaningful storytelling
Introduction to Turkish Baklava
Few desserts carry as much history as the flaky, syrup-drenched layers known across the Mediterranean. My six years in Istanbul taught me that crafting this treat isn’t just cooking—it’s time travel. Each bite connects generations through whispered techniques and shared laughter around oven doors.
My Personal Journey with Phyllo
I’ll never forget my first encounter at a bustling Istanbul market. A vendor handed me a diamond-shaped piece still warm from the pan. The crisp phyllo shattered like autumn leaves, giving way to pistachios toasted in sunlight. That moment sparked my obsession with mastering the rhythm of layering—butter, dough, nuts, repeat—until the tray felt like a living thing.
Cultural Threads in Every Layer
While neighboring regions share similarities, Turkish versions stand apart. Greeks often use walnuts and cool syrup, creating a chewier texture. Here, pistachios reign supreme, and hot syrup poured post-bake ensures that signature crisp-yet-moist contrast. The table below highlights key differences:
| Feature | Turkish Style | Greek Style |
|---|---|---|
| Primary Nut | Pistachios | Walnuts |
| Syrup Temperature | Hot | Cooled |
| Layering Approach | 40+ sheets | 30-35 sheets |
| Texture Profile | Crisp with syrup absorption | Denser bite |
What unites all versions? The understanding that rushed dough work leads to heartbreak. True artisans know patience isn’t optional—it’s baked into every golden slice.
Essential Ingredients and Tools
The soul of this dessert lies in three humble elements that transform into something extraordinary. Through trial and error, I’ve learned that cutting corners here leads to lackluster results—every component must earn its place in the pan.

Key Ingredients: Pistachios, Phyllo, and Clarified Butter
Finely chopped pistachios aren’t just a topping—they’re the heartbeat. Their vibrant green hue and earthy sweetness shine brightest when sourced from Gaziantep, Turkey’s nut capital. Look for kernels that snap crisply when bitten.
Paper-thin phyllo sheets demand respect. I store them under a damp towel while working to prevent drying. “Each layer should whisper secrets when brushed with butter,” my Istanbul mentor once told me. Cheap versions crumble; premium dough flexes like silk.
Clarifying butter removes milk solids that burn during baking. Melt unsalted butter slowly until golden liquid separates from foam. Strain through cheesecloth—this liquid gold keeps layers crisp for days.
Must-Have Kitchen Tools for Authentic Results
Your mixing bowl matters more than you think. Wide, shallow bowls let you toss nuts evenly without crushing them. I reach for my stainless steel workhorse every time.
A sharp knife isn’t optional. Dull blades drag phyllo, creating ragged edges that soak up too much syrup. My Japanese chef’s knife glides through layers like they’re air.
Don’t skip the pastry brush. Silicone versions waste less butter than bristle brushes. Dip just the tips to paint each sheet with precision—this technique took me 23 attempts to perfect.
Seek out specialty shops or online markets for authentic components. The right tools and ingredients turn nervous first-timers into confident creators. Now, let’s make magic.
Step-by-Step Turkish baklava homemade recipe
I still remember my first successful attempt at this layered masterpiece. The key lies in treating phyllo like fragile lace—gentle hands and quick movements prevent tears. Let’s break down the process into manageable steps that guarantee crisp results.
Preparing and Thawing the Phyllo Dough
Frozen phyllo needs careful thawing. Move it from freezer to fridge 12 hours before baking. Never unwrap until ready to use—exposure to air dries sheets faster than you can say “sticky disaster.”
Keep a damp kitchen towel nearby. Unroll dough gently, covering unused portions immediately. If sheets crack, don’t panic—just butter them back together. My trick? Work in batches of 3-4 sheets to maintain moisture.
Layering Techniques and Assembling the Dessert
Start with a buttered 9×13 pan. Layer 8 sheets, brushing each with clarified butter using swift upward strokes. Sprinkle chopped pistachios evenly—a heaping tablespoon per layer prevents clumping.
Repeat until you’ve used 30-40 sheets. Always end with a buttered top layer. Cut diamonds or rectangles before baking—this lets syrup penetrate every crevice later.
| Step | Action | Pro Tip |
|---|---|---|
| 1 | Thaw dough | 12 hrs in fridge |
| 2 | Butter layers | Use pastry brush tips |
| 3 | Add nuts | Spread like confetti |
| 4 | Pre-cut shapes | Diagonal lines first |
When baking, watch for golden edges—about 45 minutes at 350°F. Pour syrup hot over the pastry straight from the oven. The sizzle means it’s absorbing properly. A splash of lemon juice in the sugar water mixture balances sweetness beautifully.
Mastering the Syrup: Tips for Perfect Sweetness
The sizzle of hot syrup hitting golden pastry still makes my heart race—it’s the make-or-break moment every baker fears. Too thick, and your layers turn chewy. Too thin, and you’ll drown the crunch. Nailing this step transforms good pastry into symphony-in-a-pan magic.

The Role of Sugar, Water, and Lemon Juice
My syrup epiphany came during a sweltering Istanbul summer. A local chef showed me his 1-2-3 rule: 1 part water, 2 parts sugar, 3 squeezes of lemon. Boil until it ribbons off a spoon—about 10 minutes. The lemon’s acidity stops sugar crystals from forming, ensuring silky flow.
| Stage | Temperature | Consistency |
|---|---|---|
| Thread | 215°F | Thin, drizzle-friendly |
| Soft Ball | 235°F | Coats layers evenly |
| Hard Crack | 300°F | (Avoid—too brittle) |
Preventing Crystallization for a Flawless Finish
See those sparkly edges on store-bought versions? That’s crystallized sugar—the enemy of professional bakers. Stir gently while boiling, and never let undissolved grains stick to the pan’s sides. If crystals form, add a teaspoon of corn syrup as insurance.
When pouring, work fast but steady. Hot syrup meets hot pastry straight from the oven—this thermal shock forces absorption deep into the sheets. Let it rest 6 hours uncovered. If the top browns too quickly during baking, tent loosely with foil. Like mastering temperature control in sautéing meat, timing here is non-negotiable.
Your reward? Each bite whispers sweet secrets without gumming up the roof of your mouth. That’s the alchemy of perfect syrup—science and soul in equal measure.
Baking and Finishing Touches
There’s a sweet spot between patience and precision where pastry magic happens. I learned this balancing act through countless batches—some too pale, others charred at the edges. The right heat transforms stacked sheets into golden perfection.
The Science of Crisp
Set your oven to 350°F—the ideal temperature for even browning. Place the pan on the middle rack. Rotate it halfway through the 45-50 minute bake time. Watch closely during the final 10 minutes; edges darken faster than the center.
Why does the lemon-water-sugar trio matter? The acid in juice cuts through richness, while sugar caramelizes to create that signature crunch. Too much water thins the syrup, risking sogginess. A local baker once told me: “Listen for the sizzle when syrup meets pastry—that’s your applause.”
| Issue | Solution |
|---|---|
| Browning too fast | Reduce heat by 25°F |
| Uneven color | Rotate pan every 15 mins |
| Dry edges | Brush with butter mid-bake |
After removing from the oven, immediately brush any remaining melted butter across the top. Let cool completely before serving—this allows layers to set. The wait tests your willpower, but biting into that crisp yet tender bite makes every second worth it.
Creative Variations and Nut Combos
The beauty of layered pastries lies in their adaptability—swap one nut for another, and you’ve created an entirely new experience. I once hosted a tasting party where guests couldn’t believe walnut-studded versions came from the same pan as pistachio classics. Let’s explore how small tweaks can yield big flavor adventures.

Breaking the Mold with Bold Blends
Why settle for single-nut traditions? Try blending equal pieces of walnuts, hazelnuts, and pistachios for a confetti effect. For a richer profile, use half pistachios and half toasted almonds. Lighter? Swap in pecans—their buttery crunch pairs beautifully with orange blossom syrup.
Spice enthusiasts might add a pinch of cardamom or cinnamon to their nut mix. I’ve found warmer spices complement walnuts perfectly, while floral notes like rosewater elevate pistachios. Adjust your oven’s temperature by 10-15°F when using oilier nuts—walnuts brown faster than drier varieties.
| Nut Type | Ideal Pairing | Texture Impact |
|---|---|---|
| Walnuts | Maple syrup + cinnamon | Chewier bite |
| Hazelnuts | Honey + cocoa nibs | Crunchy layers |
| Pecans | Brown sugar + bourbon | Caramelized edges |
Portion control becomes fun with mini versions—use a cup measurement to create single-serving stacks. Drizzle contrasting syrups over different sections before baking for a striking presentation. Share your most inventive recipes online—I love seeing how bakers reinvent this timeless treat!
Common Challenges and Troubleshooting
Even seasoned bakers face hurdles when working with delicate layers. I’ve rescued countless trays from disaster—sticky bottoms, burnt edges, and syrup pools—through simple adjustments anyone can master.
How to Avoid Sogginess and Over-Browning
Phyllo drying out? Cover unused sheets with a damp towel while assembling. If edges crisp too fast, tent the pan with foil during the last couple of minutes. Check doneness by inserting a pin into the center—it should come out clean, not sticky.
Uneven browning often stems from oven hotspots. Rotate your pan every 15 minutes. For precise temperature control, place an oven thermometer on the rack. My golden rule? “If your kitchen smells like toasted nuts before the timer dings, act fast—that’s your warning signal.”
| Issue | Quick Fix |
|---|---|
| Soggy base | Reduce syrup by ¼ cup |
| Burnt top | Lower heat by 25°F |
| Crumbly layers | Brush butter more generously |
Balance sweetness by adjusting syrup-to-nut ratios. Too much sugar masks the pistachio flavor. Let the dessert rest for at least 4 hours after syrup application—this allows layers to hydrate evenly. Patience rewards you with that iconic crisp-tender bite every time.
Conclusion
Creating this layered masterpiece feels like conducting an edible orchestra—every movement matters. Through precise instructions and patience, you’ll craft a dessert that honors centuries of tradition while making it your own.
Remember: clarified butter bonds the sheets, hot syrup breathes life into crisp layers, and a sharp knife ensures clean cuts. Those troubleshooting moments? They’re just stepping stones to golden perfection. I still grin when my kitchen fills with that nutty aroma—it’s the way flavors and memories intertwine.
Don’t hesitate to play with nut blends or spice-infused syrups. Share your creations proudly—each variation adds new chapters to this sweet story. Whether serving guests or savoring solo, every bite celebrates craftsmanship.
Now grab your tools and let phyllo whispers guide you. When that first syrupy crunch hits your tongue, you’ll understand why this dessert has captivated hearts across generations. Ready to make magic?
FAQ
Can I use walnuts instead of pistachios?
Absolutely! While pistachios are traditional, walnuts or a mix of nuts work well. Just chop them finely and adjust baking time if the texture changes.
Why does my syrup crystallize?
Crystallization happens when sugar isn’t fully dissolved. Stir gently while heating, add a splash of lemon juice, and avoid boiling too rapidly to keep it smooth.
Should I pour hot or cold syrup over the pastry?
Always match temperatures! If your baked layers are hot, use cooled syrup—or vice versa. This balance prevents sogginess and keeps the crunch intact.
How do I keep phyllo from drying out while assembling?
Cover unused sheets with a damp towel. Work quickly, and brush each layer with melted butter to lock in moisture as you build.
Can I make this ahead of time?
Yes! Store it airtight at room temperature for 2–3 days. For longer freshness, refrigerate, but let it come to room temp before serving for the best texture.
What’s the trick to cutting clean pieces?
Use a sharp knife and score the top layers before baking. After baking, slice fully while it’s still warm—this prevents crumbling.
Can I freeze leftovers?
Freeze unbaked or baked portions in airtight containers. Thaw at room temp, and if reheating, warm gently in the oven to revive crispiness.
Is clarified butter necessary?
It’s ideal for high-heat baking without burning, but regular melted butter works if you’re careful. Just skim off any milk solids for a cleaner finish.
Why did my layers turn out chewy?
Over-brushing with butter or under-baking can cause this. Aim for even, thin butter layers and bake until golden—listen for that satisfying crisp sound!
Can I add spices like cinnamon or cardamom?
Go for it! A pinch between nut layers adds warmth. I love cardamom for a floral twist, but keep it subtle to let the nuts shine.


