


Cold Brew at Home: The Lazy Genius Method That Actually Works
April 18, 2025
Are You Grinding Your Coffee Wrong? Find Out Now
April 19, 2025
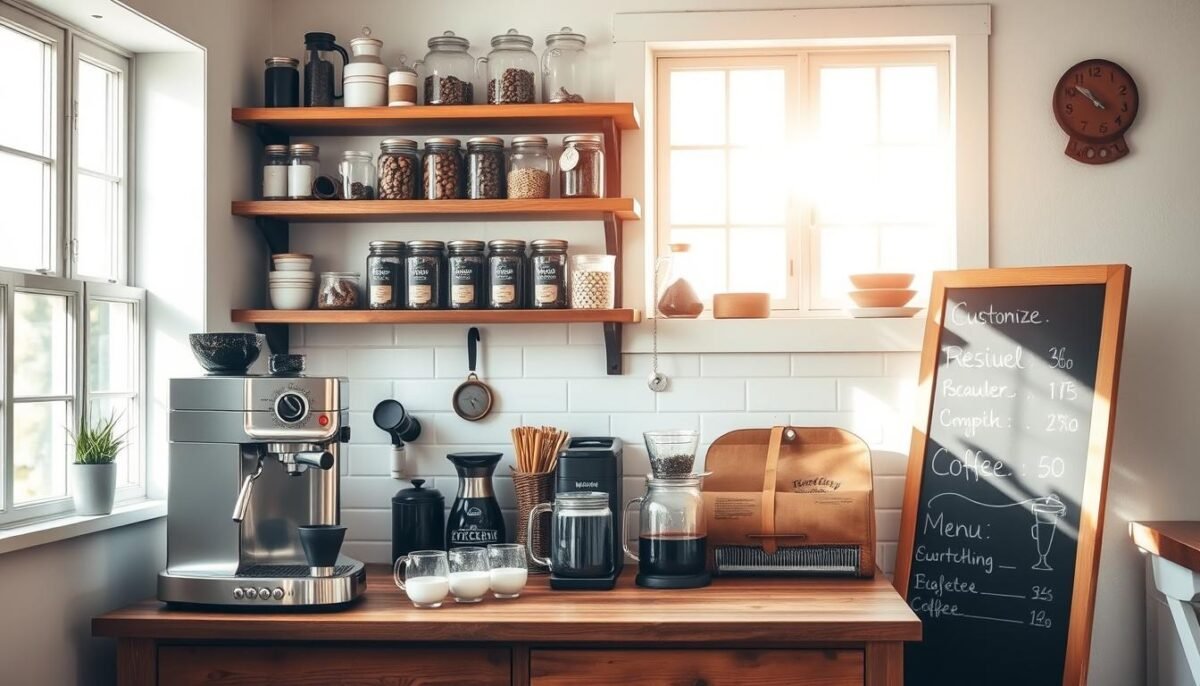
There’s something magical about starting your day with a ritual that feels uniquely yours. For years, I rushed through mornings, gulping down whatever brew I could grab. Then, during a weekend visit to a friend’s apartment, I spotted her tiny, sunlit corner dedicated entirely to espresso and conversation. It wasn’t fancy—just a thrifted cart with mugs and a pour-over setup—but it transformed her mornings into moments of calm. That’s when I realized: everyone deserves a space that turns caffeine into comfort.
Designers like Emily Henderson and Whitney Spinks have shown how even cramped areas can become stylish hubs. Think bright cabinets for energy, reclaimed wood shelves for warmth, or glossy subway tiles as a chic backdrop. My own setup began with an unused nook by the kitchen window. By mixing dollar-store finds with a $20 floating shelf, I crafted a spot that’s equal parts functional and inviting—no renovation required.
Whether you’re working with a corner of your countertop or a rolling cart, this guide will help you build a personalized retreat. Let’s explore how to blend thriftiness with design flair, one sip at a time.
Key Takeaways
- Build a budget-friendly station using repurposed furniture or small spaces
- Incorporate design tips from experts like Emily Henderson for visual appeal
- Use affordable materials like subway tile or natural wood for texture
- Prioritize functionality with smart storage for mugs and supplies
- Follow a step-by-step plan to customize layouts for any room size
Understanding Your Space and Needs
Assessing your kitchen’s layout reveals hidden opportunities. I learned this after struggling with a cramped apartment where every inch mattered. Start by measuring your potential area—even a 24-inch-wide nook can work wonders. Designers like Emily Henderson often use vertical space in tight spots, stacking shelves or adding pegboards above appliances.
Assessing available square footage
Grab a tape measure and note three dimensions: width, depth, and height. My friend transformed a 30″ x 18″ closet into a java hub using fold-down shelves. Consider traffic flow too—leave at least 36″ of walking space if your station shares a hallway.
| Area Size | Layout Tip | Storage Solution |
|---|---|---|
| Under 24″ wide | Wall-mounted shelves | Magnetic spice jars |
| 24″-36″ wide | Narrow rolling cart | Hanging mug racks |
| 36″+ wide | L-shaped configuration | Pull-out drawers |
Identifying storage and appliance requirements
Balance is key. I once crammed a bulky espresso machine into a tiny corner, only to lose easy access to filters. List your must-haves first: grinder, kettle, favorite mugs. Repurpose existing cabinets for beans and syrups—add tiered organizers to double capacity.
One client used a butler’s pantry to hide appliances behind sliding doors. Another installed a $15 tension rod under shelves for hanging measuring spoons. Remember: vertical space is your ally in small kitchens.
Designing Your DIY Home Coffee Bar Layout
The right layout transforms chaos into calm every morning. After testing setups in six different apartments, I’ve learned that flow matters more than square footage. Start by asking: Will this spot make my routine smoother or become another obstacle?
Location Strategies for Efficiency
Corners often get overlooked, but they’re goldmines for compact stations. Designer Nate Berkus once transformed a 28-inch wedge near a laundry room into a java nook using triangular shelves. Alcoves offer built-in charm—I lined one with peel-and-stick tiles for a café vibe without renovations.
Consider these layout ideas:
- Lab-style zones with everything within arm’s reach
- Multi-level carts for vertical storage
- Floating desks repurposed as brewing stations
My favorite hack? Mimic commercial kitchens by keeping daily tools front-and-center. Reserve upper shelves for occasional items like holiday mugs. One client stored her grinder and beans in a repurposed breadbox beside the toaster—genius.
Accessibility is non-negotiable. If reaching for filters feels like a yoga pose, rethink your plan. Leave 18 inches of clear counter space for active prep. Remember: A well-planned station becomes a sanctuary, not a stressor.
Finding Budget-Friendly Furniture and Fixtures
I discovered my favorite serving cart buried under old linens at a garage sale—$15 later, it became my station’s foundation. Thrift stores and Facebook Marketplace are goldmines for pieces needing minor love. A chipped dresser? Perfect for storing beans and filters after sanding and fresh paint.
Natural wood tones add warmth without costing a fortune. I stained a $8 side table to match my kitchen’s reclaimed wood shelves. For cabinet doors, a coat of sage green paint transformed my 90s-era storage unit into something Pinterest-worthy.
| Thrift Find | Cost | Upgrade | Result |
|---|---|---|---|
| Vintage tray | $4 | Added cork feet | Stylish appliance base |
| Office cart | $22 | Removed wheels | Compact brewing station |
| Medicine cabinet | $12 | Installed hooks inside | Hidden spoon storage |
Mix eras for character. My marble-topped cart plays nice with industrial pendant lights from a closing café. Found an ugly lamp base? Pair it with a modern shade—instant conversation starter.
Don’t overlook hardware swaps. Switching my cabinet handles to leather pulls ($1.50 each) created rustic charm. A local artist’s ceramic knobs later gave those same cabinets modern flair. Remember: creativity beats price tags every time.
Maximizing Counter and Cabinet Space
A well-organized space starts with smart surface management. When redesigning my kitchen nook, I discovered even 18 inches of countertop can become a powerhouse. The secret? Treat vertical space like prime real estate. Wall-mounted rails hold measuring spoons above my grinder, while a magnetic strip keeps scissors and filters within reach.

For cabinets, think beyond basic shelves. A client’s pull-out drawer now houses her French press and beans—no more digging through stacks. I added $3 tension rods inside my upper cabinets to create tiers for syrups and cups. “Closed storage shouldn’t mean forgotten storage,” says designer Sarah Sherman Samuel.
Balance open and closed solutions. My lower cabinets hide bulky appliances, while floating shelves display ceramic mugs. One baker transformed her narrow countertop into two zones: left side for brewing, right for plating pastries. Sleek pull-out boards under cabinets add prep space that vanishes when not needed.
Remember: cluttered surfaces drain joy. Keep your countertop clear by assigning homes for essentials. A designer friend uses color-coded bins in her deep cabinets—white for daily tools, gray for seasonal items. Your morning ritual deserves breathing room as much as caffeine.
Incorporating Creative Storage Solutions
Custom storage turns everyday items into display-worthy features. When I built floating ledges for my ceramic collection, I realized shelves aren’t just functional—they’re personality showcases. Start by measuring your wall space and considering how you interact with drinkware daily.
Custom shelving ideas for mugs and accessories
Reclaimed wood adds warmth while keeping costs low. My favorite project involved sanding barn planks to create staggered ledges that highlight hand-thrown pottery. Leave 1.5″ between shelves for tall tumblers, and add small hooks underneath for flavor syrups or tea strainers.
| Material | Width | Best For |
|---|---|---|
| Pine boards | 10-14″ | Mug collections |
| Metal pipes | 18-24″ | Industrial looks |
| Acrylic sheets | 8-12″ | Modern spaces |
Group items by color or frequency of use. I keep daily-driver cups at eye level, reserving higher shelves for seasonal pieces. A client used chalkboard labels on mason jars to store stir sticks and sugar packets—functional meets adorable.
Mix textures to avoid visual clutter. Try woven baskets below open shelving for napkin storage, or place a trailing pothos beside your favorite demitasse set. Remember: good storage should make mornings smoother, not prettier.
Installing Functional and Attractive Rail Systems
Mixing practicality with aesthetics, rail systems elevate how we organize essentials. When redesigning a client’s cramped kitchenette last spring, I mounted a brushed brass rail above their walnut cabinet. Suddenly, tea strainers and honey dippers became intentional decor rather than countertop clutter.
Displaying coffee and tea accessories with style
Start by choosing rails that complement your space’s vibe. My go-to is a 24-inch stainless steel bar with S-hooks from the restaurant supply store ($18). It now holds everything from matcha whisks to linen towels in my own setup. Position rails 16-18 inches above surfaces for easy reach.
Pair rails with closed storage to balance form and function. The walnut cabinet I mentioned hides bulk tea tins below while showcasing ceramic canisters above. “Visible tools should spark joy, not stress,” says designer Leanne Ford. Use decorative hooks to hang measuring spoons like jewelry—it’s storage as art.
Hardware finishes matter more than you’d think. Oil-rubbed bronze adds warmth to rustic spaces, while polished nickel suits modern aesthetics. I found vintage drawer pulls at a salvage yard that made my client’s tea station look curated for decades.
Small tweaks create big impact. A client added miniature terrariums between her rail-hung mugs—now her morning ritual doubles as plant care time. Remember: rails aren’t just organizers. They’re opportunities to celebrate the tools that make your drinks special.
Utilizing Wall Space for Shelves and Hooks
Blank walls hold untapped potential—they’re vertical canvases waiting to solve storage puzzles. Last year, I transformed a client’s empty kitchen wall into a functional art piece using reclaimed oak planks and brass hooks. Designer Justina Blakeney’s work inspired me to see walls as three-dimensional organizers rather than flat surfaces.
Adding open shelving for decorative display
Open shelves let favorite mugs and syrups shine while keeping essentials accessible. I installed floating ledges above my grinder station using $12 brackets from the hardware store. The key? Leave 14-16 inches between shelves for tall carafes and plant accents.
| Material | Depth | Style Pairing |
|---|---|---|
| Birch plywood | 8″ | Scandinavian kitchens |
| Iron pipes | 10″ | Industrial lofts |
| Stained cedar | 6″ | Rustic cabins |
Hooks add unexpected utility. I use leather straps with S-hooks for hanging scoops below my bottom shelf. A designer friend arranges her measuring spoons on decorative knobs—functional jewelry for the wall.
Balance display areas with closed storage nearby. My upper shelves showcase ceramic pour-overs, while the cabinet beneath hides bulk beans. Keep frequently used items at elbow height to maintain flow during busy mornings.
Crafting a Custom Shelf and Cabinetry Projects
Building custom shelves taught me that wood grain tells better stories than laminate ever could. My favorite project involved transforming salvaged oak planks into floating ledges that hide a bulky espresso machine below. The secret? Natural finishes enhance warmth while concealing functional elements.

Woodworking with character
I rub walnut oil into raw pine to create honey-toned shelves that age gracefully. For a client’s narrow kitchen wall, I cut 14-inch boards to frame their glass jar collection. Sanding edges to a soft curve prevents snagged towels and adds handcrafted charm.
| Material | Finish | Best Use |
|---|---|---|
| Reclaimed barn wood | Tung oil | Rustic mug displays |
| Birch plywood | Whitewash | Modern appliance covers |
| Maple slabs | Beeswax | Sturdy syrup stations |
Smart concealment strategies
Sliding cabinet doors made from old window frames hide my grinder and beans. I leave the upper half open with glass panels to showcase colorful cups. A trick from designer Studio McGee: “Use vertical grain patterns to visually expand tight spaces.”
Integrated pull-out trays keep countertops clear. My 24-inch shelf now stores twelve mugs vertically using angled dividers cut from scrap wood. Glass-front compartments display seasonal flavors while hiding less attractive supplies behind.
Remember: good cabinetry marries form and function. My client’s new breakfast nook uses floating shelves with hidden brackets to store daily essentials. The result? A clutter-free zone where morning rituals feel intentional, not chaotic.
Selecting the Perfect Coffee Maker and Espresso Machine
Brewing the perfect cup starts with choosing tools that match your rhythm. After testing 14 devices over three years—from French presses to high-end espresso machines—I’ve learned there’s no universal “best” option. It’s about aligning features with your lifestyle. Good Housekeeping’s 2024 appliance guide confirms this: “The right brewer becomes an extension of your morning ritual.”
Choosing between a coffee maker, espresso machine, or French press
My go-to drip maker shines on hectic mornings—programmable timers mean coffee’s ready when I stumble into the kitchen. But when craving velvety shots, my stovetop espresso machine delivers without breaking the bank. French presses? Ideal for slow Sundays when I want to savor floral notes in single-origin beans.
Consider these factors from culinary experts:
- Maintenance: Automatic cleaners in premium machines save time but add cost
- Footprint: Compact models like the Breville Bambino fit narrow counters
- Taste profile: Pressure-based systems extract richer flavors than pour-over methods
| Brewing Method | Best For | Maintenance Level | Space Needed |
|---|---|---|---|
| Drip maker | Busy households | Low | 12″x8″ |
| Espresso machine | Connoisseurs | Medium | 14″x11″ |
| French press | Flavor explorers | Low | 6″ diameter |
Design integration matters too. I styled my stainless steel machine alongside copper canisters for a cohesive look. Open shelves keep brewers accessible, while cabinet cubbies hide less attractive components like water reservoirs.
Remember: your perfect maker should simplify mornings, not complicate them. Test handles for comfort, listen to steam wand noise levels, and prioritize machines with visible water tanks. When form meets function, every cup feels intentional.
Incorporating a Bold Backsplash and Countertop Design
A vibrant backsplash can transform a mundane corner into a captivating centerpiece. Last spring, I worked with a client who paired navy blue subway tiles with white quartz countertops—the contrast made their brewing station pop like a boutique café. This approach turns functional surfaces into design opportunities.

Using color to create a focal point
Choose hues that energize your space without overwhelming it. My go-to trick? Paint sample strips taped to the wall for three days. Notice how morning light changes terracotta hexagons from muted to fiery. Color impacts mood more than we realize—a client’s sage green backsplash lowered her stress before first sips.
Contrast creates drama. Try matte black tiles behind brass canisters, or glossy red ceramic behind a neutral counter. I balanced my espresso machine’s stainless steel with warm walnut shelves and cobalt blue penny rounds. “Surfaces should converse, not clash,” advises designer Amber Lewis.
| Material | Durability | Style Impact |
|---|---|---|
| Peel-and-stick tiles | Rent-friendly | Quick refresh |
| Hand-painted cement | Heat-resistant | Artisan vibe |
| Recycled glass | Stain-proof | Modern shimmer |
Installation matters. Use spacers for even grout lines, and seal natural stone properly. My favorite budget hack? Frame a bold wallpaper panel with trim for temporary wow factor. Whether you choose geometric patterns or organic textures, let your backsplash tell your story.
Enhancing Your Bar with Clever Decor and Accents
A well-curated space evolves with your life’s rhythm—mine shifts with the seasons. Last winter, I swapped my ceramic creamer for a vintage brass sleigh, instantly warming chilly mornings. Designers like Athena Calderone recommend rotating three key elements quarterly: textiles, vessels, and natural textures.
Refreshing Displays Through the Year
Start simple. Switch tray liners monthly—burnt orange felt for fall, seagrass mats for summer. My mug rotation follows holidays: pastel teacups bloom in spring, earthy stoneware grounds autumn mornings. “Collections should breathe, not gather dust,” says stylist Emily Bowser.
| Season | Affordable Swap | Impact |
|---|---|---|
| Spring | Floral coasters | Fresh energy |
| Summer | Glass syrup bottles | Light reflection |
| Fall | Wooden spoon rest | Warm contrast |
Living Elements That Elevate
Plants transform sterile corners into vibrant hubs. My snake plant thrives in low light near the espresso setup, while trailing pothos softens metal shelves. For fragrance, try rosemary clippings in test tubes—they scent mornings as they root.
Artwork anchors your theme. A framed coffee bean print ties my brass accessories to walnut shelves. Found objects work too: my favorite “mug” is actually a repurposed honey jar from a farmer’s market.
| Decor Element | Cost | Source |
|---|---|---|
| Mini terrarium | $12 | Local nursery |
| Vintage spoon rack | $8 | Estate sale |
| Handmade pottery | $18 | Artisan fair |
Light catches matter. Place metallic accents near windows to dance with morning sun. My copper sugar bowl doubles as a sunrise reflector, casting warm patterns across the counter. Remember: your space should spark joy before the first sip.
Integrating Multi-Purpose Bar Carts and Butlers’ Pantries
The most surprising coffee station I ever designed started with a rusty bar cart and a vision. While helping a client organize their cramped dining area, we realized their seldom-used butler’s pantry could moonlight as a brewing hub. By adding sliding trays and magnetic spice tins, we transformed dead space into a dual-purpose marvel that serves espresso by morning and wine by night.
Bar carts shine when customized for flexibility. I swapped wobbly wheels for locking casters on a $25 flea market find, creating a mobile station that glides between kitchen and dining nook. The top shelf holds my go-to mugs, while lower tiers store airtight bags of beans and a carafe for filtered water. “Every inch should earn its keep,” I tell clients—that’s why we added fold-out side flaps for pastry plating.
Butlers’ pantries offer hidden potential. One homeowner repurposed glass-front cabinets to display ceramic canisters while concealing bulky grinders behind sliding panels. I keep my water filtration system tucked under a pull-out cutting board—it doubles as an ice bucket station during gatherings.
Three rules for multi-use success:
- Choose furniture with adjustable shelves or expandable surfaces
- Use vertical dividers to separate coffee gear from dining linens
- Label storage bags clearly to maintain morning efficiency
The real magic happens when spaces flow seamlessly. My cart’s marble top works for latte art and cheese boards, while hidden compartments house everything from stirring spoons to cocktail napkins. A recent upgrade? Leather handles added warmth and made rolling easier—all for under $10.
Adding Innovative Lighting and Aesthetic Elements
Lighting transformed my morning routine more than I ever expected. When I swapped harsh overhead bulbs for warm pendants last winter, my entire setup became a glowing sanctuary that lures me out of bed. The right illumination doesn’t just brighten—it sculpts mood and highlights textures you’ve carefully curated.
Using pendant lights and accent lighting for ambiance
Pendants became my secret weapon. I hung three adjustable fixtures above my cart, angling them to spotlight my favorite ceramic set. For early risers, dimmable LED strips under shelves provide soft task lighting without waking the household. “Light should guide your eyes, not assault them,” advises lighting designer Lindsey Adelman.
Positioning matters. Place fixtures 28-34 inches above surfaces to avoid glare on polished countertops. I angled my brass sconces downward to highlight reclaimed wood grain while keeping reflections off my espresso machine’s stainless steel. Test placements with painter’s tape before drilling—my first attempt left shadows over essential tools.
Affordable upgrades make big impacts:
- Plug-in swing arm lamps ($45) for flexible task lighting
- Battery-operated puck lights inside cabinets
- Frosted globe bulbs to soften industrial fixtures
Energy efficiency meets style with Edison LEDs. I chose amber-tinted versions that cast a sunrise glow while using 80% less power. For renters, adhesive-backed track lighting offers temporary solutions that leave no marks. Remember: your lighting should enhance functionality as much as aesthetics—one well-placed fixture can make pre-dawn brewing feel intentional rather than exhausting.
Creating an Organized Space with Drawer and Cabinet Solutions
Drawers used to be my kitchen’s chaotic secret—until I discovered compartment magic. While helping a client redesign their cramped breakfast nook, we transformed jumbled utensil drawers into dedicated stations for drink essentials. The key? Strategic dividers that adapt to your existing storage.

Start by repurposing thrifted silverware trays. I lined mine with cork to prevent rattling and added plywood sections for mug coasters and stir sticks. Designer Athena Calderone’s approach inspired me: “Treat drawers like jewelry boxes—every item deserves its own cradle.” Measure your deepest drawer, then cut lightweight dividers to create zones for filters, pods, or syrup bottles.
Materials matter more than you’d think. My go-to options balance affordability with personality:
| Material | Cost | Best For |
|---|---|---|
| Bamboo | $12/sheet | Moisture resistance |
| Acrylic | $8/sheet | Modern transparency |
| Reclaimed wood | Free-$15 | Rustic charm |
Hidden storage keeps counters clear. I installed under-shelf hooks in my upper cabinets to hang mugs vertically—now they’re accessible but out of sight. For narrow drawers, try sliding trays from old printers. One client stores her latte art tools in a repurposed cutlery organizer with flip-up lids.
Remember: organization should simplify your routine. My labeled bean jars and dedicated spoon slot shave minutes off hectic mornings. When every item has a home, your ritual becomes effortless elegance—no digging required.
Incorporating Multi-Functional Features in Your Kitchen
Reimagining kitchen spaces starts with seeing walls and cabinets as dual-purpose canvases. When redesigning my cousin’s galley kitchen last fall, we transformed unused vertical areas into functional art. Floating shelves became our secret weapon—they hold daily essentials while framing her vintage mug collection like museum pieces.
Floating shelves with hidden perks
I installed 14-inch reclaimed wood ledges above her espresso machine. The open design keeps filters and cups within reach, while concealed brackets create a sleek, weightless look. “Good storage should whisper, not shout,” says designer Joanna Gaines. We added magnetic strips under the lowest shelf for hanging measuring spoons—now they double as rustic decor.
Hidden compartments maintain minimalist vibes. A fold-down shelf beside the fridge hides her grinder setup, popping open with a gentle nudge. For narrow walls, try these space-saving solutions:
| Material | Depth | Best Use |
|---|---|---|
| Acrylic | 10″ | Modern appliance covers |
| Birch plywood | 12″ | Displaying drinkware |
| Wrought iron | 8″ | Industrial spice racks |
I recently helped a client conceal their bulky coffee setup behind sliding barn doors. The walnut panels blend with their farmhouse aesthetic, while interior hooks organize six mugs vertically. For renters, peel-and-stick shelves offer temporary solutions that leave no marks.
Balance form and function by assigning zones. Keep daily-use items at eye level, tucking specialty machines behind stylish screens. My favorite hack? Use floating ledges as room dividers in studio apartments—they define spaces without blocking light.
Repurposing Everyday Items for a Stylish Look
I once mistook a thrifted breadbox for a planter—until its true potential clicked. With sandpaper and leather straps, it became a rotating display for my favorite mugs. Transforming ordinary objects into functional art isn’t just budget-savvy—it adds layers of personality you can’t buy.
Crafting Character With Forgotten Finds
Metal hooks salvaged from old curtains now dangle measuring spoons above my grinder. A client turned wooden crates into floating ledges using $3 brackets—perfect for showcasing hand-painted cups. “Visible tools should spark joy, not stress,” says designer Leanne Ford. Her advice guided my spice rack conversion: sanded and stained, it stores stir sticks and napkins in style.
Budget Magic With What You Own
That chipped serving tray? Flip it into a catch-all for espresso pods. I lined mine with cork to mute clattering. Glass jars from pickles or candles shine as bean canisters when soaked in vinegar—add chalkboard labels for a café touch.
Three rules for successful transformations:
- Seek items with clean lines or interesting textures
- Prioritize function—if it doesn’t simplify your routine, rethink it
- Use cohesive finishes (matte spray paint works wonders)
My proudest hack? Repurposing a ladder into vertical mug storage. Sanded rungs hold cups securely, while the top shelf displays syrups. Total cost: $12 for brackets and beeswax polish. When everyday objects become intentional design elements, your space tells a story only you could write.
Conclusion
Transforming my morning routine became possible when every element fell into place. From measuring that first awkward corner to hanging the final pendant light, each choice shaped a space that fuels both efficiency and joy. Designers like Amber Lewis and Joanna Gaines taught me that intentional layouts matter more than square footage—a lesson proven daily as I glide between grinder and kettle.
Balancing practicality with personality changed how I start the day. Floating shelves keep favorite mugs visible yet organized, while clever drawer dividers tame pod chaos. That thrifted cart? It now transitions to wine service in the evening, proving good design adapts to life’s rhythms.
What began as a functional project became a testament to self-expression. Whether using subway tiles for bold contrast or repurposing crates as rustic ledges, affordable solutions spark creativity. I’ve learned that even busy days feel smoother when your station reflects your taste.
Now, steaming milk doubles as meditation time. The hiss of the machine harmonizes with morning light dancing through syrups. This nook proves style needn’t sacrifice comfort—whether savoring espresso solo or enjoying wine with friends. Your perfect setup awaits: one thoughtful detail at a time.
FAQ
How do I choose between a coffee maker and an espresso machine?
I prioritize my daily habits—if I drink mostly lattes, a Breville Bambino espresso machine works. For drip coffee, a Mr. Coffee brewer saves counter space. French presses are great for small setups!
What’s the best way to organize mugs without cabinets?
I use floating shelves or wall-mounted rails with Amazon Basics hooks. Open shelving near the station keeps my favorite Ember mugs visible and adds personality.
Can I add a backsplash without remodeling?
Absolutely! Peel-and-stick tiles from Home Depot or a bold paint color like Sherwin-Williams Evergreen Fog create a focal point. I paired mine with marble contact paper for a luxe look.
How do I hide bulky appliances like grinders?
I built a sliding tray inside a lower cabinet for my Baratza Encore. For smaller items, a lidded basket on the counter keeps things tidy but accessible.
What lighting works best for a compact corner setup?
I love IKEA’s Ranarp pendant for task lighting. Battery-operated under-cabinet strips from Luminoodle add warmth without wiring hassles.
Are bar carts practical for storing coffee accessories?
Yes! My World Market rattan cart holds syrups, stirrers, and napkins. Wheels let me move it near the dining area when hosting.
How can I repurpose items for storage on a budget?
I turned a thrifted spice rack into a pod holder and used mason jars for beans. A magnetic knife strip holds measuring spoons—cheap and chic!
What’s an easy way to refresh the look seasonally?
Swap out mug displays—think pumpkin-shaped mugs in fall or pastels for spring. A mini chalkboard sign from Target updates the vibe instantly.
Can I build custom shelves without advanced tools?
For sure! Sanded pine boards from Lowe’s and Minwax honey stain create rustic shelves. Use heavy-duty brackets for support—no saw required!
How do I balance a coffee station in a shared kitchen?
I use a rolling cart to tuck it away when not in use. A tiered tray keeps creamers and sugars compact, while a Nespresso Vertuo minimizes clutter.


