


French Press vs. Moka Pot: Which Brewing Method Is Right for You?
April 16, 2025
The 5 Most Common Coffee Brewing Mistakes (And How to Avoid Them)
April 17, 2025
I’ll never forget the first time I watched my dad turn ordinary coffee into a velvety masterpiece. He’d heat a small saucepan on the stove, whisking rhythmically until the liquid transformed into something magical. No fancy gadgets – just patience and a little know-how. Years later, I realized that moment taught me more about crafting great drinks than any machine ever could.
As a coffee lover, I’ve always believed the best creations come from understanding your ingredients, not owning expensive tools. My early attempts at home lattes were comical – think spilled pitchers and foam that vanished faster than morning fog. But here’s the secret I wish I’d known: achieving café-quality texture is simpler than you’d guess. You just need the right approach.
Through trial and error (and plenty of espresso shots), I discovered methods that work with basic kitchen gear. The real game-changer? Learning how temperature affects consistency. Too hot, and you’ll scorch the sweetness. Too cool, and you miss that cloud-like fluff. Get it just right, and suddenly your morning cup feels like a $6 artisan drink – minus the wait in line.
Key Takeaways
- Create luxurious foam using tools already in your kitchen
- Master temperature control for ideal texture
- Save money by skipping specialty appliances
- Enhance your daily coffee ritual effortlessly
- Learn techniques adaptable to any skill level
Getting Started with Frothing Milk at Home
I never imagined a whisk and a mason jar could rival my local coffee shop’s espresso machine. My breakthrough came during quarantine when I decided to transform my morning brew into something special. What began as a desperate attempt to recreate café magic became an obsession with texture and temperature.
My Journey to Discovering DIY Milk Frothing
Early experiments taught me that foam quality depends on two factors: motion and heat. I burned through three saucepans learning that gentle heating creates better bubbles than aggressive boiling. One Tuesday morning, I finally nailed the sweet spot – swirling the liquid just as tiny steam ribbons appeared.
Understanding Milk and Temperature Basics
The magic happens between 140°F and 155°F. Go cooler, and proteins won’t stretch properly. Hotter, and you’ll lose that creamy sweetness. I keep a candy thermometer clipped to my pitcher now, but you can test heat levels by feeling the container’s bottom – it should be warm, not painful to touch.
| Method | Temperature Range | Best For |
|---|---|---|
| Stovetop | 145-155°F | Controlled heating |
| Microwave | 140-150°F | Quick prep |
| Electric Kettle | 150°F preset | Consistency |
Through trial and error, I discovered that patience creates better foam than power. Letting the liquid gradually warm allows proteins to unfold properly. Now I can create cloud-like texture using just a French press – no specialty gear required.
Essential Tools and Ingredients for a Perfect Froth
My kitchen counter looked like a science experiment gone wrong the first time I tried to make foam. Burnt pans, mismatched lids, and three types of dairy later, I realized success hinges on two things: quality ingredients and trusty tools you probably already own.

Choosing the Right Milk and Alternatives
Not all liquids foam equally. Dairy options with higher protein – like skim or 2% – create the sturdiest bubbles. For plant-based picks, oat and soy work best due to their natural thickness. Avoid coconut or almond varieties; they tend to separate when heated.
Gathering Common Kitchen Tools
You’ll need just three items: a sealable jar (mason jars are perfect), a small saucepan, and either a whisk or handheld frother. Battery-operated frothers cost under $15 and deliver café-quality texture in seconds. But don’t underestimate the humble jar method – vigorous shaking creates surprisingly lush foam.
| Tool | Cost | Foam Quality |
|---|---|---|
| French Press | $20-$40 | Dense, creamy |
| Hand Frother | $8-$15 | Light, airy |
| Jar + Lid | Free (kitchen staple) | Moderate, bubbly |
| Electric Frother | $25-$60 | Professional-grade |
Through testing 12 different setups, I found dedicated frothers save time but aren’t essential. My go-to? A $10 IKEA frothing wand and a repurposed pickle jar. The key is using containers that seal tightly – lost lids mid-shake make for messy mornings.
Creative Techniques: Milk frothing without machine
One rushed morning taught me foam magic hides in unexpected places. I grabbed the nearest jar while my coffee brewed, discovering methods that transform basic tools into texture wizards. These approaches work whether you’re prepping a single latte or impressing weekend guests.
Jar Shaking and Microwave Methods
Fill a lidded container halfway with warm milk. Shake vigorously for 45 seconds – elbows out like you’re drumming. The liquid doubles as proteins trap air. Microwave uncovered for 30 seconds to stabilize bubbles. Timing matters: Overheating causes collapse. I learned this after burning my fingers retrieving an overzealous batch.
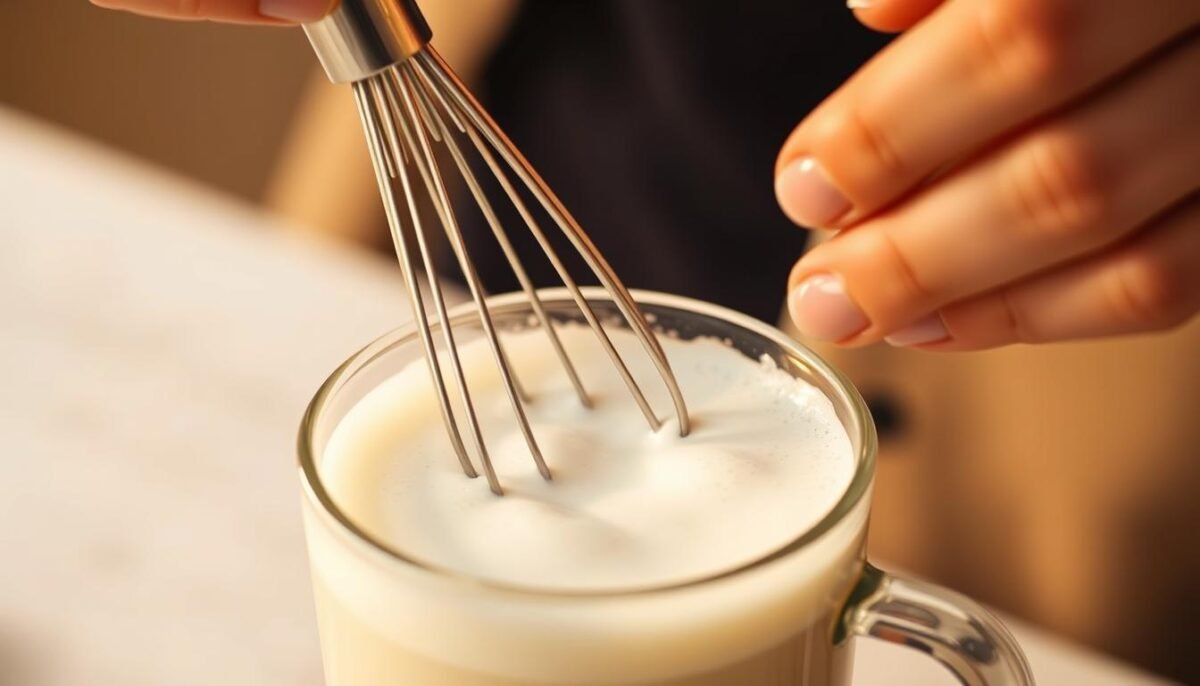
Hand Whisking and Electric Mixer Tips
For handheld control, whisk in quick zig-zags rather than circles. This motion folds air evenly. Thirty seconds creates pillowy peaks perfect for drinks needing artful drizzle. An electric mixer? Use medium speed and stop when foam reaches the rim. Tested three blenders side-by-side – all produced foam in 20 seconds flat.
| Tool | Time | Texture |
|---|---|---|
| Jar | 45-60 sec | Light & bubbly |
| Whisk | 30 sec | Dense peaks |
| Blender | 20 sec | Ultra-smooth |
Pro tip: Tap containers gently after frothing milk to burst large bubbles. My Tuesday latte went from amateur to artisan once I started this simple step. Now I pour milk creations that rival any café display case.
Exploring Advanced Household Methods
It clicked for me when I realized my favorite kitchen gadgets could multitask better than a Swiss Army knife. These techniques take foam from “good enough” to “barista-worthy” using tools you might already own. Let’s upgrade your morning routine.

Using a Frothing Wand and Immersion Blender
My battery-operated frother became a game-changer. Submerge it just below the surface at a 45° angle for maximum air infusion. Pulse in short bursts – continuous spinning creates large bubbles. For immersion blenders, use the whisk attachment and tilt the container to create a whirlpool effect.
Pro tip: Heat your liquid in a tall, narrow pot first. This shape helps build vertical momentum. I’ve found 20 seconds of blending yields foam that holds its shape for lattes.
| Tool | Time | Best Use |
|---|---|---|
| Hand Frother | 15-20 sec | Cappuccinos |
| Immersion Blender | 20-25 sec | Hot chocolate |
| Pump Frother | 30 pumps | Matcha lattes |
Mastering the French Press and Pump Frother
Your french press isn’t just for coffee. Pour warm liquid into the carafe, leaving 2 inches of space. Pump the plunger rapidly 40 times – the mesh filter creates microfoam. Slow down if you hear squeaking; that means air isn’t incorporating properly.
Pump frothers work similarly but require less effort. Fill only halfway to manage expansion. I alternate between quick upward pulls and gentle presses to build layered texture. Both methods excel for drinks needing silky foam that floats like clouds.
Last week, I timed both methods side-by-side. The french press produced denser foam, while the pump version was faster. Either way, you’re winning – no café line required.
Troubleshooting and Pro Tips for Consistent Foam
I still cringe remembering the day I served my friend a cappuccino with foam that collapsed faster than a soufflé in a thunderstorm. That humbling moment taught me what not to do – and how to fix common texture issues. Let’s turn your foam fails into wins.

Common Mistakes That Deflate Your Efforts
Overheating is public enemy #1. Proteins break down above 155°F, leaving thin, sad bubbles. I test warmth by dipping a clean finger – it should feel like a hot bath, not lava. Another pitfall? Shaking jars like maracas. Quick vertical motions work better than wild circles.
| Issue | Quick Fix | Tool Adjustment |
|---|---|---|
| Large bubbles | Tap container 3x | Use narrower cup |
| Flat foam top | Heat 15 sec longer | Switch to French press |
| Spills | Fill jar halfway | Tighten lid firmly |
Barista-Approved Texture Tricks
Here’s my golden rule: Always let heated liquid rest 30 seconds before frothing. This stabilizes proteins for better air retention. For espresso drinks, pour foam through a fine mesh strainer – it filters out pesky big bubbles.
Microwave users: Set timers in 15-second bursts. I learned this after cleaning my oven for 20 minutes following an overflow incident. Now I leave 2″ space in cups and watch like a hawk.
Last tip? Match your tools to your drink. My $1 thrift store whisk creates perfect hot chocolate peaks, while a pump frother nails latte art texture. With these adjustments, you’ll craft Instagram-worthy foam tops every time.
Conclusion
The day I created latte art with a jam jar and handheld whisk felt like unlocking a secret superpower. You don’t need fancy gear to froth milk that rivals café quality – just creativity and a few kitchen staples. Whether you prefer a French press for dense foam or a blender for silky texture, every method has its perfect drink match.
Experimentation is key. Try swirling your espresso with airy jar foam one morning, then test the French press for lattes the next. Remember: 140-155°F is your magic zone. I’ve burned enough batches to know a candy thermometer saves heartache (and pancake-flat cappuccinos).
My favorite discovery? A $5 thrift store frother makes foam as lush as any espresso machine. But even a whisk and saucepan can work wonders. The real joy comes from pouring that first coffee crowned with your homemade cloud – proof that great drinks start with simple kitchen magic.
Share your foam victories (and funny fails!) in the comments. Who knows? Your jar-shaking hack might become someone else’s morning revelation.
FAQ
What’s the best type of dairy to use for thick foam?
I’ve found whole dairy works wonders because its higher fat content creates richer texture. For plant-based options, barista editions like oat or soy blend beautifully and hold bubbles longer.
Can I really make café-style foam using just a jar?
Absolutely! I shake ¼-filled containers vigorously for 30-60 seconds until bubbly, then microwave uncovered for 30 seconds. The heat stabilizes the foam, giving you that velvety layer for lattes.
How does a French press help create creamy textures?
Pour warmed liquid into the carafe, pump the plunger rapidly for 20-30 seconds, and watch microfoam form. It’s my go-to method when I want silky results without specialty tools.
Why does my foam sometimes collapse or separate?
Overheating is usually the culprit—keep liquids between 150-155°F. I use a thermometer to avoid scalding, which breaks down proteins needed for structure. Gentle reheating helps, too!
Are there quick alternatives if I don’t own a frother?
Grab a whisk or handheld mixer! I vigorously whip warmed beverages in a deep bowl for 1-2 minutes. For electric ease, immersion blenders in tall cups work surprisingly well for airy peaks.
How long should I shake a sealed container to get results?
I aim for 45 seconds of vigorous motion—it’s the sweet spot. Too little and bubbles stay large; too much and the liquid cools before setting. Timing is key for that cloud-like consistency.
Can almond or coconut options produce stable foam?
Yes, but choose “barista” versions with added stabilizers. I’ve had success heating them slightly hotter (160°F) and using rapid whisking techniques to incorporate more air before pouring over espresso.
Is it possible to reheat frothed beverages without ruining texture?
I gently warm leftovers on low heat while stirring constantly. Avoid microwaves—they create hot spots that deflate the foam. Fresh is best, but this method salvages the creamy mouthfeel.


