


The Ultimate Guide to Using Vitamin C-Rich Fruits for Brighter Skin
March 22, 2025
Why Papaya is the Secret to Smoother and Younger-Looking Skin
March 23, 2025
Did you know that natural skincare has seen a massive surge in popularity across the United States? With more people turning to DIY solutions, it’s no wonder that simple, effective recipes are in high demand. One standout option is a hydrating treatment that combines the power of nutrient-rich ingredients to rejuvenate your skin.
Imagine this: You’ve been struggling with dry, dull skin for weeks. No matter what you try, nothing seems to work. Then, you discover a simple recipe using ingredients you already have at home. In just minutes, your skin feels softer, smoother, and deeply hydrated. Sounds too good to be true? It’s not!
In this guide, we’ll walk you through creating a DIY skincare treatment that’s perfect for anyone looking to nourish their skin naturally. From selecting the right ingredients to mastering the application process, we’ve got you covered. Let’s dive in and unlock the secrets to glowing, healthy skin!
Key Takeaways
- Natural skincare is gaining popularity in the US for its simplicity and effectiveness.
- This guide provides a step-by-step process for creating a hydrating treatment at home.
- Using nutrient-rich ingredients can help rejuvenate and moisturize your skin.
- Proper application and ingredient selection are key to achieving the best results.
- This DIY approach is perfect for those seeking a natural, affordable skincare solution.
Understanding Avocado’s Skincare Benefits
The secret to glowing skin might just be sitting in your kitchen right now. This green fruit is packed with nutrients that can transform your skincare routine. Let’s explore why it’s a favorite among experts and enthusiasts alike.
Nutritional Powerhouse and Antioxidant Rich
This fruit is a treasure trove of vitamins and minerals. It contains vitamins E and C, which are known for their brightening and restorative effects. These nutrients help repair damaged cells and promote a healthy complexion.
Antioxidants play a crucial role in neutralizing free radicals, which can cause premature aging. According to dermatologist Christine Ma, “The antioxidants in this fruit help protect the skin from environmental stressors, keeping it youthful and radiant.”
Anti-Aging and Anti-Inflammatory Properties
One of the standout benefits is its ability to reduce inflammation. Omega-3 fatty acids found in this fruit soothe redness and irritation, making it ideal for sensitive skin. It also helps build a stronger skin barrier, preventing moisture loss.
Karen Hammerman, a skincare expert, notes, “The anti-inflammatory properties of this fruit make it a go-to for calming conditions like eczema and psoriasis.” Additionally, its ability to stimulate collagen production helps reduce the appearance of wrinkles.
Combining this fruit with ingredients like honey or lemon juice can enhance its effects. Honey adds moisture, while lemon juice provides a gentle exfoliation. Together, they create a powerful treatment for dry or dull skin.
Gathering Your Ingredients and Tools
Creating a hydrating treatment at home starts with the right ingredients and tools. Quality components ensure your DIY recipe delivers the best results for your skin. Let’s explore what you’ll need and how to choose them wisely.
Choosing a Ripe Avocado and Other Essentials
Selecting a perfectly ripe avocado is crucial. Gently press the fruit—it should yield slightly without being mushy. Another trick is to remove the stem; if it comes off easily and reveals green underneath, it’s ready to use.
Alongside the avocado, you’ll need raw honey and apple cider vinegar. Honey is a natural humectant, locking in moisture, while vinegar helps balance your skin’s pH. These ingredients work together to enhance the mask’s effectiveness.
Utilizing Honey, Vinegar, and Natural Oils
Adding natural oils like olive or avocado oil can boost hydration. These oils are rich in healthy fats and vitamins, nourishing your skin deeply. For dry skin, consider using one tablespoon of olive oil for extra moisture.
Tools like a mini food processor or fork are essential for blending the ingredients smoothly. A fork works well for mashing, while a processor ensures a creamy consistency. Both methods are effective, so choose what’s convenient for you.
| Ingredient | Purpose | Quantity |
|---|---|---|
| Ripe Avocado | Moisturizes and nourishes | 1 whole |
| Raw Honey | Locks in moisture | 2 tablespoons |
| Apple Cider Vinegar | Balances skin pH | 1 teaspoon |
| Olive Oil | Boosts hydration | 1 tablespoon |
Gathering high-quality ingredients is the foundation of an effective DIY treatment. Each component complements the others, creating a balanced, nutrient-rich mask. With the right tools and careful selection, you’re one step closer to glowing, healthy skin.
Step-by-Step Avocado Face Mask Preparation
Ready to transform your skincare routine with a simple DIY recipe? Let’s walk through the process of creating a hydrating treatment that’s both easy and effective. With just a few steps, you’ll have a nutrient-rich solution for healthier, glowing skin.
Mixing Techniques for a Smooth Consistency
Start by combining ¼ cup of ripe avocado with 2 tablespoons of raw honey and ½ teaspoon of apple cider vinegar. Use a mini food processor or a fork to mash the ingredients until you achieve a smooth paste. Avoid overmixing to preserve the nutritional benefits of each component.
A blender can also be used if you prefer a creamier texture. The key is to ensure the mixture is even and free of lumps for easy application. A smooth consistency allows the mask to spread evenly, maximizing its hydrating effects.
Essential Tools and Equipment
Having the right tools makes the process seamless. A mini food processor or blender ensures a creamy texture, while a fork works well for manual mixing. You’ll also need a small bowl for combining the ingredients and a spoon for application.
Here’s a quick guide to the tools and their roles:
| Tool | Purpose |
|---|---|
| Mini Food Processor | Blends ingredients smoothly |
| Fork | Manual mashing for a chunkier texture |
| Small Bowl | Mixing and holding the mask |
| Spoon | Application onto the skin |
For more tips on perfecting your DIY recipes, check out our guide on expert techniques. With the right tools and techniques, you’ll create a mask that leaves your skin feeling refreshed and nourished.
Application Techniques for Deep Hydration
Unlock the full potential of your skincare routine with these simple application tips. Properly applying your hydrating treatment ensures maximum benefits for your skin. Let’s dive into the best methods to achieve glowing, healthy results.

Proper Application Methods on Clean, Damp Skin
Start with clean, damp skin to enhance absorption. Gently pat your face with water or a damp cloth before applying the mask. This step helps lock in moisture and improves hydration.
Using your fingertips or a brush, spread a thin, even layer over your face. Avoid the eye area to prevent irritation. A smooth application ensures the nutrients penetrate deeply for better results.
Leave the mask on for 15 to 20 minutes. This allows the ingredients to work their magic without drying out your skin. Set a timer and relax while your skin soaks up the benefits.
Rinse off with warm water, then splash your face with cool water to close pores. This step seals in hydration and leaves your skin feeling refreshed. Follow up with your favorite moisturizer for added nourishment.
For an extra boost, gently massage the mask into your skin during application. This improves absorption and promotes circulation, giving you a radiant glow.
Enjoy this self-care routine as part of your weekly skincare regimen. It’s a simple yet effective way to pamper your skin and keep it looking its best.
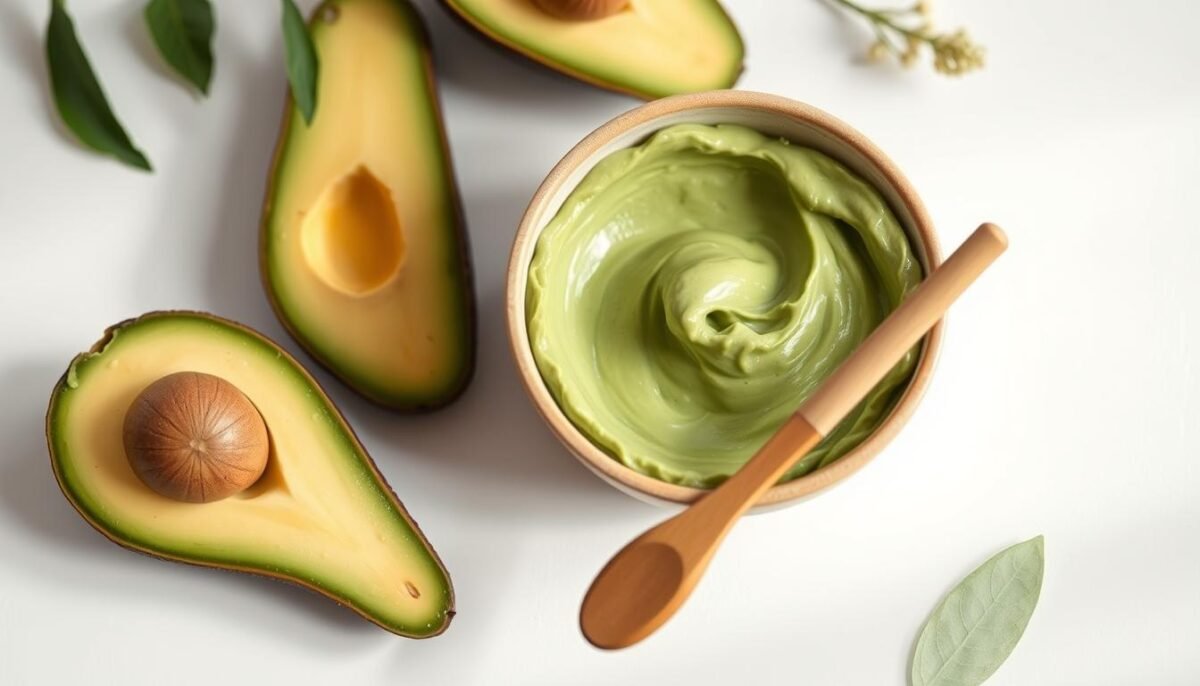
DIY Avocado Face Mask Recipe for Glowing Skin
Achieving radiant skin has never been easier with this simple, nutrient-packed recipe. Packed with vitamins and natural oils, this hydrating treatment is perfect for anyone looking to rejuvenate their complexion. Let’s dive into the steps to create your own at-home spa experience.
Precise Measurements and Mixing Instructions
Start by gathering your ingredients. You’ll need ¼ cup of ripe avocado, 2 tablespoons of raw honey, and ½ teaspoon of apple cider vinegar. These components work together to nourish and hydrate your skin deeply.
Combine the ingredients in a small bowl or mini food processor. Blend until you achieve a smooth, creamy consistency. Avoid overmixing to preserve the nutrients. The result should be a paste that’s easy to apply and absorbs quickly.
Here’s a breakdown of the ingredients and their roles:
| Ingredient | Purpose | Quantity |
|---|---|---|
| Ripe Avocado | Moisturizes and nourishes | ¼ cup |
| Raw Honey | Locks in moisture | 2 tablespoons |
| Apple Cider Vinegar | Balances skin pH | ½ teaspoon |
This recipe yields enough for 2-3 applications, making it perfect for regular use. Apply the mask to clean, damp skin and leave it on for 15-20 minutes. Rinse with warm water and follow up with your favorite moisturizer for best results.
For those with sensitive skin, we recommend testing the mask on a small area first. This ensures compatibility and prevents irritation. Enjoy the process of creating your own skincare treatment and watch your skin transform with each use.
Customizing and Enhancing Your Mask
Personalizing your skincare routine can make all the difference in achieving your desired results. By adding a few extra ingredients, you can tailor your treatment to address specific concerns like dryness, dullness, or signs of aging. Let’s explore how to enhance your mask for maximum benefits.
Adding Ingredients for Specific Skin Needs
One of the best ways to boost your mask is by incorporating natural ingredients that target your unique skin type. For gentle exfoliation, add a tablespoon of oats. They help remove dead skin cells, leaving your complexion smoother and brighter.
If you’re looking to brighten dark spots, mix in a teaspoon of yogurt and a few drops of lemon juice. Yogurt contains lactic acid, which gently exfoliates, while lemon juice acts as a natural brightener. Together, they help even out your skin tone.
For those with sensitive or acne-prone skin, turmeric is a great addition. Its antiseptic and anti-inflammatory properties help calm redness and reduce breakouts. Just a pinch is enough to see results.
Variations for Dry Skin and Wrinkle Prevention
If dryness is your main concern, consider adding a teaspoon of flaxseed oil or avocado oil. These oils are rich in healthy fats that deeply hydrate and nourish your skin, leaving it soft and supple.
For anti-aging benefits, try mixing in a teaspoon of aloe vera juice. It promotes collagen production, helping to reduce the appearance of fine lines and wrinkles. Combined with the natural oils, it creates a powerful treatment for mature skin.
Here’s a quick guide to customizing your mask:
- Oats: Gentle exfoliation for smoother skin.
- Yogurt and Lemon Juice: Brightens and evens skin tone.
- Turmeric: Reduces inflammation and calms acne.
- Flaxseed Oil: Deep hydration for dry skin.
- Aloe Vera Juice: Anti-aging and wrinkle prevention.
Feel free to experiment with these variations to find what works best for you. Always perform a patch test before full application to ensure compatibility with your skin. With a few tweaks, you can create a mask that’s perfectly suited to your needs.
Safety Tips and Best Practices
Ensuring safety is key when creating DIY skincare treatments at home. While natural ingredients are gentle, it’s important to follow best practices to avoid irritation or contamination. Let’s explore how to use your homemade mask safely and effectively.
Performing a Patch Test
Before applying the mask to your entire face, perform a patch test. Apply a small amount to your inner forearm or behind your ear. Wait 24 hours to check for redness, itching, or irritation. This step helps ensure the ingredients are compatible with your skin.
If you notice any adverse reactions, rinse the area immediately and avoid using the mask. A patch test is especially important for those with sensitive skin or allergies to certain ingredients.
Storage and Handling of Leftover Avocado
To keep your leftover avocado fresh, store it with the skin and pit intact. Wrap it tightly in plastic wrap or place it in an airtight container. Use it within 2 days to prevent browning and maintain its nutritional benefits.
For longer storage, consider mashing the avocado and adding a few drops of lemon juice. This helps preserve its color and texture. Always use clean tools to avoid contamination.
Here are some additional tips for safe use:
- Limit mask application to 15-20 minutes to avoid hardening or irritation.
- Use the mask 1-2 times a week to prevent over-exfoliation or dryness.
- Sanitize tools like bowls and spoons before and after use to maintain hygiene.
By following these safety tips, you can enjoy the benefits of your DIY treatment without any risks. Always listen to your skin and adjust the frequency or ingredients as needed.
Conclusion
Taking care of your skin naturally has never been simpler or more effective. By following our step-by-step guide, you can create a nourishing treatment that deeply hydrates and rejuvenates. The combination of nutrient-rich ingredients helps improve hydration, reduce signs of aging, and leave your complexion glowing.
Remember, proper preparation and application are key to achieving the best results. Always perform a patch test and follow safety practices to ensure your skin stays healthy. Feel free to customize the recipe to address your specific needs, whether it’s dryness, dullness, or sensitivity.
We encourage you to confidently incorporate this natural solution into your routine. Share your experiences and let us know how it works for you. Here’s to healthier, happier skin!
FAQ
What makes avocado a great ingredient for skincare?
Avocado is packed with healthy fats, vitamins, and antioxidants. These nutrients help nourish and hydrate the skin, promoting a healthy glow and reducing dryness.
Can I use honey in my DIY mask?
Absolutely! Honey is a natural humectant, meaning it locks in moisture. It also has anti-inflammatory properties, making it perfect for soothing irritated skin.
How do I choose the right avocado for my mask?
Look for a ripe avocado that’s slightly soft to the touch. Overripe ones may be too mushy, while underripe ones won’t blend smoothly.
What tools do I need to prepare the mask?
A blender or fork works well for mashing the avocado. You’ll also need a bowl for mixing and a spoon for applying the mixture.
How long should I leave the mask on my skin?
We recommend leaving it on for about 10-15 minutes. This gives your skin enough time to absorb the nutrients without over-drying.
Can I add lemon juice to the mask?
Yes, lemon juice can brighten the skin and balance oil production. However, use it sparingly, as it can be drying for some skin types.
How often should I use an avocado-based treatment?
Once or twice a week is ideal. Overuse can lead to excess oiliness, especially for those with naturally oily skin.
What’s the best way to store leftover mixture?
Store it in an airtight container in the fridge for up to 24 hours. After that, it’s best to discard it to avoid bacterial growth.
Can I customize the mask for dry skin?
Definitely! Add a teaspoon of natural oils like coconut or almond oil for extra hydration. These ingredients help lock in moisture and soothe dryness.
Is it safe to use on sensitive skin?
Yes, but always perform a patch test first. Apply a small amount to your wrist or behind your ear and wait 24 hours to check for any reactions.


