


The Ultimate Guide to Homemade Mexican Tacos from Scratch
May 4, 2025
Cooking Authentic Thai Pad Thai with Fresh Ingredients
May 4, 2025
I’ll never forget the first time I served ribs to my family. The meat was tough, the seasoning bland, and my confidence? Crumbled like overcooked bark. But that failure sparked a decade-long obsession with mastering the art of low-and-slow cooking – a journey that taught me how to turn humble pork into melt-in-your-mouth magic.
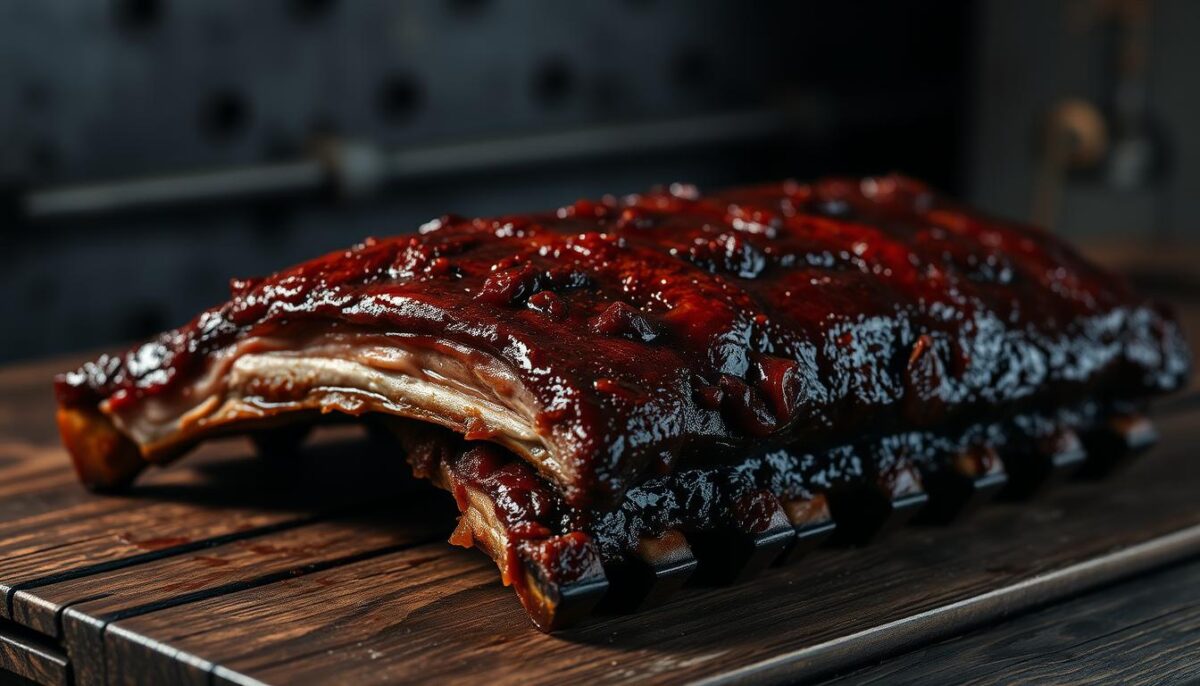
One summer evening, after wrapping a rack in foil and letting it bathe in my oven’s gentle heat for hours, everything changed. The moment I pulled apart those tender strands, watching steam rise through the caramelized sauce, I realized: this is what shared joy tastes like. Now, I want to help you create those same wide-eyed moments at your table.
The secret lies in patience and precision. Cooking at 275°F breaks down connective tissue without drying out the meat. Removing the silvery membrane ensures seasoning penetrates deeply, while wrapping in foil creates a steamy cocoon that guarantees fall-off-the-bone tenderness. It’s not just dinner – it’s edible alchemy.
Key Takeaways
- Low-temperature cooking transforms tough cuts into tender masterpieces
- Proper membrane removal allows flavors to penetrate the meat fully
- Foil wrapping locks in moisture during the crucial cooking phase
- Timing sauce application prevents burning while creating perfect glaze
- Resting meat before serving ensures juiciness in every bite
- Pairing with simple sides lets the ribs shine as the star
Exploring the American bbq ribs recipe
It took a rainy day and a broken smoker to discover the magic of indoor cooking. While traditional methods rely on open flames, your oven offers precise temperature control that transforms tough cuts into tender masterpieces. Low-and-slow heat (around 275°F) works like a culinary time machine, gently breaking down collagen over hours until it melts into silky richness.
Why Low Heat Wins
That “fall-off-the-bone” texture isn’t luck – it’s science. Connective tissues dissolve best between 200-300°F, creating succulent strands without drying the meat. A simple rub of brown sugar, salt, and pepper forms a caramelized crust that locks in moisture. I’ve found this combo works better than complicated spice blends, especially for first-timers.
Oven vs. Outdoor Cooking
Your kitchen appliance delivers three game-changing benefits:
- Consistency: No flare-ups or temperature swings
- Convenience: Cook year-round, rain or shine
- Control: Adjust timing without babysitting coals
After testing both methods, I now recommend the oven for reliable results. Set it, forget it, and let time work its magic. In the next section, we’ll walk through each step – from membrane removal to sauce glazing – so you can replicate this success at home.
Step-by-Step Process for Perfect Slow-Cooked Ribs
The journey from tough to tender starts with three non-negotiable steps. I’ve ruined enough racks to know shortcuts don’t work here—but nail these fundamentals, and you’ll create magic even on your first try.
Prepping and Seasoning the Ribs
Flip the rack bone-side up. That slippery membrane? Peel it off with a paper towel for better seasoning absorption. Pat the meat dry—moisture is the enemy of crust formation.
Mix 2 tablespoons paprika, 1 tablespoon garlic powder, and 1 teaspoon black pepper. Massage it into every crevice. For baby back ribs, use a lighter hand—their natural sweetness shines through simpler rubs.

Baking with Foil for Tenderness
Wrap the seasoned meat tightly in aluminum foil—double layers prevent leaks. Place bone-side down on a baking sheet. Set your heat oven to 275°F and let time work its magic.
| Type | Cook Time | Doneness Test |
|---|---|---|
| Baby Back | 2.5 hours | Bend test* |
| Spare Ribs | 3-3.5 hours | Probe slides easily |
*When lifted with tongs, the rack should bend 45° without breaking.
Caramelizing with Homemade BBQ Sauce
Unwrap carefully—save the juices for sauce. Brush on your glaze (store-bought works, but homemade lets you control sweetness). Broil 3-5 minutes until bubbly. Watch closely—sugar burns fast!
For spare ribs, I add a second sauce layer after slicing. Their extra fat content handles the double glaze beautifully. Let rest 10 minutes—patience rewards you with juicier bites.
Essential Ingredients and Equipment for the Best Ribs
The difference between good and extraordinary lies in your toolkit—both what you use and how you use it. Through years of trial and error, I’ve narrowed down the non-negotiables that transform basic meals into memorable feasts.
Flavor Builders: Spices That Sing
Your spice rack holds the magic. Brown sugar caramelizes beautifully, while paprika adds smoky depth. I mix ¼ cup sugar with 2 tablespoons each of garlic powder and ground black pepper. This ratio creates balance—sweetness without cloying, heat without overwhelming.
Tools That Do Heavy Lifting
Three items dominate my setup:
- A oven with precise temperature control (no spikes above 275°F)
- Heavy-duty foil that locks in steam during baking
- A grill or broiler for final caramelization
| Rib Type | Prep Time | Ideal Sauce |
|---|---|---|
| Baby Back | 2.5 hours | Light glaze |
| Spare | 3.5 hours | Double coating |
| Country-style | 4 hours | Bold barbecue |
Invest in thick foil—dollar store rolls tear mid-cook. For meat, choose racks with even marbling. I prefer Reynolds Wrap and Nordic Ware pans—they’ve never failed me during marathon baking sessions. Keep your workspace organized: spices measured, tools within reach, timer set. Good prep lets you focus on what matters—the transformative power of time and heat.
Conclusion
Perfecting this method transformed my kitchen confidence. Through trial and error, I learned that three tablespoons of brown sugar mixed with garlic powder and smoked paprika creates a rub worth savoring. Wrapping meat in aluminum foil locks in juices better than any gadget – trust me, I’ve tested them all.
Your oven does the heavy lifting here. Set it low, walk away, and let time work magic. Pair those tender bites with crisp apple slaw or roasted potatoes – simple sides let the main dish shine. I still smile remembering my neighbor’s reaction: “You made this here?!”
Don’t fear experimentation. Swap mustard for honey in your glaze, or add chili flakes to the rub. The end goal? Flavors that make your kitchen smell like a pro’s domain. Share your twists online – our growing fan base loves fresh ideas!
Ready to begin? Grab that foil, preheat your oven, and let’s create memories one -kissed bite at a time. Your future self – and hungry guests – will thank you.
FAQ
Can I use spare ribs instead of baby back ribs?
Absolutely! Spare ribs work well, but they’re meatier and may need an extra 30-60 minutes in the oven to become tender. Just adjust your cook time and keep an eye on them.
Do I have to wrap the racks in aluminum foil?
I highly recommend it! Wrapping them tightly in foil locks in moisture and helps break down the meat’s collagen, giving you that fall-off-the-bone texture. Don’t skip this step if you want tender results.
What’s a good substitute for brown sugar in the rub?
Try honey or maple syrup for a similar sweetness. If you’re avoiding sugar altogether, smoked paprika or a dash of apple cider vinegar can add depth without the sweetness.
Can I cook these entirely on the grill instead of the oven?
You can, but slow-cooking in the oven ensures even heat and tenderness. If using a grill, keep the temperature low (around 250°F) and use indirect heat to mimic the oven’s steady environment.
How do I prevent the sauce from burning during caramelization?
Brush the sauce on during the last 15-20 minutes of cooking. High sugar content burns easily, so keep the heat moderate and watch closely. A light coat and frequent basting help, too!
Is garlic powder necessary, or can I use fresh garlic?
Fresh garlic adds a punchy flavor, but powder blends evenly into the rub. If using fresh, mince it finely and mix with mustard or oil to help it stick to the meat before adding other spices.


