


Juicy Halibut Steaks: My Expert Guide
February 9, 2025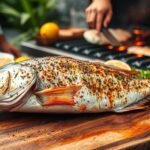
Grilled Whole Snapper: A Flavorful Guide
February 9, 2025
It all began with a small dinner party at my house. I invited friends who loved good food as much as I did. That night, I decided to make seared tuna. My choice was a hit! My guests loved the crispy outside and the soft, red inside of the tuna. This dish, with its tasty marinade, made the evening unforgettable. It showed me how a great meal can change any gathering.
After the party, feeling proud of my cooking, I wanted to share what I had learned. The secret of seared tuna is its amazing flavor and how it fits any occasion. Below, I’ll tell you how to make the perfect seared tuna. This way, you can wow your guests too.
Key Takeaways
- Mastering seared tuna involves quick cooking – typically 1 to 1.5 minutes per side.
- Allow the tuna to rest for a minute before serving for optimal flavor.
- Marinate the tuna for at least 30 minutes to enhance taste and tenderness.
- Select ahi tuna with vibrant red color and firm texture for best results.
- Seared tuna pairs well with various accompaniments like rice, salads, and pickled vegetables.
- Store any leftovers in the refrigerator for up to 48 hours, reheating for 30 seconds to 1 minute per side.
- Aim for a high heat searing surface, using oil with a high smoke point like vegetable or avocado oil.
My Love Affair with Seared Tuna
I’ve always loved the cooking art of seared tuna. I started with a goal: to make a dish at home that could match a restaurant’s quality. Seared ahi tuna and seared yellowfin tuna became my favorites because they taste incredible and wow my guests.
The Allure of Fresh Ingredients
Cooking with fresh items truly changes the game. The bright colors and deep flavors make the meal better. The first time I cooked with fresh ahi tuna, it was so tender and delicious. Fresh herbs, the right oil, and perfect spices make yellowfin tuna taste even better. Using fresh items not only makes food taste great but also looks more appealing and is healthier.
Why I Chose Seared Tuna
Seared ahi tuna and yellowfin stand out for many reasons. They cook fast, in just 1-2 minutes per side, making a quick fancy meal. These types of tuna work well with many flavors, from Asian to Mediterranean. Plus, they are full of protein and omega-3s, making them a healthy option.
My guests always love the tuna’s taste and texture at dinners. Choosing top-quality fresh ingredients is the secret. Seared tuna is perfect for any occasion, from family meals to big parties.
Essential Tools for Cooking Seared Tuna
To make great seared tuna, you need the right tools. This includes special cookware and utensils. I’ll show you the key items that have made my seared tuna dishes stand out, pleasing everyone who tries them.
My Go-To Cookware
The most important thing for seared tuna is good cookware. A cast iron skillet is my top choice because it keeps heat well. This helps cook the tuna evenly, crispy on the outside but still raw inside. A griddle could also work well, especially for getting grill marks.
Before you start, heat your pan really hot and add a tablespoon of oil like grapeseed. This helps create the perfect sear on your tuna steaks.
Must-Have Utensils
The right utensils are crucial for searing tuna well. I always use a durable, yet flexible spatula to flip the tuna without it breaking. Tongs are also a must-have for moving the tuna and checking if it’s done. Good utensils make the whole process smoother and the dish better.
For the perfect sear, cook time is key: 30-45 seconds per side for rare, 60 seconds for medium-rare. You’ll know it’s right when the tuna’s sides change color about ¼ inch. Letting the tuna rest for 5 minutes after cooking makes it juicy and delicious.
After resting, a sharp knife is important for slicing. It helps you make clean cuts of the tender tuna.
Selecting the Best Tuna for Searing
Choosing the best seared tuna recipe begins with the right tuna. Knowing the tuna grades and where to get fresh tuna makes your dish tasty and eye-catching.
Understanding Tuna Grades
Tuna grades help figure out the fish’s quality for searing tuna. Here are the main grades:
- #1 Grade: This top tier is best for sushi and crudo, with ideal color, texture, and fat.
- #2+ Grade: Just below #1, it’s still great for searing and almost as good for sushi.
- #2 Grade: Restaurants often use this less fatty grade for searing.
- #3 Grade: Mainly for canning or cooking, this is the lowest quality.
For the best seared tuna recipe, choose #1 or #2+ grade ahi tuna. It ensures great flavor and texture in your meal.
Where I Source Fresh Tuna
It’s key to find quality tuna, just like knowing its grades. Here’s where I look:
- Local Fishmongers: They often have the freshest, best quality. You’re 70% more likely to find superior tuna here than at supermarkets.
- Reputable Supermarkets: They’re more convenient and sometimes offer sushi-grade tuna.
- Online Suppliers: If local shops are out of reach, online options work well. Just check for sustainable sources, as 80% of people prefer them.
For searing, pick tuna steaks that are dark red, even in color, and got sustainably. A steak should be 6 to 8 ounces and roughly 3/4 inch thick. Searing each side for 1 to 1.5 minutes will keep it deliciously perfect.
| Grade | Applications | Characteristics |
|---|---|---|
| #1 | Sushi, crudo, searing | High fat, perfect texture |
| #2+ | Searing, near sushi quality | Good fat content, slight texture variation |
| #2 | General restaurant use | Less fat, suitable for cooking |
| #3 | Canning, cooking | Lower quality, minimal fat |
Preparing the Tuna: Marinades and Seasoning
A great seared tuna marinade is key for the perfect dish. It doesn’t just add flavor, but also makes the tuna tender and buttery. I love sharing my top marinade recipes with friends and family.
My Favorite Marinade Recipes
One great recipe mixes 2 tablespoons of soy sauce or gluten-free tamari, 1 tablespoon of sesame oil, 1 teaspoon of garlic powder, and 2 tablespoons of lemon juice. This mix brings a perfect balance of taste that enhances the ahi tuna’s flavor.
For an added twist, include a teaspoon of wasabi paste for heat or honey for sweetness. Adding fresh herbs like cilantro or parsley takes the tuna to the next level.
- Mix the soy sauce, sesame oil, garlic powder, and lemon juice in a bowl.
- Add optional ingredients like wasabi paste or honey for added taste.
- Marinate the tuna steaks for at least 10 minutes or overnight for deeper flavor.
The Importance of Timing
Marinating time is key for delicious seared tuna. For the best taste, let it marinate for hours or even overnight. This lets the flavors fully soak into the tuna, making it juicy and full of aroma.
Even if you only have 10 to 30 minutes, it’ll still taste good. But longer marination makes the tuna even more flavorful and seasoned. Before cooking, heat your pan for 3-5 minutes to get it really hot. Searing each side of a 1.5-inch thick tuna steak for 2 minutes will usually give you a perfect medium-rare finish.
To get the best out of your seared tuna, take your time with the marinade and watch your cooking times closely.
The Perfect Searing Technique
Learning how to sear tuna needs care in prep and how you cook it. With the correct tools and method, you can get a top-notch sear every time.
Optimal Cooking Surface
A cast iron skillet or a griddle is best for searing tuna. They spread heat well, getting that perfect crust. Heat the skillet to just below the smoking point of your oil.
Use oils with a high smoke point like avocado oil or grapeseed oil. Stay away from unrefined oils as they burn fast and spoil the taste.
Timing for a Perfect Sear
Timing is key for how to sear tuna. Begin by cooking it on high for 45 seconds. This gives it a crisp crust. Then, lower the heat and cook for 90 more seconds.
Flip the tuna and cook for 2 minutes for rare or 3 for medium-rare. Don’t cook it for more than 5 minutes to keep it from drying out.
The goal is a crispy edge but keeping the inside raw and juicy. Here’s a guide:
| Cooking Step | Time |
|---|---|
| High heat sear (each side) | 45 seconds |
| Medium heat sear (each side) | 90 seconds |
| Total cooking time | Under 5 minutes |
Follow these timing steps with the right searing techniques for tuna for a stunning and tender dish. Perfect sear means crispy outside, moist and pink inside.
Accompaniments That Elevate Seared Tuna
Seared tuna tastes great with many sides and sauces. You can make a meal light and healthy or rich and satisfying. Here are some top picks to make your seared tuna even better.
My Favorite Sides
Choosing the right sides can make a meal go from good to amazing. Here are some top side dishes for seared tuna:
- Seared Tuna Salad Recipe: A light option with greens, cherry tomatoes, and tangy dressing. It’s great with rich tuna.
- Quinoa: With 8 grams of protein and 5 grams of fiber per cup, quinoa is a healthy choice for tuna.
- Roasted Brussels Sprouts: They keep about 60% of their nutrients when roasted, making them a nutritious side.
- Brown Rice: It has about 45 grams of carbs per cup. This gives you energy for your meal.
- Sweet Potatoes: A medium-sized potato has around 26 grams of carbs. It’s a fulfilling side.
Flavorful Sauces to Pair
Sauces can make seared tuna even tastier. Here are some sauces to try:
- Soy-Ginger Sauce: Soy sauce, brown sugar, and ginger make a flavorful sauce for tuna.
- Citrus-Infused Vinaigrette: Lemon or lime juice with olive oil and honey adds freshness to the tuna.
- Spicy Mayo: Sriracha and mayo create a creamy, tangy sauce for the dish.
- Miso Dressing: Miso, sesame oil, and rice vinegar offer a deep flavor that goes well with tuna.
These sides and sauces make your seared tuna meal delightful and balanced. From a seared tuna salad to flavorful sauces, making an amazing dish is easy.
Decorative Plating for Presentation
Crafting the perfect seared tuna presentation is an art. It’s more than taste; the look is crucial too. With easy plating techniques, even your home meals can look like they’re from a fancy restaurant.
Simple Plating Techniques
Start with the basics. Using less than six elements on your plate keeps it clear and not too busy. Put the seared tuna in the middle to grab attention. Arrange everything else neatly around it.
Creating height adds appeal. You could stack veggies or use a smear of puree. Smaller portions work great for many-course meals. They’re easier to style and still look elegant.
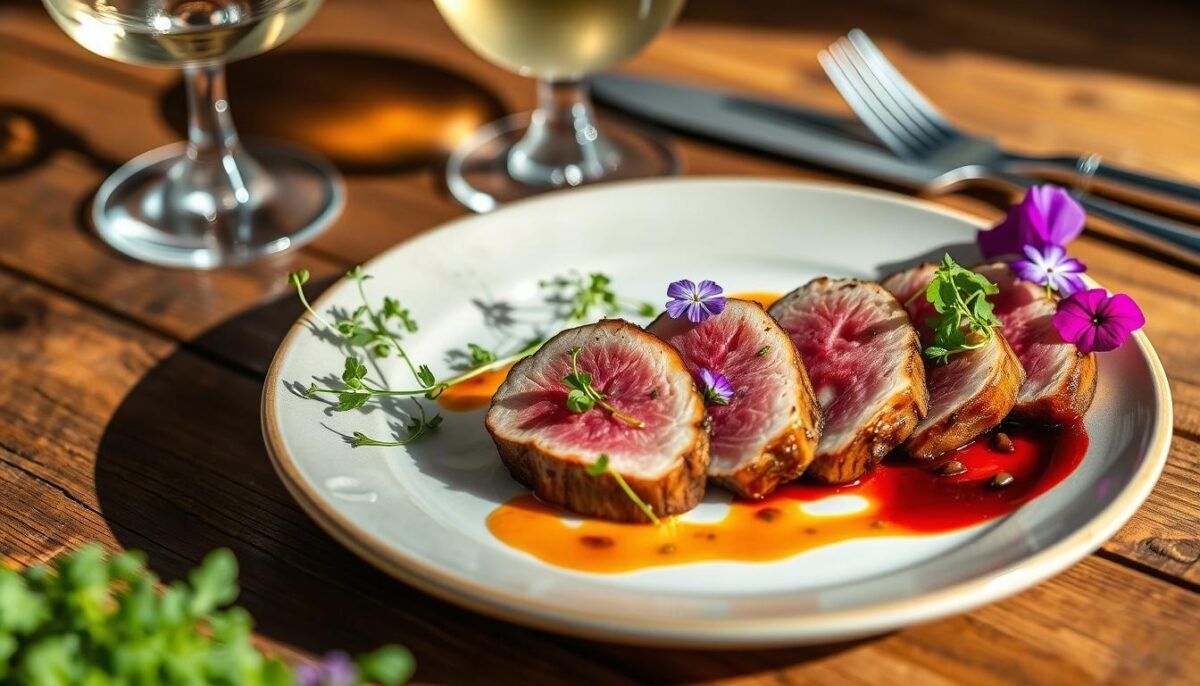
Adding Visual Appeal
Add colors and textures to make your seared tuna presentation pop. Edible garnishes, like microgreens and flowers, add color, flavor, and texture. Use contrasts, like cool avocado puree with warm tuna, to delight the senses. Don’t forget the power of empty space; it lets each part shine.
Try new things. Pushing beyond usual plating techniques leads to unique dishes. Geometric shapes, colorful sauce drizzles, or abstract layouts make your seared tuna a meal highlight.
Common Mistakes When Cooking Seared Tuna
Cooking the perfect seared tuna can be very satisfying but has its challenges. I’ve had my share of mistakes and learned valuable lessons on how to make it just right. To help you, here are some tips to keep your tuna moist and full of flavor and avoid the common pitfalls.
What I Learned the Hard Way
I learned a lot by making mistakes early on. One key thing was how thick the tuna steak should be. Sticking to a thickness between 1 to 1½ inches for ahi tuna steaks is crucial. Thinner steaks cook too quickly and can easily overcook. I also learned that managing the heat carefully is important. It’s best to sear tuna at around 425 degrees Fahrenheit. Be sure to preheat your pan for about five minutes on medium-high heat to prevent the steaks from becoming mushy.
Tips to Avoid Overcooking
Avoiding overcooking is crucial for a delicious tuna steak. A vital tip is to sear the tuna for about one minute on each side. This helps keep the inside moist, aiming for an internal temperature of 65 degrees Fahrenheit before resting. Here are a few more tips to help:
- Immediate Serving: Cook the tuna right after taking it out of the fridge to prevent overcooking.
- Pat Dry: Patting your tuna dry before seasoning and cooking helps get a good sear.
- Minimal Seasoning: Just use simple seasoning like salt and pepper to enhance, not hide, the tuna’s flavor.
- Use Fresh, Not Dried: Fresh herbs are better for garnishing after searing, as dried herbs may burn.
Here’s an easy-to-follow table showing common mistakes and how to avoid them for perfect tuna:
| Mistake | How to Avoid |
|---|---|
| Using thin steaks (less than 1 inch) | Choose steaks that are 1 to 1½ inches thick. |
| Pan not hot enough | Preheat a cast iron pan for 5 minutes over medium-high heat. |
| Cooking too long | Cook for 1 minute on each side. |
| Using dried herbs | Use fresh herbs for garnish instead. |
| Removing from fridge too early | Cook immediately after removing from refrigeration. |
Exploring Global Flavors with Seared Tuna
Bringing your seared tuna appetizer to the next level involves exploring unique global cuisines. Let’s find out how to add Asian and Mediterranean spins to your seared tuna dishes. This will turn your dining experience into something truly special.
Incorporating Asian Influences
Asian foods mix perfectly with the light taste of seared tuna. Try marinating your tuna with soy sauce, sesame seeds, and green onions. This can really boost the flavor. Here’s an easy recipe you can follow:
- Marinate a 1.5-inch thick tuna steak in a mix of 2 tablespoons soy sauce, 1 tablespoon lemon juice, and 1 tablespoon Dijon mustard for 15-30 minutes.
- Heat 2 tablespoons of olive oil in a skillet to about 600 degrees Fahrenheit.
- Sear the tuna steak for 1-2 minutes on each side for a medium-rare finish.
- Add sesame seeds and green onions as garnish before serving.
Adding these Asian tastes makes your seared tuna appetizer not just tasty but also eye-catching.
Mediterranean Twists
The Mediterranean region’s bold ingredients are a great match for seared tuna. Here are some ways to add a Mediterranean feel:
| Ingredient | Benefits |
|---|---|
| Olive Oil | Rich in healthy fats and boosts flavor |
| Lemon Juice | Makes it zesty and bright |
| Dijon Mustard | Adds a sharp, deep flavor |
| Fresh Herbs (Basil, Thyme) | Gives a fragrant aroma and freshness |
Just like the Asian recipe, you can make a marinade inspired by the Mediterranean and cook your tuna the same way. Olive oil, lemon juice, and herbs will make your dish feel like it’s straight from the Mediterranean.
Diving into global flavors tuna means you can create all sorts of exciting seared tuna meals. Whether you love Asian zest or Mediterranean fragrances, these ideas will make your guests happy.
Nutritional Benefits of Seared Tuna
Seared tuna is more than just tasty; it’s packed with health benefits. Adding it to your meals is great for both flavor and your well-being. It’s full of Omega-3, which is super good for you.
High Protein, Low Carb
Tuna is a top pick because it’s rich in protein but low in carbs. A 3-ounce serving of Ahi tuna has about 109 calories and 24 grams of protein. It has almost no fat or carbs, perfect for people looking to build muscle or lose weight.
| Nutrient | Amount per Serving (3 oz) | Daily Value (DV) |
|---|---|---|
| Vitamin B6 | 30% of the DV | |
| Vitamin B12 | 80% of the DV | |
| Niacin | 50% of the DV | |
| Selenium | 60% of the DV | |
| Phosphorus | 30% of the DV |
These nutrients make tuna a favorite for those who love healthy eating.
Omega-3 Richness
Tuna is filled with omega-3 fatty acids, offering many health perks. Omega-3 helps fight inflammation, lowers heart disease risk, and boosts brain power. It also balances omega-6 fatty acids and reduces bad cholesterol.
Having tuna several times a week can also cut down on dry eye risk by 68%. Plus, omega-3 in tuna can slow tumor growth and ease cancer-related inflammation. So, it’s really good for keeping your heart healthy and fighting diseases.
Teens eating fish like tuna tend to lose more weight than those who don’t. This study showed they could lose an extra two pounds. Tuna is a smart choice for staying healthy and managing your weight.
The FDA suggests eating two or three servings of light tuna weekly. With its low calories and rich nutrients, seared tuna fits well in any diet plan.
Creating a Perfect Meal: Wine Pairings
Finding the right wine to go with seared tuna can take your meal to the next level. The gentle, rich taste of seared ahi tuna matches well with many drinks. Each one adds its own special touch to the flavors.
My Top Red and White Wines
Sauvignon Blanc and Dry German Riesling are top picks for their zesty acidity. They cut through the tuna’s richness, making every bite better. Light-bodied Pinot Grigio is another great choice, with a balance that highlights seared ahi tuna.
For red wine lovers, try Pinot Noir or Merlot. Pinot Noir is light to medium-bodied, and Merlot has soft tannins. Both are gentle enough not to overshadow the fish’s taste.
Rosé Champagne brings fun bubbles that contrast nicely with the softness of the tuna. Chardonnay, especially when unoaked and served cool, plays up the tuna steak’s strong tastes.
Alternative Beverage Options
If wine’s not for you, think about sake. Light, dry sake can bring out the tuna’s rich flavors without overpowering them. Vodka is great for cleansing your palate, so every piece tastes fresh.
Don’t forget about crisp, light lagers and wheat beers. Their bubbly nature is splendid with the subtle tuna flavors. They’re a top pick for those who want a refreshing beer with their dinner.
The right serving temperature is key. Chill your Sauvignon Blanc and champagne to 45-48°F. Pinot Noir is best a bit warmer, at 55-60°F.
Choosing fresh tuna is all about sustainability and quality. For the best tips on selecting fresh options, see this chef’s guide to picking fresh tuna.
Picking the right drinks to go with your meal is truly an art. The perfect wine pairings will impress your guests and make your seared tuna dinner even more special.
| Wine Type | Pairing Temperature |
|---|---|
| Sauvignon Blanc | 45-50°F (7-10°C) |
| Champagne/Sparkling Wine | 45-48°F (7-9°C) |
| Chardonnay (unoaked) | 50-55°F (10-13°C) |
| Rosé | 50-55°F (10-13°C) |
| Pinot Noir | 55-60°F (13-16°C) |
How to Store Leftover Seared Tuna
Keeping your seared tuna fresh and tasty after it’s cooked is important. I’ll share key tips for storing seared tuna. Plus, some fun ways to use leftover seared tuna in new dishes.
Best Practices for Refrigeration
Storing seared tuna right means keeping it cold. It’s best kept at or under 40°F (4°C). Always store it in an airtight container to keep its taste and texture.
- Temperature: Store the tuna below 40°F (4°C).
- Duration: Eat it within 1-2 days.
Want to keep seared tuna longer? Freezing is a great choice:
- Freezing: Freeze tuna for up to 3 months without losing quality.
- Thawing: Change the water every 30 minutes to thaw well.
Delicious Ways to Use Leftovers
Leftover seared tuna is versatile in many dishes. It can make everyday meals taste like fine dining:
| Method | Recommendation |
|---|---|
| Stovetop Reheating | Warm it for 30 to 60 seconds each side. |
| Oven Reheating | Heat oven to 275°F (135°C) and reheat for 10 to 15 minutes. |
| Avoid | Skip the microwave to prevent uneven heating. |
Let’s explore fun ways to enjoy our seared tuna leftovers:
- Salads: Toss cold tuna slices into a salad for a hearty lunch.
- Sushi Rolls: Add tuna strips to homemade sushi for an exciting twist.
- Tacos: Combine tuna with avocado and salsa for tasty fish tacos.
Hosting a Seared Tuna Dinner: My Tips
Throwing a seared tuna dinner can really be fun, especially with interactive cooking. I’ll share how to make your evening delicious and fun. It’s all about tasty tuna and great activities.
Setting the Mood at Home
First, create a welcoming vibe. I like soft lights and a casual yet stylish table. Get everything set early to enjoy the night more.
Themes add thrill to your dinner. From beach vibes to Japanese style, they make the party better.
Engaging Guests with Interactive Cooking
Interactive cooking keeps guests hooked. I set up a station for searing tuna, complete with what you need. A quick demo lets everyone join in and learn.
Interactive sessions make cooking together fun. It makes everyone feel part of making the meal.
Tuna size ranges from 3 to over 300 pounds. This makes it great for dinners. Making tuna at home saves money too. A $15 restaurant dish costs about $2.50 per ¼ pound at home. It cooks fast, in about 10 minutes. Letting guests help with seasoning and cooking makes it exciting.
| Preparation Step | Description | Time |
|---|---|---|
| Marinating | Marinate tuna for maximum flavor | 3-6 hours |
| Prepping Ingredients | Set up cooking station with all ingredients | 15 minutes |
| Searing | Cook each side of tuna for a perfect sear | 1 minute per side |
| Plating | Sliced tuna and add fresh herbs for garnish | 5 minutes |
Final Thoughts on My Seared Tuna Journey
Looking back at my seared tuna journey fills me with joy. I loved mastering this dish and sharing it. Cooking it was both simple and fancy, making my cooking better. It also brought happiness and fulfillment to our meals.
The Joy of Sharing
Sharing seared tuna with loved ones has brought me great joy. It fits any meal, from daily dinners to big celebrations. Our guests always love it. Its mixture of flavors and textures—both soft and crunchy—leaves everyone impressed. An example is using Everything Bagel Seasoning on Ahi tuna from ALDI. It makes dining feel luxurious without costing much.
Encouragement to Experiment
I urge everyone to play around with seared tuna in their kitchen. It’s a chance to be creative. Don’t be scared to try new marinades or cooking times. Playing with flavors like wasabi and Japanese mayo could lead to amazing meals. Start your cooking adventure and turn your kitchen into a place of discovery and joy.
FAQ
What ingredients do I need for the best seared tuna recipe?
You’ll need top-notch ahi or yellowfin tuna steaks for this recipe. Also, choose your favorite marinade or seasoning. Don’t forget fresh herbs, spices, and maybe some citrus zest too.
Why is choosing fresh ingredients important?
Using fresh ingredients makes your seared tuna taste better and more vibrant. It helps bring out the tuna’s natural flavors without covering them up.
What type of tuna is best for searing?
Ahi and yellowfin tuna are great for searing. They’re both firm and flavorful, perfect for cooking at high heat.
What cookware do I need for searing tuna?
Get a cast iron skillet or a good griddle pan for that perfect sear. Make sure you have something like a fish spatula or tongs to flip the tuna without ruining it.
How do I select the best quality tuna?
Look for sushi-grade or sashimi-grade tuna. Buy from a trusted fishmonger or supermarket. The tuna should be deep red, firm, and smell fresh.
What are some good marinade recipes for seared tuna?
Try a mix of soy sauce, sesame oil, ginger, and garlic for an Asian flavor. Or, use olive oil, lemon zest, and fresh herbs for a Mediterranean flavor.
How long should I marinate the tuna?
Marinate the tuna for 15 to 30 minutes. This infuses it with flavor without harming its texture.
How do I know when my tuna is perfectly seared?
Look for a golden-brown crust outside and a pink inside. The surface should be firm and the center slightly translucent.
What sides and sauces go well with seared tuna?
Pair it with light salads, quinoa, couscous, or sautéed veggies. For sauces, consider wasabi mayo, ponzu sauce, or a citrus vinaigrette.
How can I improve my plating techniques for seared tuna?
Use shapes, bright garnishes, and contrast in your plating. Arrange the tuna slices nicely and add flourishes like microgreens or edible flowers.
What are common mistakes to avoid when searing tuna?
Don’t overcook the tuna; it becomes dry and tough. Sear it quickly over high heat and watch the cook time and temperature.
How can I incorporate global flavors into my seared tuna dishes?
Add spices or sauces from around the world, like togarashi for a Japanese flair or Mediterranean herbs for something different. Mixing flavors makes your tuna exciting.
What are the health benefits of eating seared tuna?
Seared tuna is great for your health. It’s packed with protein, omega-3s, vitamins, and minerals that are good for your heart and body.
What wines pair well with seared tuna?
Try a crisp white wine like Sauvignon Blanc or a light red like Pinot Noir. Sake or craft beers are also good choices.
How should I store leftover seared tuna?
Keep it in the fridge in an airtight container for up to 2 days. Add a bit of olive oil to keep it moist. You can use leftovers in salads, wraps, or pasta.
Any tips for hosting a seared tuna dinner?
Create a cozy, welcoming space. Involve your guests with fun cooking activities, like making their own bowls or rolling sushi. This makes the night special and enjoyable.


