


How to Master Fajitas Without Overcooking the Meat: 4 Key Tips
February 15, 2025
7 Rules Every Chef Should Follow for the Best Thanksgiving Turkey
February 15, 2025
I’ve always loved cooking, but there’s one dish that challenged me like no other. My first attempt at making this classic appetizer ended in a soggy mess. It was frustrating, but it sparked my determination to master the art of creating the perfect version of this dish.
Did you know that this dish is one of the most popular appetizers in the U.S., with over 2 million servings ordered annually? That’s why I decided to dive deep into the techniques used by professional chefs. After countless trials and errors, I’ve uncovered the secrets to achieving that golden, crunchy finish every time.
In this guide, I’ll share step-by-step tips on preparation, frying methods, and troubleshooting. Whether you prefer deep frying or air frying, these chef-approved hacks will transform your kitchen game. Get ready to impress your family and friends with a dish that’s as flavorful as it is visually stunning.
Key Takeaways
- Learn chef-approved techniques for consistent results.
- Discover the benefits of using panko breadcrumbs for extra crunch.
- Explore both deep frying and air frying methods.
- Understand how to troubleshoot common issues like sogginess.
- Master the art of presentation for a restaurant-quality dish.
Introduction to Perfectly Crispy Onion Rings
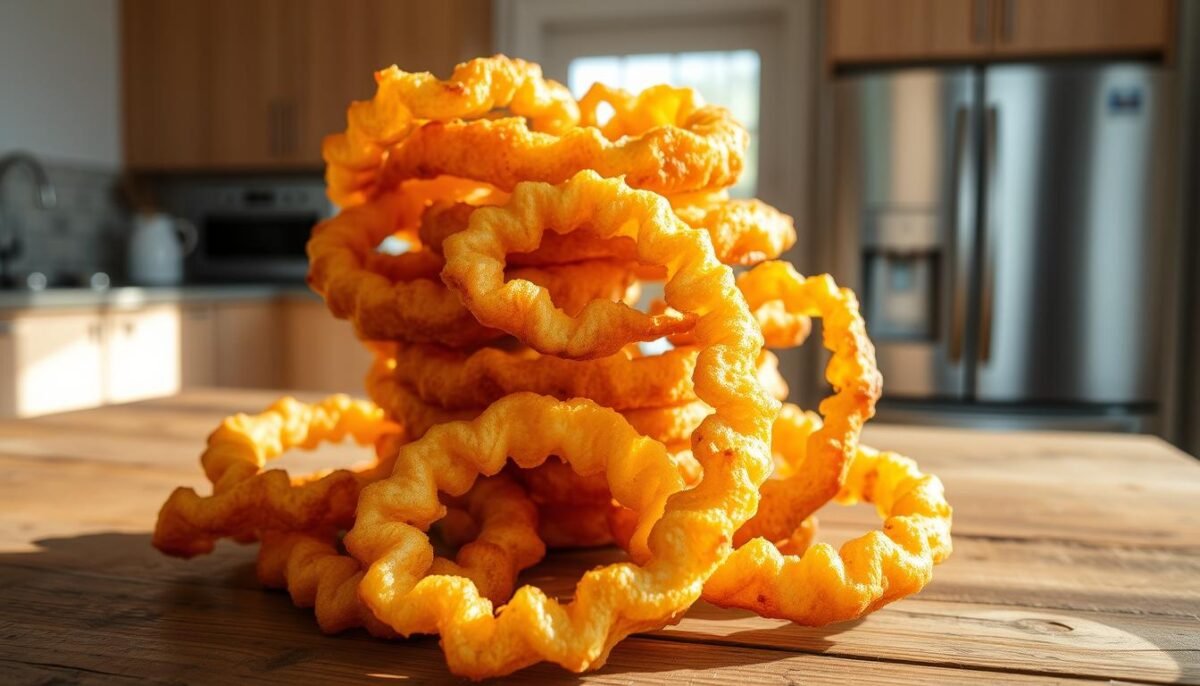
There’s something magical about the first bite of a perfectly fried dish. For me, that moment came when I made my first batch of homemade onion rings. The golden exterior, the satisfying crunch, and the sweet, tender inside—it was love at first bite. That experience sparked my passion for mastering this classic appetizer.
Why I Love Making Homemade Onion Rings
Making this dish at home is more than just cooking—it’s an experience. I remember my first attempt vividly. The aroma of sizzling oil filled the kitchen, and the sound of the rings frying was music to my ears. When I finally tasted them, I knew I had found a new favorite.
One of the secrets to achieving that perfect crunch is using quality oil and maintaining the right temperature. I always aim for 375°F, which ensures a crispy exterior without absorbing too much oil. Timing is also crucial. Fry them for just 2-3 minutes, and you’ll avoid sogginess or greasiness.
Here are a few tips I’ve learned along the way:
- Use a paper towel to remove excess oil after frying.
- Serve them hot for the best texture and flavor.
- Experiment with different batters to find your favorite.
Compared to other recipes, my method focuses on simplicity and consistency. It’s a straightforward process that’s worth every minute of preparation. Whether you’re cooking for a crowd or just for yourself, this dish brings excitement and joy to any meal.
Essential Ingredients and Tools for Great Onion Rings
Creating the perfect appetizer starts with the right ingredients and tools. Over the years, I’ve learned that precision in preparation makes all the difference. Whether you’re a beginner or a seasoned cook, having the essentials on hand ensures consistent results every time.
Must-Have Ingredients
To achieve that golden crunch, you’ll need a few key ingredients. I always start with sweet onions, sliced to about ¼ inch thick. For the batter, I use 1¼ cups of all-purpose flour, which creates a light and crispy coating. Adding 1 teaspoon of salt enhances the flavor, while 1 tablespoon of baking powder ensures a fluffy texture.
Here’s a complete list of ingredients with precise measurements:
| Ingredient | Quantity |
|---|---|
| Sweet onions | 2 large |
| All-purpose flour | 1¼ cups |
| Salt | 1 teaspoon |
| Baking powder | 1 tablespoon |
| Milk | ¾ cup |
| Egg | 1 |
Best Tools in My Kitchen
Having the right tools can make the process smoother and more enjoyable. I rely on a deep fryer to maintain the oil temperature at 375°F, ensuring even cooking. A wire rack is essential for draining excess oil, and shallow dishes are perfect for the batter and coating process.
Here are the tools I can’t live without:
- Deep fryer or heavy-bottomed pot
- Wire rack for draining
- Shallow dishes for batter and coating
- Thermometer to monitor oil temperature
- Paper towels for absorbing excess oil
Investing in quality tools not only improves the final result but also makes the cooking process more efficient. With these essentials, you’re well on your way to mastering this classic dish.
Crispy Onion Rings Hacks
Every chef has their secrets, and I’m here to share mine for achieving that ideal crunch. Over the years, I’ve refined my techniques to ensure a light, golden coating every time. These hacks are simple but make a world of difference in your final dish.
Chef-Approved Secrets for Optimal Crunch
One of the most important steps is ensuring the batter and coating adhere properly. I always press the seasoned bread crumbs gently onto the slices to create a firm bond. This prevents the coating from falling off during frying.
Another trick is to let the breaded slices rest on a wire rack for a few minutes before frying. This allows the coating to set and ensures an even, crispy texture. A damp towel can also help enhance adhesion by lightly moistening the slices before coating.
When it comes to frying, maintaining the right temperature is crucial. I set my fryer to 375°F and make small adjustments as needed to keep it consistent. Frying for just 2-3 minutes per side ensures a perfect golden finish without absorbing too much oil.
Here are some additional tips to elevate your dish:
- Shake off excess mixture to avoid clumping and ensure an even coating.
- Use a quick dip in the batter before coating to create a light, airy texture.
- Experiment with different seasonings in the bread crumbs to add unique flavors.
By following these chef-approved hacks, you’ll achieve a dish that’s not only visually stunning but also packed with flavor. These small adjustments can transform your cooking and impress everyone at the table.
Prepping the Onions and Crafting the Batter
Perfecting the art of making this classic dish starts with the right preparation and a flawless batter. The key lies in selecting the best ingredients and following a meticulous process to ensure every bite is a delight.
Selecting the Perfect Onion
Choosing the right onions is crucial for both flavor and texture. I always go for sweet onions like Vidalia or large yellow varieties. Their mild taste and firm structure make them ideal for this dish.
When slicing, aim for even rings about ½ inch thick. This ensures they cook uniformly and hold their shape during frying. A sharp knife or a mandoline slicer can help achieve consistent results.
Achieving the Ideal Batter Consistency
The batter is the heart of this dish, and getting it right is essential. Start by mixing 1¼ cups of all-purpose flour with 1 teaspoon of salt and 1 tablespoon of baking powder. This creates a light, airy coating that crisps up beautifully.
For the liquid, I use a combination of ¾ cup of milk and 1 beaten egg. Whisk the mixture until smooth, ensuring there are no lumps. A lump-free batter ensures an even coating and a perfect crunch.
Here’s my step-by-step process for dipping:
- Start by coating the rings in the flour mixture.
- Next, dip them into the egg or buttermilk mixture.
- Finally, press them gently into bread crumbs for a consistent layer.
Let the coated rings rest on a wire rack for a few minutes before frying. This allows the batter to set, enhancing the crispiness. These steps not only perfect the texture but also elevate the dish to a true appetizer-worthy status.
Just like avoiding common steak mistakes, attention to detail here ensures a flawless result. With these tips, you’ll create a dish that’s as impressive as it is delicious.
Breading Techniques for Maximum Crisp
Mastering the art of breading is the key to achieving that perfect crunch. Over the years, I’ve refined my methods to ensure a consistent, golden coating every time. The process involves careful mixing, precise dipping, and a few expert tricks to elevate your dish.
Mixing the Flour and Seasonings
Start by combining 1¼ cups of all-purpose flour with 1 tablespoon of baking powder and 1 teaspoon of salt in a large bowl. This dry mixture forms the base of your coating. For extra flavor, I like to add a pinch of smoked paprika or garlic powder.
Whisk the ingredients thoroughly to ensure an even distribution. This step is crucial for a consistent texture. If you’re feeling adventurous, experiment with different seasonings to create a unique homemade blend.
Effective Dipping and Coating Methods
Once your dry mixture is ready, it’s time to prepare the wet batter. In a separate bowl, whisk together ¾ cup of milk and 1 beaten egg until smooth. This creates a homogeneous mixture that adheres perfectly to the slices.
Here’s my step-by-step process for dipping:
- Start by coating the slices in the dry flour mixture.
- Next, dip them into the wet batter, ensuring full coverage.
- Finally, press them gently into panko bread crumbs for an extra crunch.
Using a separate bowl for each step prevents clumping and ensures an even coating. Let the breaded slices rest on a wire rack for a few minutes before frying. This allows the coating to set, enhancing the crispiness.
| Ingredient | Quantity |
|---|---|
| All-purpose flour | 1¼ cups |
| Baking powder | 1 tablespoon |
| Salt | 1 teaspoon |
| Milk | ¾ cup |
| Egg | 1 |
By following these techniques, you’ll achieve a dish that’s not only visually stunning but also packed with flavor. These small adjustments can transform your cooking and impress everyone at the table.
Frying and Air Frying for That Golden Crunch
Getting that golden crunch just right is all about the method you choose. Whether you prefer deep frying or air frying, each technique has its own benefits. I’ve experimented with both and found ways to achieve the perfect texture every time.

Deep Frying Tips for Even Cooking
For deep frying, maintaining the right temperature is key. I always aim for 365°F to ensure the coating crisps up without absorbing too much oil. Use a thermometer to monitor the heat and adjust as needed.
When frying, work in small batches to avoid overcrowding. This ensures even cooking and prevents the oil temperature from dropping. After frying, place the rings on a wire rack to drain excess oil and keep them crispy.
Air Fryer Adjustments for Crispy Finish
Air frying is a healthier alternative that still delivers great results. Preheat the air fryer to 375°F and arrange the rings in a single layer. This allows hot air to circulate evenly, creating a uniform finish.
Cook for about 12-15 minutes, flipping halfway through. For extra crispiness, lightly spray the rings with cooking oil before air frying. Using a wire rack inside the air fryer basket can also help improve airflow.
Both methods have their advantages. Deep frying gives a classic, indulgent crunch, while air frying offers a lighter option. Whichever you choose, these tips will help you master the art of making this beloved dish.
Troubleshooting Common Onion Ring Challenges
Even the most experienced cooks face challenges when perfecting certain dishes. Whether you’re making onion rings to pair with a juicy burger or as a standalone snack, a few common issues can arise. Let’s dive into the most frequent problems and how to fix them.
Avoiding Greasy or Soggy Results
One of the most frustrating issues is ending up with greasy or soggy results. This often happens when the oil temperature is too low. To avoid this, use a thermometer to maintain the oil at 365°F. If the temperature drops, the coating absorbs more oil, leading to a greasy texture.
Another culprit is excess moisture in the batter. Adding a teaspoon of pepper or other seasonings can enhance flavor without adding moisture. If the batter is too thick, it can slide off during frying. Adjust the consistency by adding a bit more milk or flour as needed.
Here are some quick fixes to ensure a crispy finish:
- Double-dip the rings lightly in the batter for better adherence.
- Let the breaded rings rest on a wire rack for a few minutes before frying.
- Use panko bread crumbs for a lighter, crispier coating.
Monitoring oil quality is also crucial. Reusing oil too many times can affect both taste and texture. If the oil starts to smoke or smells off, it’s time to replace it.
Finally, make small adjustments as you go. If the rings aren’t turning out as expected, check the oil temperature, batter consistency, and seasoning ratios. These tweaks can make all the difference in achieving that perfect golden crunch.
Serving Ideas and Delicious Dipping Sauces
Serving up a plate of golden, crunchy goodness is just the beginning—pairing it with the right dishes and sauces takes it to the next level. Whether you’re hosting a party or enjoying a cozy meal at home, presentation and flavor combinations matter. Here’s how to make your dish shine.
Creative Plating and Pairing Ideas
Plating is an art, and a little creativity can turn your dish into a showstopper. I love arranging the rings in a circular pattern with a small bowl of sauce in the center. It’s simple yet elegant. For a fun twist, serve them in mini paper cones for a casual, party-friendly vibe.
Pairing these golden bites with the right dishes enhances the experience. They’re a perfect match for burgers, grilled meats, or even a classic steak. The contrast of textures and flavors creates a memorable meal. If you’re serving them as an appetizer, pair them with fries or a fresh salad for balance.
Quick and Flavorful Dipping Sauces
No dish is complete without the perfect dipping sauce. Here are three easy recipes to try:
| Sauce | Ingredients |
|---|---|
| Garlic Aioli | ½ cup mayonnaise, 1 tsp garlic granules, 1 tbsp lemon juice |
| Spicy Ranch | ½ cup ranch dressing, 1 tsp chili paste, ½ tsp smoked paprika |
| Classic Ketchup | ½ cup ketchup, 1 tbsp Dijon mustard, ½ tsp black pepper |
Using a whisk ensures a smooth, lump-free consistency for each sauce. Adjust the amount of seasoning to suit your taste. These sauces are quick to make and add a burst of flavor to every bite.
Tips for Serving Fresh and Hot
To maintain the perfect texture, serve your dish immediately after frying. If you’re preparing a large amount, keep them warm in the oven at 200°F until ready to serve. This prevents them from becoming soggy.
For parties, I recommend making extra batches. They’re a crowd-pleaser and disappear quickly. Pair them with cold, refreshing dips to balance the warmth of the freshly fried rings. Experiment with different garnishes, like thinly sliced herbs or a sprinkle of paprika, to add a pop of color.
“The right sauce can transform a simple dish into something extraordinary.”
Whether you’re serving them as a side or the star of the meal, these tips ensure a delicious and visually appealing experience. Enjoy experimenting with different combinations to find your favorite!
Conclusion
Cooking is an art, and mastering a dish like this brings immense satisfaction. From selecting the right ingredients to perfecting the oil frying technique, every step matters. Using all-purpose flour and the right tools ensures a consistent, golden finish every time.
Whether you’re a seasoned cook or just starting, these tips can help you avoid common pitfalls. Remember to maintain the oil temperature and let the batter set before frying. These small adjustments make a big difference in the final result.
For serving, pair your dish with creative sauces and sides to elevate the experience. Experiment with flavors and presentation to make it your own. Cooking is about enjoying the process and sharing the results with loved ones.
Thank you for following along! I’d love to hear about your experiences and any extra tips you’ve discovered. With these techniques, every bite will be a delicious success. Trust your instincts, have fun, and happy cooking!
FAQ
What’s the best type of onion to use for homemade rings?
I recommend using sweet onions like Vidalia or Walla Walla. They have a mild flavor and hold up well during frying, giving you that perfect balance of taste and texture.
How do I prevent my rings from turning out greasy?
To avoid greasy results, make sure your oil is at the right temperature—around 375°F. Also, place the fried rings on a wire rack with a paper towel underneath to drain excess oil.
Can I make these without a deep fryer?
Absolutely! I often use an air fryer for a healthier option. Just lightly spray the rings with oil and adjust the cooking time to ensure they come out golden and crunchy.
What’s the secret to a crispy batter?
The key is to whisk the batter until it’s smooth but not too thick. I also add a bit of cornstarch to the flour mixture for extra crunch. Don’t forget to season it well with salt and pepper!
How do I keep the breading from falling off?
Dip the onion slices in flour first, then into the batter, and finally into the bread crumbs. Press the crumbs gently to ensure they stick. This layering technique works wonders.
What dipping sauces pair well with these?
I love serving them with classic ranch, spicy sriracha mayo, or even a tangy barbecue sauce. They’re versatile and go great with almost any dip you can think of.
Can I prepare the batter ahead of time?
Yes, you can! I sometimes make the batter an hour or two in advance and keep it chilled. Just give it a quick stir before dipping the onions to ensure consistency.
How do I store leftovers?
Store them in an airtight container in the fridge for up to two days. To reheat, I use the oven or air fryer to bring back their crispiness.


