


Pan-Seared Flounder 101: 4 Quick Tips for Golden Perfection
February 10, 2025
The Hidden Art of Soufflé: 7 Steps to Mastery
February 10, 2025
To me, crème brûlée is more than a dessert; it’s a beautiful experience. My first encounter with it was in a little Paris shop. Breaking the caramelized top to find the creamy vanilla inside was unforgettable.
Learning from Chef Raphael Francois was a major highlight. He worked at Le Cirque in New York and learned from Chef Claude Lavalle. Chef Francois taught me the beauty and simplicity in making perfect crème brûlée.
Making the best crème brûlée starts with the best ingredients. Choose fresh egg yolks, heavy cream, and real vanilla. Chef Francois showed how small details, like the right egg yolk texture, matter a lot.
I’m excited to share five Michelin chef secrets to perfect crème brûlée. From selecting the best cream to perfecting the caramelized sugar top. These tips will elevate your dessert game, ensuring a perfect custard and caramel combination every time.
Key Takeaways
- Michelin chefs value mastering basics, especially crème brûlée.
- A good crème brûlée should be 1 to 2 inches thick.
- Quality ingredients like fresh egg yolks and vanilla beans are key.
- Cook crème brûlée at 205 degrees Fahrenheit for 40-45 minutes, watching it closely.
- Caramelizing sugar with a torch is better than using the broiler.
The Allure of Crème Brûlée
The Crème Brûlée captures hearts with its velvety custard and crisp topping. It’s a luxurious mix of textures and tastes. Originating from France, it has become a global delight, mixing simplicity with decadence.
What Makes It a Classic Dessert?
This classic dessert is famous for its history and simple ingredients. It uses cream, egg yolks, sugar, and vanilla for a sophisticated taste. The goal is a perfect creamy custard with a caramelized top. François Massialot’s 1691 recipe has made it a timeless treat.
My First Experience with Crème Brûlée
My first taste of Crème Brûlée was magical. When my spoon broke the caramel top, I was mesmerized. The crunch of the caramel and the rich custard was a delight. It was an elegant yet easy dessert.
Every bite since then has reminded me of that first magical taste. It’s why I love this dessert so much.
Essential Ingredients for the Perfect Crème Brûlée
The best crème brûlée starts with choosing the right ingredients. I’ll show you how to pick the best ones for a great dessert.
Choosing the Right Cream
For a creamy dessert, use heavy cream with lots of fat. This kind of cream makes the custard smooth and creamy. About 3 cups of heavy cream is perfect, which is 75% of the cream needed. Add a pinch of salt to bring out the flavors.
The Importance of Fresh Eggs
Fresh eggs, especially the yolks, make the custard rich and stable. You’ll need 8 large egg yolks. It’s important to mix the yolks with a bit of the cream first. This stops the eggs from curdling and keeps the custard smooth.
Exploring Flavor Variations
Vanilla beans are a great choice for a deep, aromatic flavor. Use them to infuse the cream and get a fantastic taste. Try adding flavors like citrus zest or a bit of coffee. These can make your crème brûlée unique and extra tasty.
| Ingredient | Quantity | Details |
|---|---|---|
| Heavy Cream | 3 cups | Ideal for a luxurious, smooth texture |
| Fresh Eggs | 8 large yolks | Critical for richness and stability |
| Vanilla Beans | 1-2 beans | For classic aromatic depth |
| Granulated Sugar | ¾ cup | For sweetening the custard |
| Salt | Pinch | Enhances overall flavor |
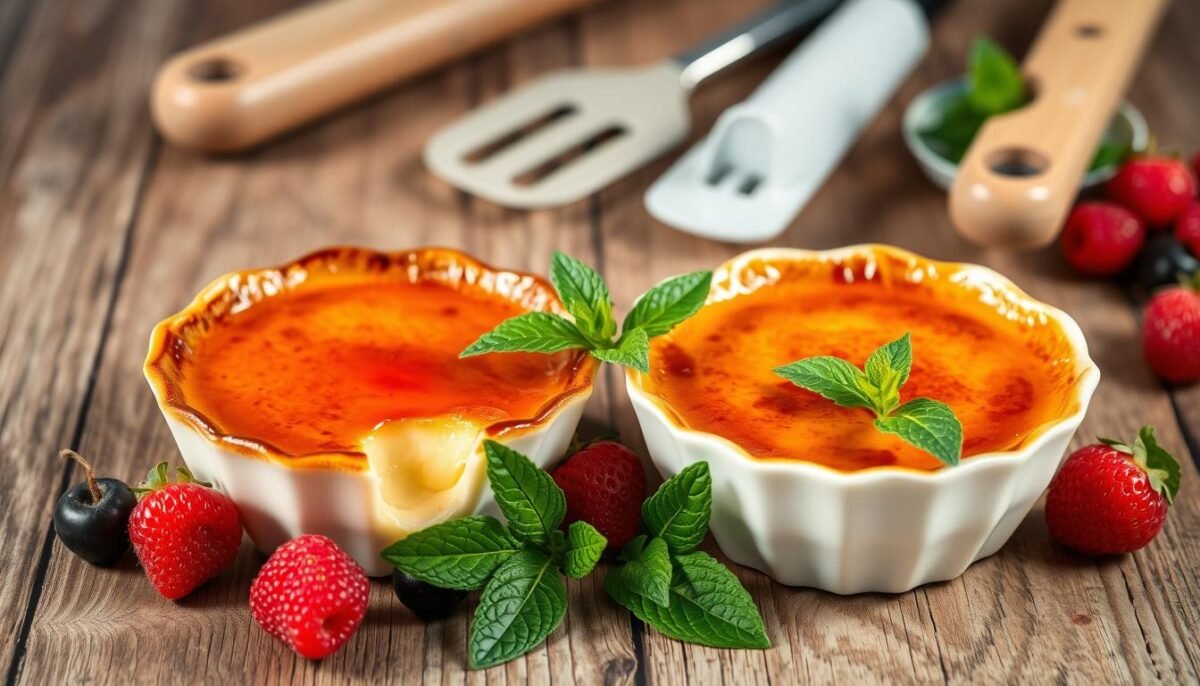
The Equipment You’ll Need
To make the perfect crème brûlée, you need more than just the right ingredients. Having the right *dessert equipment* is crucial. Here’s a list of the essential *crème brûlée tools* to help you make this classic dessert:
Must-Have Tools for the Perfect Crème Brûlée
- Ramekins: Traditional shallow ramekins are best for a larger caramelized sugar area. They allow the dessert to cook evenly.
- Fine Sieve: A fine sieve ensures a smooth custard. It removes any egg solids for a silky texture.
- Measuring Cups and Spoons: To get the right mix, use measuring cups and spoons. They help measure cream, sugar, and other items accurately.
Using a Kitchen Torch vs. Oven Broiler
Your choice of *dessert equipment* is key for the caramelized sugar top. A *kitchen torch* gives you control over caramelization. It lets you create an even crust without cooking the custard too much. It’s a good buy for crème brûlée lovers.
You could also use an *oven broiler*. This method doesn’t need extra tools but requires you to watch closely. The sugar can burn, or the custard might get too hot. When using the *oven broiler*, watch your ramekins to get the perfect top.
| Tool | Function | Recommendation |
|---|---|---|
| Kitchen Torch | Caramelizes sugar on top uniformly | Ideal for best results |
| Oven Broiler | Alternative method for caramelizing sugar | Requires careful monitoring |
| Ramekins | Even cooking and wider surface area for sugar | Traditional shallow ones are best |
Preparing the Custard Base
The custard base is crucial for making a great crème brûlée. It ensures the dessert is smooth and delicious. There are important steps to follow for a perfect base.
How to Create a Smooth Mixture
Start by mixing the egg yolks and sugar until light and smooth. It’s vital for the sugar to dissolve well for a silky dessert. Then slowly mix in the warm cream to avoid cooking the eggs too fast. This careful process gives you a creamy, smooth crème brûlée.
My Tip for Avoiding Lumps
To keep the custard lump-free, add the cream to the eggs slowly while whisking. This stops the eggs from cooking into bits. Also, straining the mix through a fine sieve into ramekins catches any solids. This way, you end up with a perfectly smooth custard.
The Art of Baking
Learning to make baking crème brûlée just right needs balance. It’s all about the right heat, timing, and way of doing it. To nail it every time, you have to know the best conditions for this sweet treat.
The Perfect Baking Temperature
The right oven temperature for crème brûlée is key. It’s best baked at 300°F (150°C). This gentle warmth stops the custard from curdling. Keeping this perfect baking temperature steady is crucial for a smooth mix.
Using a Water Bath for Consistency
A water bath helps cook it evenly. You put your dishes in water that comes up halfway. This water bath stops the edges from getting too done, ensuring an even dessert consistency. Watch the water level to keep the moisture just right.
My Experience with Timing
In my own baking, timing is everything for crème brûlée. It usually bakes in 35 to 40 minutes. The center should slightly wiggle when shaken. Keep an eye on it as it finishes baking for that perfect creamy feel.
So, great baking crème brûlée means right temperature, water bath use, and sharp timing. These steps will make your dessert just right.
Cooling and Chilling Your Crème Brûlée
Making a great crème brûlée is more than mixing eggs and cream. It’s vital to cool it right, affecting its creamy feel.
Why Chilling is Crucial
After baking at 350°F for about 45 minutes, it must cool the right way. First, it stays in the water bath for 30 minutes. Then, let it stand at room temp for 30 minutes before it goes into the fridge.
Chilling it for at least four hours is key, but doing it overnight is best. This slow cooling is what gives it that silky texture we all love.
My Favorite Chilling Time
I’ve found that letting it chill overnight really makes it taste better. The extra time helps the custard set perfectly, making it rich and creamy. This also makes planning for dinner parties easier.
When it’s chilled right, each bite is pure joy. Being careful with how you cool it can make this awesome dessert even better, impressing all who try it.
| Step | Duration | Purpose |
|---|---|---|
| Cooling in Water Bath | 30 minutes | Initial temperature reduction |
| Room Temperature Cooling | 30 minutes | Prepares for refrigeration |
| Refrigeration | At least 4 hours (overnight preferred) | Sets custard and enhances texture |
The Benefits of Caramelizing Sugar
Caramelizing sugar turns simple desserts into extraordinary treats. It adds a yummy crunch and infuses the dish with a deep, toasty flavor. This enhances the creamy custard it pairs with.
Choosing the Right Sugar
For the best crème brûlée crust, picking the right sugar is key. Granulated sugar is popular for its uniformity and easy access. But muscovado sugar, with its rich taste and moist texture, adds a special touch. Also, some chefs like using coconut palm sugar. It’s healthier and adds a subtle difference to the dessert.
Techniques for a Golden Crust
To get that golden crust on your crème brûlée, you can use a kitchen torch or oven broiler. The torch gives you control, letting you evenly brown the sugar without cooking the custard too much. It creates a thin, well-caramelized top. If you use a broiler, be careful. You want to avoid burning. The goal is a beautiful golden crust.
It doesn’t matter if you choose granulated, muscovado, or coconut palm sugar. Caramelizing is what makes your crème brûlée so special. It gives the dessert an amazing mix of textures and flavors, elevating it to something truly elegant.
Creative Flavor Additions
Stepping beyond plain vanilla, we can make crème brûlée exciting with different flavors. Imagine mixing in lavender, orange zest, or chai spices with the cream. This lets chefs play with many natural tastes that go well with the creamy custard.
Infusing Natural Flavors
Adding natural flavors when you heat the cream is a trick to amazing crème brûlée. This process makes sure the flavors mix well, giving a even taste. For example, adding just the right amount of lavender is key to not overpower the dessert.
Putting citrus zest like orange or lemon in the cream adds a fresh touch. It makes the dessert taste brighter.
My Favorite Flavor Combinations
I like to mix vanilla bean and cardamom. This combo adds a mild, warm aroma. It makes the traditional dessert even better. Chocolate crème brûlée is also great, with either dark chocolate for a rich taste or milk chocolate for sweetness.
Adding macerated raspberries under the custard or a strawberry layer with jam offers a surprising twist. It really makes the dessert special.
| Flavor | Description |
|---|---|
| Pumpkin | Infused with pumpkin puree and cinnamon, perfect for fall. |
| Salted Caramel | Rich, buttery caramel with a hint of sea salt. |
| Matcha | A fusion of French and Japanese influences, offering a mix of earthiness and sweetness. |
| Red Velvet | Combines vanilla and chocolate flavors, ideal for Valentine’s Day. |
| Mango | Features layered fresh mango beneath the custard for a tropical taste. |
These creative flavors can turn simple crème brûlée into something extraordinary. Natural flavors make the custard stand out. Every spoonful becomes a delicious journey.
Troubleshooting Common Issues
Baking crème brûlée can be tricky, but knowing what to do can save your dessert. Two big problems are overcooked custard and a weepy dessert. Both can turn your creation from great to a mistake.
Fixing Overcooked Custard
Overcooked custard turns grainy. It happens from too much heat or baking too long. Keep your oven at the right temperature, around 325 degrees Fahrenheit, using a water bath. Chef Raphael François suggests cooking at 205 degrees Fahrenheit, without a water bath for gentle heat.
If your custard is overcooked, adding a little heavy cream can make it smoother. Using a water bath and wrapping your ramekins in aluminum foil can also prevent overcooking. This creates a moist cooking environment.
How to Deal with a Weepy Crème Brûlée
A weepy dessert is when liquid splits from the custard. This can come from too much condensation or not baking enough. Make sure to strain your mix to remove lumps for an even bake. Small changes, like baking a bit longer or using whole eggs instead of just yolks, can help.
Quickly cooling it down also stops weepiness. Let your crème brûlée cool at room temperature before putting it in the fridge. It’s best to refrigerate it overnight for the right firmness and to keep liquids from splitting.
| Problem | Solution |
|---|---|
| Overcooked Custard | Whisk in heavy cream and bake at lower temperatures. |
| Weepy Dessert | Strain mixture, use egg yolks only, cool gradually, and refrigerate overnight. |
These tips should help you fix common problems so your crème brûlée stays creamy and delicious.
Serving Your Crème Brûlée
Presentation is key when serving crème brûlée. A great dessert presentation improves the look and sets up a great eating experience. Here are tips and pairing ideas to make your crème brûlée amazing.
Presentation Tips That Impress
Presenting crème brûlée in ramekins or glass dishes is recommended. It shows the custard’s smoothness and the caramelized top, adding elegance. A typical crème brûlée needs 4 cups of cream, ¾ cup of sugar, and 7 egg yolks. Make sure you have 4-6 oz. ramekins, perfect for serving crème brûlée.
For a fancy touch, add a simple garnish. Fresh berries or mint add color and freshness. And, turbinado sugar makes a golden, tasty crust.
Pairing Suggestions for Dessert
Choosing the right drink enhances the crème brûlée experience. A tangy Prosecco cuts through the creaminess, while a sweet wine brings out vanilla flavors. Whether it’s bubbly or sweet wine, it should match the custard’s sweetness.
The secret to serving crème brûlée is in the details. Good dessert presentation and dessert pairing make it unforgettable.
Variations on Classic Crème Brûlée
The classic crème brûlée recipe is loved all over the world. However, many variations and modern twists have been made to suit different diets and adventurous tastes. Whether you’re into vegan crème brûlée or dairy-free desserts, there are plenty of ways to explore and change up this classic dish.
Vegan and Dairy-Free Alternatives
For those on a vegan diet or looking for dairy-free options, making a vegan crème brûlée is easy with the right substitutes. Ingredients like coconut milk or almond cream can take the place of dairy. They keep the dessert creamy while adding their own unique tastes.
Coconut milk gives a rich and smooth texture perfect for those wanting a dairy-free version. Using cashew cream is another way to achieve that rich creamy texture. These changes fit well with today’s dietary trends without losing the dessert’s classic charm. If you’re interested in healthier options, check out more about cheese here.
Unique Takes on This Classic
Chefs from around the globe have put their unique spin on the traditional crème brûlée. Here are some of the most interesting versions I’ve found:
- White Chocolate Crème Brûlée: This variation is simple and only needs 5 ingredients. It takes about 15 minutes to get ready.
- Gooseberry Crème Brûlée Tart: This fruity version sets in just 10 minutes and has a tasty shortcrust pastry.
- Blueberry Cheesecake Brûlée Pots: These can be made a day ahead, combining blueberries and creamy custard perfectly.
- Strawberry Rice Brûlée: A quick, rice-based version of the classic, ready in 20 minutes.
Trying different serving sizes offers a change in texture. Use a 4-ounce ramekin for about 6 servings or a 6-ounce for around 4 servings. Baking time varies, usually 45-50 minutes for larger servings and 35-40 minutes for smaller ones.
Many chefs also mix in new ingredients to shake things up. For example, adding lemon zest or using cream liqueurs like Amarula or Bailey’s instead of heavy cream can really enhance the flavor. Even coffee beans simmered in cream can introduce a wonderful coffee taste, perfect for those who love coffee.
| Crème Brûlée Variation | Preparation Time | Ingredients Required | Comments |
|---|---|---|---|
| White Chocolate Crème Brûlée | 15 minutes | 5 | Rich and indulgent |
| Gooseberry Crème Brûlée Tart | 10 minutes | Classic plus gooseberries | Fruity and tangy |
| Blueberry Cheesecake Brûlée Pots | 1 day in advance | Blueberries, custard base | Perfect for early prep |
| Strawberry Rice Brûlée | 20 minutes | Rice, strawberries, custard | Unique rice pudding twist |
The Perfect Crème Brûlée in Different Cultures
Crème brûlée is a dessert loved all over the globe. Each culture adds its unique twist to it. This treat is known for its rich custard and caramelized sugar top.
How Other Countries Embrace This Dessert
The origins of crème brûlée are found in countries like France, England, and Spain. Each claims it started with them. Spain’s crema catalana might have citrus peels and sometimes corn starch. This shows how diverse this dessert can be around the world.
In Japan, they add green tea or matcha to it. This mix of French technique and local flavors shows crème brûlée’s global appeal. Looking at its journey shows how global desserts have a wide flavor range.
My World Travels and Crème Brûlée Finds
Traveling allowed me to try crème brûlée in many places. Portugal’s leite de creme uses corn starch and lemon peel. Its unique taste and texture made it stand out.
In Brazil, pudim de leite condensado showed me the vast culinary diversity there. This dessert adapts to local tastes, which is common in recipe evolution globally.
| Country | Local Name | Unique Ingredients | Texture |
|---|---|---|---|
| Spain | Crema Catalana | Citrus peels, sometimes corn starch | Slightly thick |
| Japan | Matcha Crème Brûlée | Matcha (green tea) | Silky smooth |
| Portugal | Leite de Creme | Corn starch, lemon peel | Smooth, with a slight thickness |
| Brazil | Pudim de Leite Condensado | Condensed milk | Creamy and dense |
From Spain’s crema catalana to Japan’s matcha version, each crème brûlée variant tells a story. This variety shows our shared love for this classic dessert. I’m excited to find more versions on my travels.
How to Store Leftover Crème Brûlée
Storing crème brûlée the right way keeps it fresh and tasty. I’ll share tips for keeping this favorite dessert great.
Best Practices for Maintaining Freshness
For the best crème brûlée, let it cool before you store it. Then, tightly cover each dish with plastic wrap. This keeps it fresh and stops it from picking up fridge smells. Keep it in the fridge at 40°F or colder. Put it in the main part of the fridge, not the door.
Here’s a quick guide on storing crème brûlée:
- Allow to cool to room temperature.
- Tightly cover each ramekin with plastic wrap.
- Store in the refrigerator, preferably in the main compartment.
- Consume within 3 to 4 days.
My Experience with Leftovers
Handling leftovers well keeps crème brûlée delightful. I let it warm up for 30 minutes before eating to get the best flavor and texture. Freezing it without the top layer can make it last 1 to 2 months.
It’s important to store it right to avoid spoilage. Look for mold, discoloration, or a bad smell as signs it’s gone bad. Eating spoiled crème brûlée can make you sick, so always aim for freshness.
Host a Crème Brûlée Tasting
Throwing a crème brûlée tasting is a fun way to check out different kinds of this dessert with your loved ones. You get to mix rich tastes, new recipes, and good times. We’ll look at how to set up an amazing dessert night and share some cool tasting themes to make your party stand out.
Organizing the Perfect Dessert Night
To have an unforgettable crème brûlée tasting, begin by making various versions of this classic treat. The trick to exciting your guests lies in offering a range and preparing well:
- Traditional Vanilla: The classic choice that highlights the custard’s creamy texture and simple taste.
- Chocolate: Gives a lush and luxurious twist to the usual recipe.
- Seasonal Fruit-Infused: Uses fresh, in-season fruits to boost the flavor.
Remember to include flavors that everyone can enjoy, from safe picks to bold choices.
My Favorite Tasting Themes
Hosting themed crème brûlée tasting nights can add more excitement and participation to your event. Here are a few tasting themes I really like:
| Theme | Description |
|---|---|
| Tour de France | Explore flavors from across France, with variations inspired by different regions. |
| Seasonal Delights | Use the best seasonal ingredients, like berries in spring or spices in fall. |
| Chocolate Lovers’ Night | Show off different chocolate-based crème brûlées, from milky white to intense dark. |
Whether you’re great at cooking or just enjoy it, planning a crème brûlée tasting is a tasty way to connect and share this dessert with those you care about.
Final Thoughts on Perfecting Crème Brûlée
Perfecting crème brûlée has made my cooking journey very rewarding. I mastered the basics and tried new flavors too. Each step showed me the value of patience, precision, and being creative.
This dessert only takes 15 minutes to prepare and needs 3 hours and 5 minutes in total. This shows us that hard work and careful attention can create amazing results. Learning about each ingredient’s role, like using fresh eggs and getting the cream mix just right, makes the dessert special.
Reflections on My Journey
Through making crème brûlée, I learned how important patience and technique are. Mixing cream and milk the right way makes the custard richer. And baking it at 325°F (160°C) makes a big difference.
Also, using a water bath helps the custard cook softly and evenly, without curdling. This trick is used by famous chefs like Pierre Hermé and Jacques Pépin.
My Encouragement for Aspiring Chefs
If you’re starting your journey in cooking, try mastering crème brûlée and add your own twist. Don’t be afraid to try new things and take on challenges. This dessert doesn’t just improve your skills; it also makes you love making desserts more.
Remember, making crème brûlée is not just about the end result. It’s about enjoying the journey and finding happiness in every step you take.
FAQ
What makes crème brûlée a classic dessert?
Crème brûlée stands out because of its smooth, creamy inside topped with a crispy caramel layer. Its French roots make it a loved gourmet choice around the world. People enjoy its simple yet sophisticated taste.
What is the secret to achieving the perfect crème brûlée texture?
The trick to that perfect texture is to mix egg yolks and sugar until they are light and fluffy. Slowly adding hot cream while you whisk makes the mix smooth and creamy.
Which ingredients are essential for the best crème brûlée recipe?
For a top-notch crème brûlée, you need cream with a lot of fat and fresh, quality eggs. Vanilla beans add that classic flavor, but you can also try things like citrus or coffee for a unique taste.
Is a kitchen torch necessary for making crème brûlée?
Yes, a kitchen torch is key for getting that perfect caramelized sugar top. It lets you get the sugar just right without making the custard too hot. You can use a broiler, but you have to watch it closely.
Why is a water bath important in baking crème brûlée?
A water bath keeps the custard from getting too hot, so it cooks evenly. This prevents the custard from cooking too much at the edges, so it’s just right.
How long should crème brûlée be chilled before serving?
Chilling crème brûlée the right way is crucial. First, let it cool down to room temperature. Then, put it in the fridge for at least four hours. Overnight is best for the texture and taste to be just right.
What are some creative flavor additions for crème brûlée?
You can make crème brûlée even more exciting with flavors like lavender, orange zest, or chai spices. I really like adding vanilla bean and cardamom for a unique, spicy-sweet flavor.
How do I fix overcooked custard?
If the custard cooks too much, mixing in some cream might help smooth it out. But, it’s always better to keep a close eye on it while it bakes to prevent overcooking.
What’s the best way to store leftover crème brûlée?
Once it’s cooled, cover each crème brûlée tightly with plastic wrap. Keep it in the fridge for up to two days. Let it sit out for 30 minutes before you eat to enjoy its best taste and texture.
Can I make crème brûlée dairy-free or vegan?
Yes! For a dairy-free or vegan version, use coconut milk or almond cream. These give you the creamy texture that’s so important for crème brûlée.
How can I organize a crème brûlée tasting event?
A crème brûlée tasting event is a fun way to enjoy this dessert. Make different types like traditional vanilla, chocolate, and ones with fruits. You could have a ‘Tour de France’ theme or a ‘Seasonal Delights’ theme for your tasting night.


