


How to Slow-Cook Chicken Legs for Fall-Off-the-Bone Tenderness
February 26, 2025
5 Steps to Make Oven-Roasted Chicken Thighs Crispy and Delicious
February 26, 2025
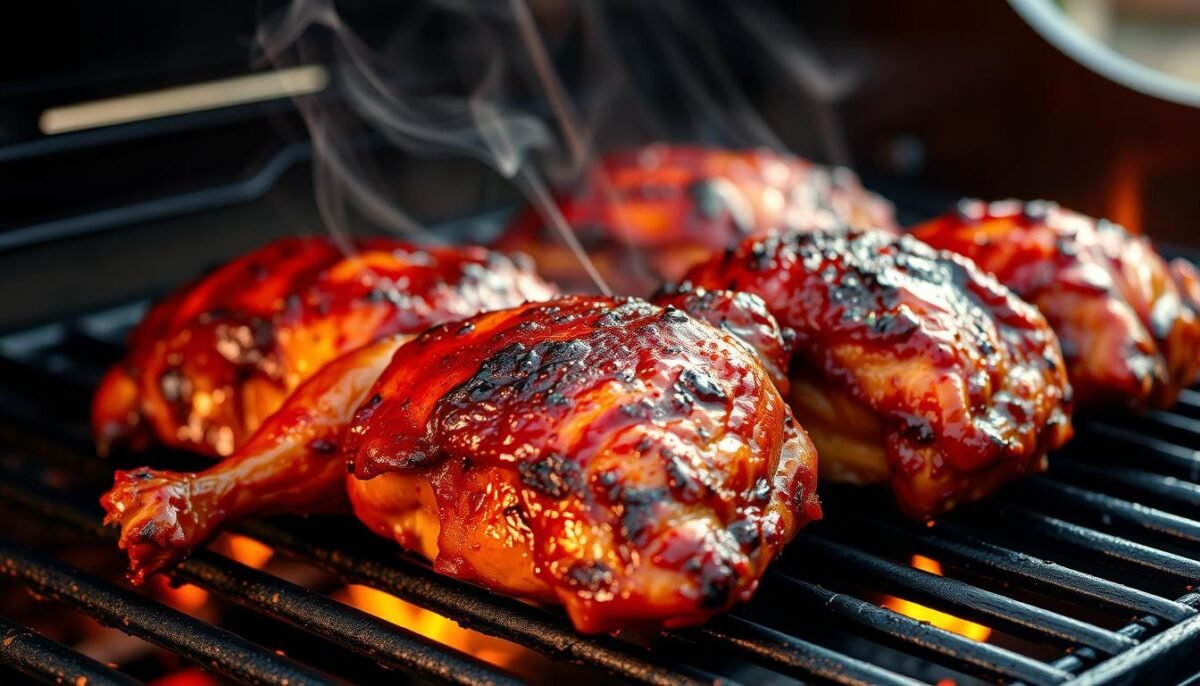
Did you know that 68% of Americans prefer cooking outdoors during summer? Grilling isn’t just a cooking method; it’s a way of life. Yet, many struggle to achieve that mouthwatering, smoky flavor that defines great barbecue. Let’s change that.
Picture this: It’s a warm summer evening, and you’re hosting friends. The aroma of sizzling food fills the air, and everyone gathers around, eager to taste your masterpiece. But instead of juicy, flavorful bites, they’re met with dry, bland disappointment. Sound familiar? Don’t worry—you’re about to learn the secrets to turning that around.
In this guide, you’ll discover four expert-backed tips to elevate your grilling game. From mastering the slow-and-low method to perfecting your seasoning, these techniques will ensure your next cookout is unforgettable. Whether you’re a beginner or a seasoned pro, these insights will help you create a dish that’s tender, juicy, and bursting with flavor.
Key Takeaways
- Learn the difference between barbecue and grilling for better results.
- Discover why bone-in, skin-on cuts are ideal for flavor and moisture.
- Master the art of marination and seasoning for a richer taste.
- Understand the importance of temperature control during cooking.
- Get tips on setting up your grill for optimal performance.
Selecting the Right Chicken Cuts and Preparation Techniques
The secret to juicy results starts with the right selection. Not all cuts are created equal when it comes to flavor and texture. Choosing the best option ensures your dish is tender, moist, and packed with taste.
Bone-In vs. Boneless Options
Bone-in cuts, like legs and thighs, are ideal for grilling. They retain moisture and deliver richer flavor. Boneless options, such as chicken breast, cook faster but require extra care to avoid dryness.
Marinating for Maximum Flavor
Marination is key to infusing taste into every chicken piece. A mix of acidic ingredients, oils, and spices penetrates the meat over time. For best results, let it sit for at least 30 minutes or overnight.
| Cut | Flavor | Moisture | Best Use |
|---|---|---|---|
| Legs | Rich | High | Slow grilling |
| Thighs | Savory | High | Direct heat |
| Breast | Mild | Low | Quick cooking |
Balancing flavors doesn’t have to be complicated. Use simple ingredients like lemon, garlic, and herbs for a marinade that enhances without overpowering. Your grilled chicken will shine with minimal effort.
Essential Tools and Preparing Your Grill for Success
Grilling success begins with the right tools and setup. Whether you’re a beginner or a seasoned pro, understanding your equipment and how to prepare it is key to achieving that perfect sear and even cooking.
Charcoal vs. Gas Grills
Choosing between charcoal and gas grills depends on the flavor and convenience you’re after. Charcoal grills deliver a smoky, rich taste but require more effort to manage heat. Gas grills, on the other hand, offer precise temperature control and are easier to use.
| Feature | Charcoal Grill | Gas Grill |
|---|---|---|
| Flavor | Smoky, rich | Clean, mild |
| Heat Control | Manual, requires skill | Precise, easy to adjust |
| Setup Time | Longer | Quick |
| Maintenance | More effort | Less effort |
Prepping and Establishing Temperature Zones
Creating different temperature zones on your grill is essential for versatility. A high-heat zone is perfect for searing, while an indirect zone allows for slower, even cooking. This setup ensures your dish is cooked to perfection without burning.
Start by arranging coals on one side for a charcoal grill or adjusting the burners on a gas grill. This creates a gradient of heat levels. For even better results, oil the grate before cooking to prevent sticking and retain heat.
Balancing direct and indirect zones is simple. Use the high-heat area for searing and the cooler side for finishing. This technique locks in juices and ensures a tender, flavorful result every time.
Secrets for Flawless Seasoning and Spice Rubs
Seasoning is the heart of any great grilled dish, and mastering it can transform your results. A well-crafted spice rub ensures every bite is packed with flavor. Let’s dive into the essentials of creating and applying the perfect rub.
Key Ingredients in the Spice Rub
The foundation of a great rub lies in its ingredients. A balanced mix of sugar, salt, and spices creates a harmonious blend. Here’s how each component contributes:
- Sugar: Adds a hint of sweetness and helps caramelize the surface for a golden crust.
- Salt: Enhances natural flavors and tenderizes the meat.
- Spices: Introduce depth and complexity, from smoky paprika to zesty garlic powder.
Step-by-Step Rub Application
Applying the rub correctly ensures even flavor distribution. Follow these steps for the best results:
- Pat the meat dry with a paper towel to help the rub stick.
- Generously coat every part, pressing the rub into the surface.
- Let it rest for at least 30 minutes to allow the flavors to penetrate.
| Ingredient | Role | Example |
|---|---|---|
| Sugar | Caramelization | Brown sugar |
| Salt | Flavor enhancement | Kosher salt |
| Spices | Complexity | Paprika, garlic powder |
By understanding the role of each ingredient and applying the rub with care, you’ll achieve a dish that’s rich in flavor and perfectly seasoned. Let the rub work its magic, and your grilled creation will shine.
Expert Tips for BBQ chicken on the grill
Mastering the grill is all about precision and timing. To achieve juicy, flavorful results, you need to focus on two critical factors: heat control and cooking duration. Let’s break down the essentials to help you elevate your outdoor cooking game.
Setting Optimal Heat Levels
Heat management is the backbone of successful grilling. Start by preheating your grill to the right temperature. For most dishes, a medium-high heat works best. This ensures a good sear without burning the exterior.
Use a two-zone setup to create flexibility. One side of the grill should be hot for searing, while the other side remains cooler for slower cooking. This method prevents overcooking and keeps your dish moist.
Managing Cooking Duration
Timing is everything. Cooking for the right number of minutes ensures your dish is neither underdone nor burnt. For bone-in cuts, aim for 40-45 minutes, while boneless pieces may only need 20-25 minutes.
Flip your meat every 10 minutes to ensure even cooking. Basting with sauce during the last 10 minutes adds flavor without burning. Avoid opening the grill too often, as this can cause heat loss and extend cooking time.
By mastering these techniques, you’ll cook with confidence and create dishes that are tender, juicy, and full of flavor.
The Crucial Role of Temperature and Timing
Achieving that tender, flavorful bite requires precise control over heat and cooking duration. Whether you’re a beginner or a seasoned pro, understanding these elements ensures your dish is always a hit. Let’s explore how to master them.
Using a Meat Thermometer
Tracking internal temperature is the key to juicy results. A meat thermometer provides accurate information about doneness, preventing overcooking or undercooking. For cuts like the chicken thigh, aim for an internal temperature of 165°F.
Insert the thermometer into the thickest part of the meat, avoiding bones. This ensures you get a true reading. Consistent monitoring helps you achieve perfection every time.
Creating Indirect Heat Zones
Indirect heat is essential for even cooking. This method allows the meat to cook slowly, retaining moisture and flavor. Set up your grill by placing coals or burners on one side, leaving the other side cooler.
For best results, give your dish at least an hour of cooking time in the indirect zone. This ensures it’s thoroughly cooked without drying out. Flip the meat occasionally for even heat distribution.
By mastering temperature and timing, you’ll create dishes that are tender, juicy, and full of flavor. These techniques are simple yet transformative, making every cookout a success.
Incorporating Your Favorite BBQ Sauces Without Burning
The perfect glaze on your dish is all about timing and technique. Applying sauce too early can lead to burning, while adding it at the right moment creates a luscious, flavorful finish. Here’s how to master the way to achieve that balance.

Timing the Sauce Application
Timing is everything when it comes to adding sauce. Brush it on during the final stages of cooking to avoid burning. This ensures the sauce caramelizes without turning bitter. A good rule of thumb is to apply it in the last 10 minutes.
Using a measured cup of sauce helps maintain consistency. This prevents over-saucing, which can lead to uneven cooking. For best results, drain excess fat before brushing on the sauce. This keeps the flavors clean and prevents flare-ups.
Balancing Sweet and Smoky Flavors
Balancing sweet and smoky flavors is essential for a well-rounded dish. Start with a base of sweet sauce, then add smoky elements like paprika or chipotle. This creates depth without overpowering the natural taste of the meat.
During summer grilling sessions, this balance is especially important. The heat can intensify flavors, so a lighter touch with the sauce works best. Remember, less is often more when it comes to achieving perfection.
“The key to a great glaze is patience. Wait until the end to add your sauce, and you’ll be rewarded with a flawless finish.”
For more tips on selecting the best ingredients, check out this guide on picking fresh chicken for BBQ. It’s a great resource to ensure your dish starts with the best possible foundation.
Grilling Techniques: Searing, Basting, and Finishing Touches
To achieve that perfect sear and juicy finish, mastering a few essential techniques is key. Whether you’re working with a thigh or another cut, these methods ensure your dish is flavorful and visually appealing.
Mastering the Sear
A good sear starts with proper preparation. Lightly coat your meat with oil to prevent sticking and promote even browning. Place it skin side down on the hot grill to create a crisp, caramelized exterior.
Patience is crucial. Let the meat sear without moving it for a few minutes. This allows the surface to develop a golden crust. Flip it only once to avoid overcooking.
Basting Techniques for Juicy Results
Basting locks in moisture and enhances flavor. Use a brush to apply your favorite sauce or marinade during the final stages of cooking. This prevents burning while adding a rich glaze.
For best results, baste every 5-10 minutes. Focus on the skin side to ensure it stays tender and flavorful. Avoid over-saucing, as it can lead to uneven cooking.
Final Crisping Tips
Finish strong by crisping the exterior. Move the meat to a hotter part of the grill for the last few minutes. This step ensures a perfectly charred surface and appealing grill marks.
Once done, let the meat rest for a few minutes before serving. This allows the juices to redistribute, ensuring every bite is moist and delicious.
“The secret to a great sear is patience. Let the heat do its work, and you’ll be rewarded with a flawless finish.”
Creative Side Dishes to Complement Your Grilled Chicken
A great meal isn’t complete without the perfect accompaniments. The right side dishes can elevate your dinner from good to unforgettable. Whether you’re serving a chicken recipe or another cut of meat, these ideas will round out your meal with flavor and variety.

Easy Summer Salad Ideas
Light and refreshing, summer salads are a natural pairing for grilled dishes. A crisp mix of greens, cherry tomatoes, and cucumbers tossed with a tangy vinaigrette adds a fresh contrast to smoky flavors. For a heartier option, try a quinoa salad with roasted vegetables and feta cheese.
Perfect Coleslaw Recipes
Coleslaw is a classic side that balances richness with a touch of acidity. A creamy version with shredded cabbage, carrots, and a mayo-based dressing is always a hit. For a lighter twist, opt for a vinegar-based slaw with apple cider vinegar and a hint of honey.
Cornbread and Other Sides
Cornbread is a comforting addition to any dinner spread. Its slightly sweet flavor pairs beautifully with savory dishes. Other great options include garlic butter roasted potatoes, grilled vegetables, or a creamy mac and cheese. These sides add texture and depth to your meal.
| Side Dish | Flavor Profile | Best Pairing |
|---|---|---|
| Summer Salad | Fresh, tangy | Light cuts of meat |
| Coleslaw | Creamy, tangy | Rich, smoky dishes |
| Cornbread | Sweet, savory | Hearty chicken recipe |
Experiment with different combinations to find your favorite pairings. A well-planned side can transform your meal into a memorable dining experience. Whether you’re hosting a casual get-together or a formal dinner, these ideas will inspire you to create a balanced and delicious spread.
Conclusion
Creating a perfect dish outdoors is both an art and a science. By mastering the balance of temperature, timing, and seasoning, you can achieve unbeatable results every time. Remember to handle the breast with care, ensuring it stays moist and flavorful. Managing fat and skin properly also plays a crucial role in retaining that rich taste.
We encourage you to revisit the key techniques discussed and apply them to your next outdoor cooking session. Share your results and leave a comment about your experience. Your insights can help others enhance their skills and enjoy delicious meals.
Finally, don’t be afraid to experiment. Outdoor cooking is about creativity and enjoyment. Embrace the process, and you’ll create memorable dishes that everyone will love.
FAQ
What’s the best cut for grilling?
Bone-in pieces like thighs or drumsticks stay juicier, while boneless breasts cook faster. Choose based on your preference for flavor and texture.
How long should I marinate the meat?
For maximum flavor, marinate for at least an hour. Overnight marinating works even better for deeper taste penetration.
Is charcoal or gas better for grilling?
Charcoal adds a smoky flavor, while gas offers convenience and precise temperature control. It depends on your preference for taste and ease.
What’s the ideal heat level for grilling?
Medium-high heat works best for searing, while lower heat ensures even cooking without burning the exterior.
How do I know when it’s fully cooked?
Use a meat thermometer. The internal temperature should reach 165°F for safe consumption.
When should I apply the sauce?
Brush it on during the last 5-10 minutes of cooking to prevent burning and lock in flavor.
What are some good side dishes to pair with grilled chicken?
Try a fresh summer salad, creamy coleslaw, or warm cornbread for a balanced meal.
How do I prevent the skin from sticking to the grate?
Oil the grates lightly before cooking and ensure the meat is dry before placing it on the grill.
Can I use a spice rub instead of a marinade?
Absolutely! A well-balanced rub with salt, sugar, and spices adds incredible flavor without the need for marinating.
What’s the secret to juicy results?
Avoid overcooking, use indirect heat zones, and baste occasionally to keep the meat moist and tender.
