


4 Steps to Baking Halibut Without Drying It Out
February 22, 2025
4 Tricks to Perfectly Frying Catfish for a Crispy Finish
February 23, 2025
There’s something magical about cooking a dish that feels like it belongs in a fine dining restaurant. For me, that dish is pan-seared sea bass. It all started during a trip to a coastal town, where I first tasted its buttery, delicate flavor. That moment sparked my passion for mastering this recipe.
Did you know that Chilean sea bass, one of the most sought-after fish, can cost up to $30 per pound? Its rich flavor and flaky texture make it a favorite among chefs. But achieving that perfect sear requires more than just a hot pan. It’s about technique, timing, and the right ingredients.
Over the years, I’ve discovered five secrets that transformed my cooking. From selecting the freshest fillets to managing the perfect internal temperature, these tips have helped me create a dish that rivals any Michelin-starred meal. Let’s dive in and uncover these secrets together.
Key Takeaways
- Discover the importance of technique in achieving the perfect sear.
- Learn how to select the freshest sea bass fillets for your recipe.
- Understand the ideal cooking time and temperature for a flaky texture.
- Explore the role of professional kitchen tools in elevating your dish.
- Gain personal tips for avoiding common cooking mistakes.
Introduction: My Journey to Perfect Sea Bass
The first time I tasted sea bass, I knew I had found my culinary muse. Its delicate, buttery texture and rich flavor were unlike anything I’d experienced before. That moment sparked a passion for mastering this white fish and creating a dish that felt both luxurious and approachable.
Why I Fell in Love with Sea Bass
What drew me to sea bass was its versatility. Whether paired with a simple lemon butter sauce or seasoned with garlic and herbs, it always delivers a memorable meal. Its flaky texture and mild flavor make it a favorite among chefs and home cooks alike.
I remember experimenting with different cooking methods, from grilling to baking, but pan-searing stood out. The crispy crust and tender interior were a game-changer. It was then I realized that the right technique could elevate this fish to restaurant-quality perfection.
The Inspiration Behind This Recipe
My recipe was inspired by the simplicity of fine dining. I wanted to create a dish that felt special yet easy to replicate at home. Influences from renowned chefs taught me the importance of quality ingredients and precise timing.
“Cooking is about passion, patience, and a little bit of creativity.”
Over time, I refined my approach, learning that even small details—like the right amount of butter or a pinch of salt—could make a big difference. Each experiment brought me closer to the perfect recipe, and now I’m excited to share these secrets with you.
Nutritional Highlights
| Nutrient | Per Serving |
|---|---|
| Calories | 318 |
| Protein | 14g |
| Fat | 28g |
| Vitamin C | 20mg |
This journey has taught me that cooking is more than just following a recipe—it’s about understanding the ingredients and techniques that make a dish truly exceptional. Let’s dive into the secrets that transformed my sea bass into a Michelin-worthy meal.
Selecting the Best Sea Bass for Your Recipe
Choosing the right fish is the first step to creating a dish that feels like it’s straight from a five-star kitchen. The quality of your ingredients can elevate your recipe from good to extraordinary. When it comes to fish, freshness is everything.
Understanding Quality and Freshness
When I shop for fish, I always start by examining its texture. Fresh fillets should feel firm to the touch, not mushy or slimy. The color is another clue—look for a bright, pearly hue without any discoloration.
Smell is just as important. Fresh fish has a clean, ocean-like scent. If it smells overly fishy or sour, it’s past its prime. Trust your senses—they’re your best tools for finding quality ingredients.
Here’s my personal checklist for evaluating fish at the store:
- Texture: Firm and smooth, not slimy.
- Color: Bright and consistent, with no browning.
- Smell: Fresh and mild, like the ocean.
Freshness is the foundation of a great recipe. It ensures the best flavor and texture, making every bite memorable. Whether you’re cooking for a special occasion or a weeknight dinner, high-quality fish is a must.
There are different types of fish, each with its unique characteristics. For example, Chilean sea bass is known for its rich, buttery flavor and flaky texture. It’s a favorite among chefs and home cooks alike.
When inspecting fish, look for clear eyes (if buying whole) and shiny skin. These are signs of premium quality. Taking the time to choose the best ingredients will pay off in the final dish.
Essential Ingredients and Tools for the Perfect Dish
Creating a dish that feels restaurant-worthy starts with the right ingredients and tools. Over the years, I’ve learned that quality is non-negotiable. From the freshest fillets to the perfect skillet, every detail matters.
Stocking My Kitchen: Must-Have Ingredients
When I prepare this recipe, I rely on a few key ingredients to elevate the flavor. Olive oil and butter are my go-to fats for cooking. They add richness and help achieve that golden crust.
For seasoning, I keep it simple: salt, pepper, and a touch of garlic. Fresh lemon is a must for brightness. These ingredients work together to enhance the natural taste of the fish without overpowering it.
Choosing the Right Skillet and Other Equipment
A high-quality skillet is indispensable for this dish. I prefer a heavy-bottomed stainless steel or cast iron pan. It distributes heat evenly, ensuring a perfect sear every time.
Other tools I rely on include a sharp knife for prepping the fish and a meat thermometer to check the internal temperature. These small investments make a big difference in the final result.
Here’s my go-to equipment list:
- Skillet: Heavy-bottomed for even heat distribution.
- Knife: Sharp and precise for clean cuts.
- Thermometer: Ensures the fish is cooked to perfection.
With the right ingredients and tools, you’re well on your way to creating a dish that rivals any fine dining experience.
Preparing Your Sea Bass: Tips for Cleaning and Filleting
Preparing sea bass at home can feel intimidating, but with the right steps, it’s surprisingly simple. The key lies in careful cleaning and precise filleting. These steps ensure the fish retains its delicate texture and flavor, making it perfect for any recipe.
My Step-by-Step Process for Prepping the Fish
Start by rinsing the fish under cold water to remove any impurities. Pat it dry with a paper towel to ensure a clean surface. This step is crucial for maintaining hygiene and preventing contamination.
Next, use a sharp, flexible knife to make a clean cut along the belly. Remove the guts carefully, ensuring you don’t damage the flesh. Rinse the cavity thoroughly to eliminate any remaining residue.
For filleting, begin by making a diagonal cut behind the gills. Slide the knife along the spine, separating the fillet from the bones. Repeat on the other side. Use tweezers to remove any pin bones for a smooth, enjoyable texture.
Here are my go-to tools for this process:
- Knife: Sharp and flexible for precise cuts.
- Tweezers: Essential for removing pin bones.
- Cutting Board: Non-slip and easy to clean.
Proper preparation ensures the fish cooks evenly and retains its flaky texture. Taking the time to clean and fillet correctly makes all the difference in the final dish.
| Nutrient | Per Serving |
|---|---|
| Calories | 132 |
| Protein | 24g |
| Fat | 6g |
| Vitamin C | 15mg |
With these tips, you’ll be ready to create a sea bass recipe that’s both delicious and visually appealing. The effort you put into preparation will shine through in every bite.
Pan-searing sea bass: My Signature Technique
The secret to a flawless dish lies in the balance of heat and timing. Over the years, I’ve refined my technique to create a crispy exterior while keeping the inside tender and moist. It’s all about precision and patience.
Balancing Temperature and Time
Getting the heat just right is crucial. I start by preheating my skillet over medium-high heat. This ensures the pan is hot enough to sear the fish without burning it. Adding a touch of oil helps create that golden crust we all love.
Timing is equally important. I cook each side for about 4-5 minutes, depending on the thickness of the fillet. This ensures the fish remains flaky and moist. A meat thermometer can help you check for an internal temperature of 120°F, which is perfect for this dish.
Here’s my step-by-step approach:
- Preheat the skillet: Medium-high heat works best.
- Add oil: Just enough to coat the pan.
- Cook evenly: 4-5 minutes per side for a crispy finish.
- Check the temperature: Aim for 120°F for perfect doneness.
Small adjustments can make a big difference. For example, lowering the heat slightly if the skin is browning too quickly. This balance between high heat and controlled technique is what elevates the dish to restaurant quality.
With practice, you’ll master this signature technique and create a meal that’s both impressive and delicious. It’s all about understanding the process and trusting your instincts.
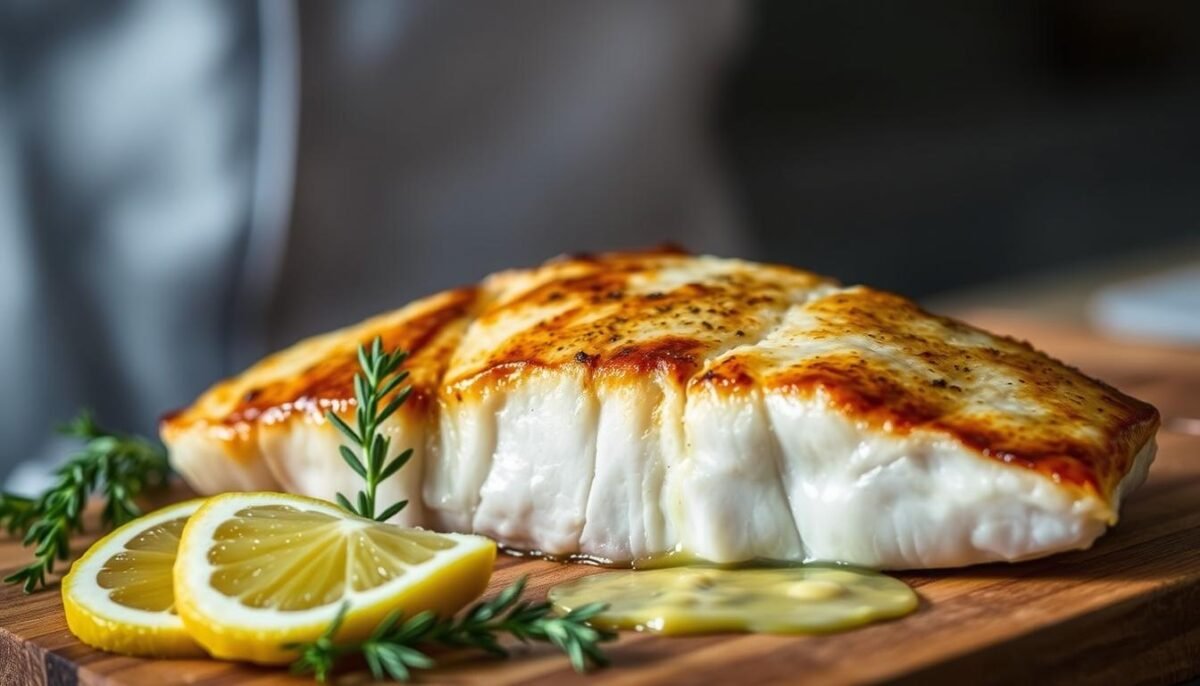
Mastering Heat: Achieving a Crispy, Golden Crust
Mastering the art of heat control is the key to unlocking a crispy, golden crust on your fish. It’s not just about cranking up the stove—it’s about understanding how heat interacts with the ingredients to create that perfect texture. Over the years, I’ve learned that small adjustments can make a big difference.
Using High Heat and the Right Fat
High heat is essential for achieving that beautiful crust. I start by preheating my skillet over medium-high heat. This ensures the pan is hot enough to sear the fish without burning it. Adding the right fat, like olive oil or butter, helps create that golden finish we all love.
Here’s my go-to approach:
- Preheat the skillet: Medium-high heat works best.
- Add oil or butter: Just enough to coat the pan.
- Cook evenly: 4-5 minutes per side for a crispy finish.
Adjusting the heat slightly if the skin is browning too quickly can save your dish. It’s all about finding that balance.
The Science Behind a Perfect Sear
The Maillard reaction is the secret behind that irresistible crust. It’s a chemical process that occurs when proteins and sugars in the fish react to high heat. This reaction enhances both the flavor and texture, giving you a dish that’s crispy on the outside and tender on the inside.
Here are some tips to nail the Maillard reaction:
- Pat the fish dry: Moisture is the enemy of a good sear.
- Use high-smoke-point oils: Avocado or grapeseed oil works well.
- Don’t overcrowd the pan: This lowers the temperature and prevents browning.
With these techniques, you’ll create a dish that’s both visually stunning and delicious. It’s all about understanding the science and trusting your instincts.
Enhancing Flavor with Butter, Olive Oil, and Seasonings
The right combination of ingredients can transform a simple dish into a culinary masterpiece. For me, the secret lies in the perfect blend of butter, olive oil, and seasonings. These elements work together to elevate the natural taste of the fish, creating a dish that’s both rich and balanced.
Mixing Garlic, Lemon, and Pepper for a Flavor Boost
One of my favorite ways to enhance flavor is by mixing garlic, lemon, and pepper. This trio adds brightness, depth, and a hint of spice to the dish. I start by mincing fresh garlic and combining it with lemon zest and freshly ground black pepper. This mixture is then added to the skillet during the final minutes of cooking, allowing the flavors to meld perfectly.
Here’s why this combination works so well:
- Garlic: Adds a savory, aromatic note.
- Lemon: Provides a fresh, citrusy tang.
- Pepper: Introduces a subtle heat and complexity.
Timing is key when adding these ingredients. I recommend incorporating them just before the fish is done cooking. This ensures the flavors remain vibrant and don’t overpower the dish.
Here’s a quick guide to my go-to seasoning ratios:
| Ingredient | Quantity |
|---|---|
| Garlic | 2 cloves, minced |
| Lemon Zest | 1 teaspoon |
| Black Pepper | ½ teaspoon |
Experimenting with these ratios can help you find the perfect balance for your taste. Whether you prefer a stronger garlic flavor or a more pronounced citrus note, small adjustments can make a big difference.
The Role of Side Dishes and Complementary Sauces
A great main dish shines brightest when paired with the perfect sides and sauces. For me, the right accompaniments can elevate a meal from good to unforgettable. Whether it’s a simple vegetable medley or a rich, flavorful sauce, these elements bring balance and depth to every bite.
When I cook, I always think about how the flavors will harmonize. A tangy lemon butter sauce can brighten the richness of a perfectly cooked fillet, while a side of garlic-infused asparagus adds a savory contrast. It’s all about creating a well-rounded experience that delights the palate.
Crafting a Delicious Lemon Butter Sauce
One of my go-to sauces for fish is a simple yet elegant lemon butter sauce. It’s quick to make and pairs beautifully with the delicate flavor of the fillet. Here’s how I do it:
- Melt butter in a pan over medium heat.
- Add minced garlic and cook until fragrant.
- Squeeze in fresh lemon juice and a pinch of pepper.
- Simmer for a minute, then drizzle over the fish.
The key is to balance the tangy freshness of the lemon with the richness of the butter. This sauce adds a burst of flavor without overpowering the dish.
Timing is also crucial. I prepare the sauce while the fish is resting, ensuring everything comes together seamlessly. This way, the meal feels cohesive and thoughtfully planned.
Here’s a quick guide to my favorite pairings:
| Side Dish | Preparation Time |
|---|---|
| Garlic Parmesan Asparagus | 15 minutes |
| Zesty Southwest Quinoa Salad | 30 minutes |
| Easy Pesto Orzo Salad | 20 minutes |
Experiment with different combinations to find what works best for you. The right sides and sauces can transform your meal into a restaurant-worthy experience.
Plating Like a Michelin Chef: Presentation Tips
Presentation is the final touch that turns a great dish into a masterpiece. The way you arrange your food on the plate can elevate it from ordinary to extraordinary. For me, plating is where creativity meets culinary skill, transforming a meal into an experience.

Start by choosing the right plate. A clean, white plate works best to highlight the colors and textures of your dish. Arrange the fillet as the centerpiece, and use sides like roasted vegetables or quinoa to add balance. A drizzle of lemon butter sauce can add both flavor and visual appeal.
Garnishing Ideas to Elevate Your Dish
Garnishes are the finishing touches that make your dish pop. Fresh herbs like parsley or dill add a burst of color and freshness. A sprinkle of black pepper or a pinch of sea salt can enhance both the look and taste. For a more elegant touch, consider edible flowers or microgreens.
Here are some of my favorite garnishing ideas:
- Herbs: Parsley, dill, or cilantro for a fresh, vibrant look.
- Citrus: Thin slices of lemon or lime for a pop of color.
- Edible Flowers: Adds a touch of elegance and sophistication.
When plating, think about balance and contrast. Use colors and textures to create visual interest. For example, pair the delicate texture of the fillet with crunchy vegetables or a smooth sauce. This not only enhances the dish’s appearance but also its overall experience.
| Element | Purpose |
|---|---|
| Herbs | Add freshness and color |
| Citrus | Brighten the plate |
| Edible Flowers | Elevate sophistication |
Remember, plating is your chance to express creativity. Experiment with different arrangements and garnishes to add your own signature touch. For more tips on perfecting your fish cooking techniques, check out this guide.
Quick Tips for a Restaurant-Worthy Meal at Home
Bringing a restaurant-quality meal to your kitchen is easier than you think. With a few simple tricks, you can turn an ordinary dish into something extraordinary. Here are my top tips to help you achieve that fine dining experience at home.
First, always start with the freshest ingredients. Whether it’s a sea bass fillet or a side of roasted vegetables, quality matters. For fish, look for firm texture and a clean, ocean-like scent. Freshness ensures the best flavor and texture in every bite.
Next, focus on preparation. Pat your fillets dry before cooking to ensure a crispy crust. Use a heavy-bottomed skillet and preheat it over medium-high heat. Add a touch of olive oil or butter for richness and to prevent sticking.
Timing is crucial. Cook each side of the fillet for about 4-5 minutes, depending on thickness. Use a meat thermometer to check for an internal temperature of 120°F. This ensures the fish remains tender and flaky.
Here are some additional time-saving tips:
- Prep ahead: Chop vegetables and measure ingredients before you start cooking.
- Use multitasking tools: A skillet with a lid can help steam vegetables while you sear the fish.
- Simplify sauces: A quick lemon butter sauce can elevate your dish without extra effort.
Finally, trust your instincts and be creative. Cooking is as much about passion as it is about technique. Experiment with flavors and presentation to make the meal your own. Remember, the goal is to enjoy the process and create something delicious.
With these tips, you’ll be able to craft a restaurant-worthy meal that impresses every time. Happy cooking!
Conclusion
Cooking a dish that feels gourmet at home is an art worth mastering. From selecting the freshest fish to plating it like a pro, every step matters. The journey begins with choosing the right sea bass, ensuring it’s firm, fresh, and full of flavor. Preparation, timing, and the right tools are key to achieving that perfect texture and taste.
Remember, the secret lies in balance—whether it’s the heat of the pan or the simplicity of a lemon butter sauce. Each stage, from cleaning to cooking, contributes to an exceptional meal. Don’t be afraid to experiment with flavors and presentation. With practice, you’ll create a dish that rivals any restaurant.
Thank you for joining me on this culinary adventure. I hope these tips inspire you to refine your skills and explore new possibilities. Keep this guide handy for future inspiration, and happy cooking!
FAQ
What’s the best way to ensure my fish stays fresh?
I always look for clear eyes, firm flesh, and a fresh ocean smell. If buying frozen, check for minimal ice crystals and proper packaging.
Can I use a different type of skillet for this recipe?
Yes, but I recommend a cast iron or stainless steel skillet for even heat distribution and a perfect sear.
How do I know when the fish is cooked through?
I use a fork to check if the flesh flakes easily. The internal temperature should reach 145°F for safe consumption.
What’s the secret to a crispy crust?
Pat the fillet dry before cooking and use high heat with a good fat like olive oil or butter. Don’t overcrowd the pan!
Can I substitute another white fish for this recipe?
Absolutely! Cod or halibut works well, but adjust cooking times based on thickness.
How do I make the lemon butter sauce?
I melt butter in a pan, add fresh lemon juice, minced garlic, and a pinch of black pepper. Simmer until it’s rich and flavorful.
What sides pair well with this dish?
I love serving it with roasted asparagus, garlic mashed potatoes, or a light arugula salad for a balanced meal.
How can I make my plating look professional?
I use a clean white plate, arrange the fish with a drizzle of sauce, and garnish with fresh herbs or lemon slices for a pop of color.


