


5 Steps to Make Oven-Roasted Chicken Thighs Crispy and Delicious
February 26, 2025
5 Chef-Approved Techniques for Smoking Pork Shoulder
February 26, 2025
Did you know that pork tenderloin is one of the leanest cuts of meat, with only 3 grams of fat per serving? This makes it not only delicious but also a healthier option for your family dinners. Whether you’re a seasoned cook or just starting out, this recipe is designed to impress without the stress.
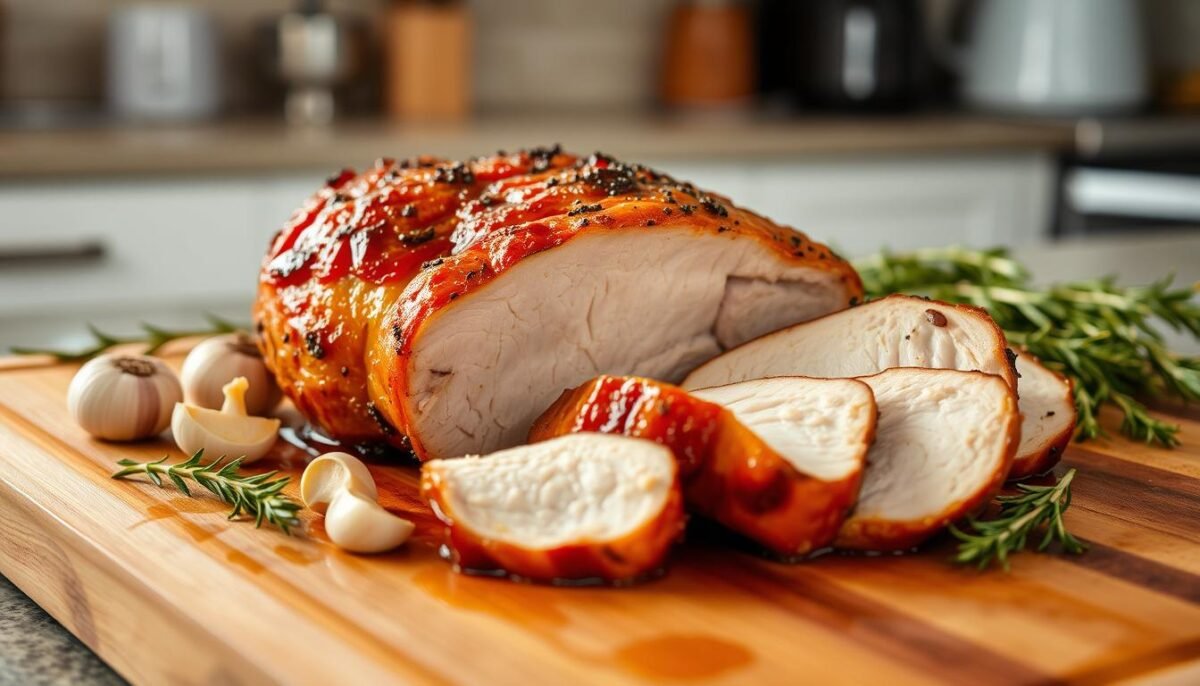
Imagine this: It’s a busy Wednesday evening, and you’re craving something hearty yet easy to prepare. You pull out a simple pork tenderloin recipe, season it with your favorite herbs, and pop it into the oven. In less than an hour, you’re serving a dish with a golden, seared crust and tender, juicy meat that everyone at the table loves.
This guide will walk you through every step, from selecting the right ingredients to mastering the perfect bake. You’ll learn how searing and oven cooking work together to create a flavorful experience. Plus, we’ll share tips from trusted sources like Natasha’s Kitchen and Carlsbad Cravings to ensure your meal is a success.
Key Takeaways
- Pork tenderloin is a lean and healthy option for family dinners.
- This recipe is quick, easy, and perfect for midweek meals.
- Searing and oven roasting create a flavorful, juicy dish.
- Trusted sources like Natasha’s Kitchen and Carlsbad Cravings recommend this method.
- Learn how to select, prep, cook, and serve this dish with confidence.
Introduction: Why Pork Tenderloin is a Midweek Winner
Busy weeknights call for meals that are both fast and satisfying. A pork tenderloin recipe fits the bill perfectly, offering a lean and versatile option that’s ready in minutes. Whether you’re juggling work, school, or other commitments, this dish ensures you can serve something delicious without spending hours in the kitchen.
Quick Prep and Minimal Fuss
One of the biggest advantages of cooking with this cut is its simplicity. You’ll spend less time prepping and more time enjoying your meal. With just a few basic ingredients and a straightforward method, even novice cooks can achieve great results. It’s a time-saver that doesn’t compromise on flavor.
Family-Friendly Appeal
This dish is a hit with both kids and adults, making it a reliable choice for family dinners. Its mild flavor pairs well with a variety of sides, and leftovers can be repurposed into sandwiches or salads for the next day. It’s a versatile option that keeps everyone happy and well-fed.
Selecting the Best Pork Tenderloin
The key to a flavorful dish starts with selecting quality ingredients. When it comes to preparing a pork tenderloin recipe, choosing the right cut is essential. This section will guide you through the differences between tenderloin and loin, and what to look for at the store.
Understanding Cuts: Tenderloin vs. Loin
While both cuts come from the same animal, they are quite different. The tenderloin is a smaller, leaner cut, typically weighing 1 to 1½ pounds. It’s known for its tenderness and quick cooking time. On the other hand, the loin is larger, ranging from 2 to 5 pounds, and has a slightly firmer texture.
For this recipe, the tenderloin is ideal because of its size and tenderness. It cooks evenly and absorbs flavors well, making it perfect for a midweek dinner.
What to Look For at the Store
When shopping, focus on a few key features. Look for cuts that are free from excessive fat and silver skin. Silver skin is a tough membrane that doesn’t break down during cooking, so it’s best to avoid it.
Check the label to ensure you’re getting the right cut. A high-quality pork tenderloin should have a pinkish-red color and a firm texture. If possible, buy from a trusted butcher or store with a good reputation for fresh meat.
| Feature | Tenderloin | Loin |
|---|---|---|
| Weight | 1-1½ pounds | 2-5 pounds |
| Texture | Very tender | Slightly firmer |
| Cooking Time | Quick | Longer |
By selecting the right cut, you’re setting the stage for a delicious meal. Take your time at the store, and don’t hesitate to ask questions. A little effort upfront ensures a fantastic result on your plate.
Prepping Your Pork: Trimming and Drying
Proper preparation ensures your dish turns out flavorful and tender. Trimming and drying your meat is a crucial step that sets the stage for a delicious meal. Let’s break it down into simple, actionable steps.
Removing the Silver Skin
Silver skin is a tough membrane that doesn’t break down during cooking. To remove it, use a sharp knife. Natasha’s Kitchen recommends sliding the blade between the silver skin and the meat, gently lifting it as you go. This technique ensures you don’t waste any of the tender meat.
Always work carefully to avoid accidents. Keep your fingers clear of the blade and use a steady hand. Proper trimming not only improves texture but also reduces cooking time.
Patting Dry with a Paper Towel
After trimming, pat the meat dry with a paper towel. This step is essential for achieving a golden, seared crust. Moisture on the surface can steam the meat instead of browning it.
Drying also helps the seasoning stick better. Use a dry paper towel to absorb any excess moisture. This simple trick ensures your dish is flavorful and visually appealing.
| Step | Tool | Purpose |
|---|---|---|
| Remove Silver Skin | Sharp Knife | Improve texture and reduce cooking time |
| Pat Dry | Paper Towel | Enhance searing and seasoning adherence |
Taking the time to prep your meat properly ensures a better cooking experience. Whether you’re a beginner or a pro, these steps will help you achieve a perfectly browned crust and tender, juicy results.
Essential Ingredients and Seasoning
Great meals start with the right ingredients and seasoning. For this dish, the combination of spices and herbs plays a crucial role in enhancing the natural flavor of the meat. Let’s explore how to craft the perfect dry rub and optional marinades to elevate your recipe.
Crafting the Perfect Dry Rub
A dry rub is a simple yet effective way to add depth to your dish. Start with a base of sea salt and black pepper. Then, add Italian seasoning, garlic powder, and ground coriander for a balanced flavor profile. Each seasoning brings its unique touch:
- Sea salt: Enhances natural flavors.
- Black pepper: Adds a subtle heat.
- Italian seasoning: Introduces herbal notes.
- Garlic powder: Provides a savory kick.
- Ground coriander: Offers a hint of citrusy warmth.
Mix these spices thoroughly and apply them generously to the meat. Let it sit for at least 15 minutes to allow the seasoning to penetrate.
Enhancing Flavor with Marinades and Sauces
If you have more time, a marinade can take your dish to the next level. Combine olive oil, soy sauce, honey, and minced garlic for a simple yet flavorful marinade. The oil helps tenderize the meat while the other ingredients infuse it with rich flavor.
For sauces, consider a tangy mustard glaze or a sweet balsamic reduction. These additions complement the dish without overpowering its natural taste. Remember, balance is key when using seasoning and sauces.
Using high-quality ingredients makes a noticeable difference in the final dish. Fresh spices, good olive oil, and premium cuts ensure a meal that’s both delicious and satisfying.
Mastering the Art of Searing
Searing is the secret to unlocking deep, rich flavors in your dish. This technique isn’t just about browning the surface—it’s about creating a flavorful crust that enhances every bite. When done right, searing locks in juices and ensures your meat stays tender and succulent.
Creating a Beautiful, Flavorful Crust
The magic of searing lies in the Maillard reaction. This scientific process occurs when proteins and sugars in the meat react to high heat, creating a complex, savory flavor. To achieve this, you’ll need a few key elements: the right oil, a hot pan, and precise timing.
Start by choosing an oil with a high smoke point, like avocado or extra light olive oil. These oils can withstand high temperatures without burning, ensuring a clean, even sear. Preheat your pan until it’s hot but not smoking—this is crucial for achieving that golden crust.
“Searing locks in juices and creates a delightful crust that’s packed with flavor.”
Here’s a step-by-step guide to perfect searing:
- Pat the meat dry with a paper towel to remove excess moisture.
- Heat your pan over medium-high heat and add a thin layer of oil.
- Place the meat in the pan and let it sear for 2-3 minutes without moving it.
- Flip and repeat on the other side until evenly browned.
Short, high-heat searing prevents the meat from drying out, keeping it juicy pork every time. Use a meat thermometer to monitor the internal temperature and ensure it’s cooked to perfection. Mastering this step elevates the overall flavor of your recipe and makes it a standout dish.
| Step | Key Tip |
|---|---|
| Preheat Pan | Use medium-high heat for even searing. |
| Choose Oil | Opt for high smoke point oils like avocado or extra light olive oil. |
| Monitor Temperature | Use a meat thermometer for precision. |
For more advanced techniques, check out our guide on mastering the art of sautéing. With these tips, you’ll create a dish that’s both visually stunning and incredibly flavorful.
Expert Tips for Roasting Pork Tenderloin
Achieving the perfect roast requires attention to detail and the right tools. Whether you’re a seasoned cook or a beginner, these expert tips will help you create a dish that’s juicy, flavorful, and cooked to perfection.
Monitoring Temperature with a Meat Thermometer
Using a thermometer is the best way to ensure your meat is cooked safely and evenly. The USDA recommends an internal temperature of 145°F for pork, followed by a 3-minute rest. This ensures the meat is safe to eat while remaining tender and juicy.
An instant-read thermometer is a must-have tool. Insert it into the thickest part of the meat, avoiding bones or fat. This simple step takes the guesswork out of cooking and prevents overcooking.

Ensuring Juiciness and Even Cooking
To keep your roast juicy, avoid opening the oven door frequently. Heat fluctuations can dry out the meat. Instead, flip the pork halfway through the cooking time to ensure even browning and heat distribution.
Another tip is to let the meat rest after cooking. This allows the juices to redistribute, resulting in a more flavorful and tender dish. Cover it loosely with foil to retain warmth.
“Proper temperature monitoring is the key to a safe and delicious roast.”
By following these tips, you’ll master the art of roasting and impress your family with a perfectly cooked meal every time.
Step-by-Step Cooking Process
Cooking a delicious meal doesn’t have to be complicated—this step-by-step guide simplifies the process for you. Follow these instructions to create a flavorful dish that’s perfect for any day of the week.
Searing in a Cast Iron or Dutch Oven
Start by preheating your oven to 400°F. While it heats, prepare your pork tenderloin by patting it dry with a paper towel. This ensures a golden crust when searing.
Heat a cast iron or Dutch oven over medium-high heat. Add a tablespoon of oil and let it shimmer. Place the meat in the pan and sear for 2-3 minutes on each side. This step locks in juices and creates a rich, flavorful crust.
Baking with Precision
Once seared, transfer the meat to the preheated oven. Bake for 15-20 minutes, flipping halfway through. This ensures even cooking and a perfect golden-brown finish.
Use a meat thermometer to check the internal temperature. The USDA recommends 145°F for safe consumption. Let the meat rest for 3 minutes before slicing. This allows the juices to redistribute, keeping it moist and tender.
“Proper searing and baking are the keys to a flavorful and juicy dish.”
This recipe is simple enough for busy days but delivers impressive results. By following these steps, you’ll create a meal that’s both delicious and satisfying.
Resting and Slicing for Maximum Flavor
The final step to a perfect dish lies in how you handle it after cooking. Resting and slicing your meat correctly ensures it stays juicy and full of flavor. This phase is just as important as the cooking process itself.
Allowing the Meat to Reabsorb Juices
After baking, let your meat rest for 5-10 minutes. This allows the internal temperature to stabilize and the juices to redistribute. Skipping this step can result in a dry and less flavorful dish.
Use a dry paper towel to lightly cover the meat while it rests. This helps retain warmth without trapping steam, which could soften the crust. Proper resting ensures every bite is tender and juicy.
Proper Slicing Techniques
When it’s time to slice, use a sharp knife for clean cuts. Cutting against the grain ensures maximum tenderness. This technique shortens the muscle fibers, making each piece easier to chop and enjoy.
“Resting and slicing correctly finalizes the texture and flavor of your dish.”
Handle the meat minimally to preserve the crust’s integrity. Use a paper towel to grip the meat if needed, ensuring your hands stay clean and the dish remains pristine. These small steps make a big difference in the final result.
Creative Serving Suggestions and Side Pairings
Transform your dinner into a restaurant-quality experience with creative side pairings. The right sides can elevate your dish, adding balance and variety to your meal. Whether you prefer fresh salads or hearty starches, these ideas will inspire you to experiment and enhance your dining experience.
Complementary Vegetables and Salads
Fresh vegetables and salads are perfect for lightening up your meal. A classic Caesar salad or a peppery arugula mix pairs beautifully with the flavors of your dish. For a more vibrant option, try a green bean salad with cherry tomatoes and a tangy vinaigrette.
Roasted vegetables are another excellent choice. Toss carrots, zucchini, or bell peppers with olive oil and herbs, then roast until tender. These sides add color and nutrition to your plate.

Delicious Potato and Rice Ideas
Hearty sides like potatoes and rice can make your meal more satisfying. Creamy mashed potatoes or crispy roasted wedges are always a hit. For a Mediterranean twist, try Greek lemon potatoes seasoned with oregano and garlic.
Rice dishes also pair well. A simple pilaf or a fragrant jasmine rice can complement the flavors of your dish. For added texture, mix in some wild rice or quinoa.
“The right sides can turn a simple meal into a memorable dining experience.”
Here are some creative pairing ideas to try:
- Roasted vegetables with a drizzle of balsamic glaze.
- Fresh arugula salad with shaved Parmesan and lemon dressing.
- Mashed sweet potatoes with a hint of cinnamon.
- Wild rice pilaf with toasted almonds and dried cranberries.
Experiment with different combinations to find your favorite. These serving suggestions not only enhance the flavors but also make your dinner feel special.
Leftover Solutions: Storage and Reheating
Leftovers can be just as delicious as the original meal if stored and reheated correctly. Proper handling ensures your dish stays flavorful and moist, making it perfect for quick lunches or dinners later in the week. Here’s how to store and reheat your meal without losing its quality.
Proper Storage Techniques in an Airtight Container
Start by letting your meat cool to room temperature before storing. This prevents condensation, which can make the dish soggy. Once cooled, transfer it to an airtight container. This keeps the meat fresh and prevents it from absorbing odors in the fridge.
For best results, use a high-quality container that seals tightly. Label it with the date to keep track of freshness. Proper storage not only maximizes flavor but also ensures your meal is safe to eat for up to three days.
Best Practices for Reheating Without Drying Out
When reheating, gentle methods work best to retain moisture. Preheat your oven to 250°F and place the meat in a baking dish. Add a splash of broth or water to keep it from drying out. Cover with foil and heat for 10-15 minutes, or until warmed through.
For stovetop reheating, use a non-stick pan over low heat. Add a bit of oil or butter to prevent sticking. Stir occasionally to ensure even heating. Avoid microwaving, as it can dry out the meat and alter its texture.
“Proper storage and reheating techniques ensure your leftovers stay juicy and flavorful.”
Planning ahead with these tips makes weekday meals a breeze. For more insights on handling leftovers, check out our guide on cooking juicy filet mignon.
Time-Saving Tips and Recipe Variations
Want to save time without compromising on flavor? Here’s how. Busy weeknights call for quick adjustments that still deliver a delicious meal. With a few tweaks, you can make this dish work for your schedule while keeping it flavorful and satisfying.
Quick Adjustments for Busy Weeknights
If you’re short on time, try prepping ingredients ahead. Chop vegetables or mix spices the night before. This cuts down on prep time and lets you focus on cooking. Another tip is to double the recipe for leftovers. It’s a great way to save effort later in the week.
Experiment with spice blends to suit your taste. Swap Italian seasoning for smoked paprika or add a pinch of chili flakes for heat. Small changes can transform the dish into something new. For a quick glaze, mix honey and soy sauce for a sweet and savory twist.
“Small tweaks can turn a simple dish into a new experience.”
Creative Variations to Try
Switch up the flavors with herb-crusted or honey-garlic glazed versions. For an Asian-inspired twist, use ginger, garlic, and sesame oil. These variations are easy to make and add excitement to your meals.
Pair your dish with a fresh salad or roasted vegetables for a complete meal. A simple arugula salad with lemon dressing complements the flavors perfectly. These sides are quick to prepare and add balance to your plate.
With these tips, you can cook a delicious meal in no time. Whether you’re experimenting with spices or prepping ahead, there’s always a way to make it work for your schedule.
Nutritional Insights and Health Benefits
When it comes to healthy eating, pork tenderloin stands out as a top choice. This lean cut of meat is packed with essential nutrients, making it a smart addition to any meal plan. Whether you’re focused on fitness or simply want to eat better, pork tenderloin delivers both flavor and nutrition.
Lean Protein and Low-Fat Advantages
Pork tenderloin is an excellent source of lean protein, ideal for maintaining muscle mass and supporting overall health. With only 3 grams of fat per serving, it’s a low-fat option that fits seamlessly into a balanced diet. Compared to other meats like beef or chicken, pork tenderloin offers a similar protein content with fewer calories.
Here’s a quick breakdown of its nutritional profile per 3-ounce serving:
- Calories: 120
- Protein: 22 grams
- Fat: 3 grams
- Iron: 6% of daily value
- Vitamin B6: 15% of daily value
These nutrients play a vital role in energy production, immune function, and overall well-being. Including pork tenderloin in your recipe rotation ensures you’re getting a variety of essential vitamins and minerals.
Versatility for a Balanced Diet
One of the best things about pork tenderloin is its versatility. It pairs well with a range of sides, from fresh salad to hearty rice or bean dishes. This makes it easy to create meals that are both nutritious and satisfying.
“Pork tenderloin is a lean, nutrient-dense option that supports a healthy lifestyle.”
By choosing thoughtful ingredients and cooking methods, you can enhance the nutritional profile of your meals. Whether you’re grilling, baking, or sautéing, pork tenderloin remains a healthy and delicious choice.
Conclusion
Creating a delicious meal doesn’t have to be time-consuming or complicated. This pork tenderloin recipe is proof that you can enjoy a flavorful, tender dish any day of the week with minimal effort. By following the step-by-step guide, you’ll master the art of searing, seasoning, and resting to ensure every bite is packed with flavor.
Whether you’re cooking for family or hosting friends, this recipe is versatile enough to suit any occasion. Don’t be afraid to experiment with your own variations—your creativity can make it even more special. Share your feedback and inspire others to try this simple yet impressive dish.
Thank you for exploring this pork tenderloin recipe with us. We hope it becomes a regular part of your cooking routine. For more culinary inspiration, check out other recipes from trusted sources like Natasha’s Kitchen and Carlsbad Cravings. Happy cooking!
FAQ
What’s the best way to trim and dry the meat before cooking?
Use a sharp knife to remove the silver skin, then pat the surface dry with a paper towel. This helps the seasoning stick and ensures a better sear.
How do I create a flavorful crust when searing?
Heat oil in a cast iron or Dutch oven until it’s hot. Sear the meat on all sides for 1-2 minutes until it develops a golden-brown crust.
What’s the ideal internal temperature for juicy results?
Use a meat thermometer to check for an internal temperature of 145°F. This ensures the meat is cooked through but still tender and moist.
How long should I let it rest before slicing?
Let it rest for about 5-10 minutes under foil. This allows the juices to redistribute, keeping the meat flavorful and juicy.
What are some great side dishes to pair with this dish?
Try roasted vegetables, a fresh salad, or sides like mashed potatoes or rice. These complement the flavors beautifully.
How should I store leftovers to keep them fresh?
Place leftovers in an airtight container and refrigerate for up to 3 days. Reheat gently to avoid drying out the meat.
Can I use a marinade for extra flavor?
Absolutely! A simple marinade with olive oil, garlic, and herbs can enhance the taste. Let it sit for at least 30 minutes before cooking.
What’s the difference between tenderloin and loin cuts?
Tenderloin is leaner and more tender, while loin is slightly larger and can be a bit fattier. Both are great but require slightly different cooking times.
How can I reheat leftovers without losing moisture?
Reheat in a covered dish with a bit of broth or water at a low temperature. This helps retain juiciness.
Are there any quick adjustments for busy weeknights?
Use a pre-made seasoning rub or sauce to save time. You can also prep the meat the night before for faster cooking.


