


How to Make Syrian Comfort Food: Kibbeh, Yalanji, and More
May 2, 2025
How to Make Traditional Japanese Sushi Rolls in Your Own Kitchen
May 3, 2025
I still remember the first time I bit into a wood-fired Neapolitan-style pie during a trip to Naples. The crisp, leopard-spotted crust, the tangy tomato sauce, and the creamy mozzarella clinging to my fork—it felt like tasting sunlight. That moment sparked my obsession with recreating that magic in my own kitchen, one imperfect dough ball at a time.
Early attempts were… humbling. My oven refused to hit the blistering 900°F of traditional brick ovens. Store-bought flour left the crust dense. But through years of trial (and edible errors), I discovered secrets that bridge Italy’s artistry with American home kitchens. Like how resting dough overnight transforms its flavor, or why a baking steel rivals professional decks.
This guide isn’t about shortcuts. It’s about honoring centuries-old methods while adapting them for modern tools. You’ll learn why yeast behaves differently in humid climates, how to shape edges by hand without tearing, and when to trust your instincts over the timer. Let’s turn your kitchen into a pizzeria—no passport required.
Key Takeaways
- Quality flour and slow fermentation create airy, flavorful dough
- Home ovens can mimic professional results with strategic heat management
- Hand-stretching techniques prevent tough crust formation
- Fresh ingredients like San Marzano tomatoes elevate simplicity
- Patience is your secret ingredient for developing complex flavors
Understanding Authentic italian pizza making
There’s a rhythm to crafting Neapolitan-style pies that feels almost musical – fold, press, spin. Unlike thicker American versions or cracker-thin Roman cousins, these creations balance structural integrity with cloud-like lightness. The secret lies in strict guidelines enforced by the Neapolitan Pizza Association, ensuring every element honors tradition.
Science Meets Art in Every Bite
True Neapolitan dough behaves differently than standard recipes. It demands:
- 00 flour for optimal gluten development
- Precise water ratios (about 65% hydration)
- 72-hour fermentation at room temperature
This process creates those signature charred crust bubbles and tender interior. As one pizzaiolo told me:
“We don’t make pizza – we guide the ingredients to become their best selves.”
Guardians of Culinary Heritage
Traditional methods forbid rolling pins or excessive toppings. Even mozzarella placement follows rules – torn by hand, never sliced. While experimenting is fun (I’ve made my share of common cooking mistakes), mastering these fundamentals first builds essential skills. My breakthrough came when I stopped fighting my home oven and learned to work with its heat patterns instead of against them.
Essential Tools for Your Neapolitan Pizza Journey
Ever tried sliding dough off a cookie sheet? Let’s just say my first attempt ended in a cheesy floor mosaic. The right gear bridges the gap between home kitchens and professional results. While you don’t need a brick oven, three tools revolutionized my results.

Must-Have Equipment: Pizza Stone and Pizza Peel
A quality pizza stone mimics brick-oven heat retention. I tested six brands before finding one that maintains 500°F+ for crispy edges. Pair it with an aluminum peel – its thin edge slides under delicate dough without sticking. Pro tip: Dust the peel with semolina flour before launching.
Additional Kitchen Tools and Accessories
These helpers streamline the process:
- Bench scraper: Cuts portions cleanly and lifts dough without deflating air pockets
- Large mixing bowl: Allows proper fermentation (I prefer glass for easy cleanup)
- Dough docker: Prevents uneven bubbling – especially crucial for thin crust recipes
My game-changer? A $15 infrared thermometer. Knowing my stone’s exact surface temperature prevents underbaked centers. For those using home ovens, preheat the stone for 45 minutes – patience here pays off in golden baking results.
Sourcing Quality Ingredients
Great pies begin long before shaping dough – they start with what’s in your pantry. After burning through countless recipes, I learned that premium components elevate results more than any technique. Your tools matter, but ingredients write the flavor story.
Fresh Mozzarella, San Marzano Tomatoes, and More
Not all cheese behaves the same. Fresh mozzarella’s high moisture content creates creamy pools, while low-moisture versions turn rubbery. For sauce, DOP-certified San Marzano tomatoes from volcanic soil offer balanced sweetness. A pizzaiolo in Naples once told me:
“Bad ingredients make sad pies – they can’t hide behind heat.”
I tested this theory using generic crushed tomatoes versus San Marzanos. The difference? Like comparing ketchup to sunshine.
The Importance of 00 Flour and Proper Yeast
Caputo’s 00 flour became my game-changer. Its fine texture and 12.5% protein content create elastic dough that bubbles beautifully. Pair it with active dry yeast (not instant) for controlled fermentation.
Water quality matters too – New York chefs swear by filtered water for optimal gluten development. When my dough kept collapsing, switching to bottled spring water fixed it overnight. Sometimes, perfection hides in the details.
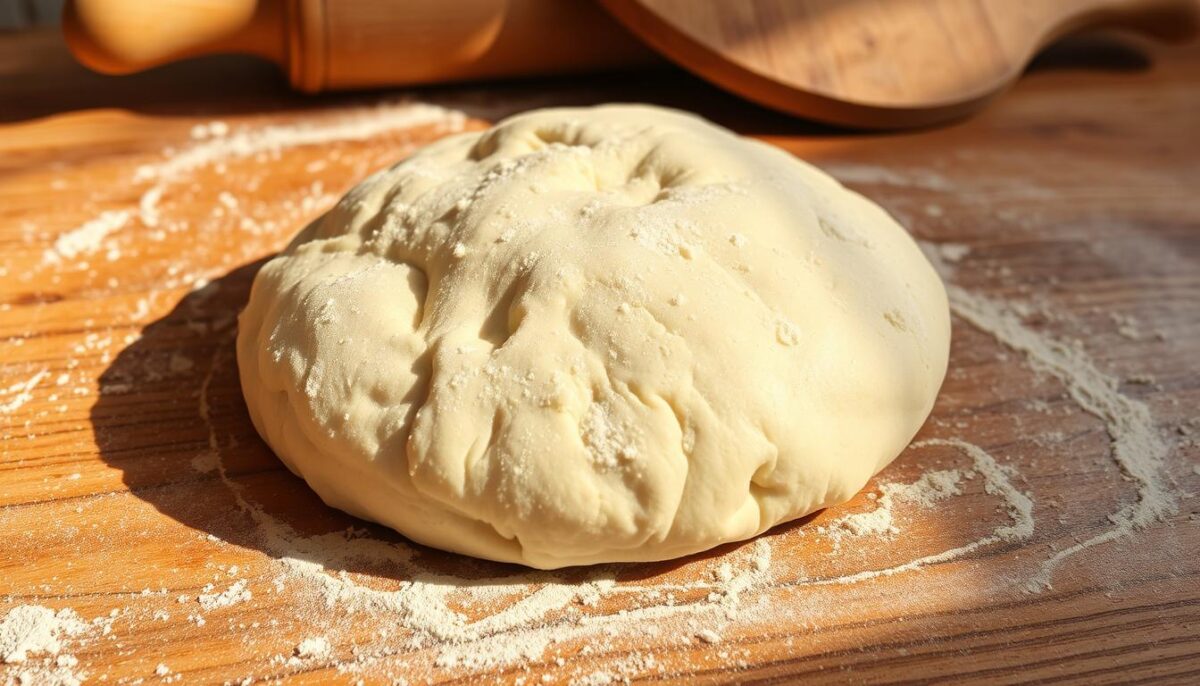
Step-by-Step Dough Making Process
The magic of a great crust begins long before the oven preheats. It starts with your fingertips pressing into a supple, living mass that remembers every fold and rest. I’ve ruined enough batches to know: rushing this stage turns potential into cardboard.

Mixing, Resting, and Proofing the Dough
Combine flour, water, and yeast in a large bowl until shaggy – perfection comes later. Let it rest 20 minutes before kneading. This autolyse period lets gluten form without fight.
After shaping into a ball, fermentation becomes your clock. I proof mine 24 hours in the fridge. Cold slows yeast, deepening flavor without overproofing. Timing is crucial – room-temp dough? Watch closely.
Techniques for Achieving a Light, Airy Crust
Handle dough like a fragile ecosystem. Dust your work surface lightly – too much flour creates tough spots. Stretch from the center outward, letting gravity help.
When transferring to the peel, move swiftly but gently. A hesitant hand deflates all your patient work. That first bite of blistered edges? Worth every minute.
Building the Perfect Sauce and Toppings
A perfectly balanced pie dances between simplicity and precision. While dough forms the foundation, sauce and toppings become its voice – too loud, and you lose nuance; too quiet, and magic fades. My early attempts drowned in sugar-laden sauces and chaotic ingredient piles until I discovered less truly is more.
Crafting a Flavorful, Sugar-Free Red Sauce
Authentic red sauce needs just three stars: San Marzano tomatoes, sea salt, and extra virgin oil. Crush tomatoes by hand to preserve texture – blenders create foam that alters flavor. Simmer uncovered for 20 minutes to concentrate taste without caramelization. A Neapolitan chef once advised:
“Your sauce should whisper ‘tomato,’ not shout ‘sugar.'”
If sauce tastes flat, add a pinch of baking soda to neutralize acidity instead of sweeteners. Test consistency by dragging a spoon – it should leave a temporary trail without pooling.
Optimal Topping Placement for Balanced Flavor
Think of your pizza as a layered symphony. Start with sauce, leaving a ½-inch border. Add cheese next – fresh mozzarella torn into nickel-sized pieces melts evenly. Meats go on top to crisp slightly, while delicate herbs like fresh basil should wait until after baking.
| Layer | Ingredients | Purpose |
|---|---|---|
| Base | Sauce | Prevents soggy crust |
| Middle | Cheese | Acts as flavor anchor |
| Top | Meats/Veggies | Enhances texture contrast |
When my overeager pepperoni placement once steamed the crust into mush, I learned: heavy toppings belong near the oven‘s hottest zone. For home bakes, cluster meats toward the center where heat concentrates. Remember – every ingredient competes for attention. Choose three heroes, not a crowded cast.
Mastering the Art of Pizza Shaping
Shaping dough feels like conducting a silent orchestra – every finger movement determines whether you’ll hear crisp crunch or dull thud when biting in. My first attempts resembled abstract art more than circular pies until I discovered the transformative power of technique.

Hand Stretching Versus Rolling Techniques
I learned the hard way that rolling pins are dough’s worst enemy. During a disastrous dinner party, my rolled-out base baked into a cracker-thin disc that shattered under toppings. A pizzaiolo’s YouTube tutorial changed everything:
“Treat dough like a bubble wrap package – protect the air inside.”
Hand stretching preserves those precious gas pockets created during fermentation. Here’s how they differ:
| Method | Texture | Edge Integrity |
|---|---|---|
| Hand Stretching | Airy, uneven char | Thick, puffy cornicione |
| Rolling Pin | Dense, uniform | Thin, prone to burning |
For beginners, I recommend the “gravity stretch” technique. Lightly oil your work surface instead of flouring – it reduces sticking without drying the dough. Let the weight of the ball do most of the work as you rotate it between your knuckles.
Keep edges ½-inch thicker than the center. This creates a protective barrier against sauce seepage while allowing the crust to puff dramatically. My goof-proof test? If fingerprints remain visible after shaping, you’ve handled it gently enough.
Harnessing the Power of Your Pizza Oven
I once watched a wood-fired oven devour a pie in 67 seconds flat – the exact moment I understood heat’s transformative power. While most home kitchens can’t reach 900°F, strategic tools and techniques bridge this gap beautifully.

Wood-Fired Oven Benefits Compared to Home Ovens
Traditional brick ovens work magic through:
- Radiant heat: Surrounds dough evenly for quick cooking
- Smoky flavor infusion: Charred wood adds depth
- Moisture control: High heat evaporates excess water instantly
My neighbor’s backyard oven bakes pies in 90 seconds – crusts puff like balloons while tomatoes stay bright. But don’t despair if you’re stove-bound. As a pizzaiolo friend advised:
“Treat your home oven like a sports car – preheat aggressively and know its hot zones.”
Using a Pizza Stone or Steel Effectively
These heat-retention heroes mimic brick ovens:
| Tool | Best For | Preheat Time |
|---|---|---|
| Stone | Crispy base | 45 minutes |
| Steel | Faster recovery | 1 hour |
Place your stone/steel on the oven’s top rack. Crank the broiler 10 minutes before launching – this mimics wood-fired temperature spikes. Keep a spray bottle handy: misting the oven floor creates steam for better crust rise.
My game-changer? Letting the peel warm near the oven while prepping. Cold metal shocks dough, causing sticking. For basil lovers: add fresh leaves under cheese to protect them from scorching.
Time-Saving Tips and Tricks in the Kitchen
Time management transformed my pizza nights from chaotic to calm. Through trial and error, I discovered strategies that shave hours off prep work while maintaining artisanal quality. Let’s turn your kitchen into a well-oiled machine.
Prepping Ingredients and Organizing Your Workspace
Clear counters are your secret weapon. I keep three zones: dry ingredients on the left, dough station in the center, and topping assembly on the right. This “pizza triangle” minimizes steps during crunch time.
Batch prep saves weekends:
- Mix dough for multiple balls – freeze extras in oiled containers
- Portion sauce into ice cube trays (1 cube = perfect per pie)
- Pre-chop hardy veggies; store in large bowl with damp paper towels
My game-changer? A baking steel stays permanently on the oven’s bottom rack. It preheats while I prep, cutting wait time by 30 hours monthly. For surface work, a marble slab stays chilled – ideal for warm kitchens.
“Organization isn’t about perfection – it’s about creating flow.”
When shaping dough, keep a spray bottle nearby. Lightly mist your hands and work area instead of flouring – reduces cleanup by half. For last-minute dinners, par-bake crusts for 2 minutes, then freeze. They’ll crisp up in 5 minutes when topped.
Troubleshooting Common Pizza-Making Issues
We’ve all been there – pulling a pie from the oven that looks more like a pancake than a masterpiece. Through years of trial (and occasional tears), I’ve cracked the code on fixing common dough disasters. Let’s tackle those stubborn issues stealing your pizza joy.
Fixing Dough Consistency and Proofing Errors
Sticky dough? Add flour 1 tsp at a time during kneading. If it’s tearing, let it rest 10 minutes – gluten needs hydration breaks. My worst batch ever taught me this golden rule: cold fermentation fixes most sins. Let overproofed dough sit at room temp 30 minutes before reshaping.
| Symptom | Likely Cause | Fix |
|---|---|---|
| Dense texture | Underproofed | Extend rise time 1 hour |
| No bubbles | Dead yeast | Test in warm water first |
| Crumbly edges | Low hydration | Add 1 tbsp oil next batch |
Achieving the Ideal Crust Texture and Avoiding Sogginess
Soggy bottoms often come from cold pizza stones. Preheat yours 60 minutes minimum. If cheese pools liquid, blot fresh mozzarella with paper towels first. A pizzaiolo once showed me his steam trick: spritz the oven walls lightly before closing the door.
For crackly crust, bake plain dough 2 minutes before saucing. My “aha” moment came when I stopped overloading toppings – three ingredients max keeps moisture balanced. Remember: less sauce means more crunch. If edges burn before the center cooks, lower your oven rack one notch.
Learning from My Italian Cooking Class Experience
The moment Chef Marco corrected my dough fold, I realized I’d been missing the poetry in pizza creation. At FlorenceTown Cooking School, flour-dusted counters became classrooms where precision met passion. Our group of eight learned that every motion – from mixing to plating – carries intention.
Inspiration from a FlorenceTown Cooking Class
Chef Marco’s approach transformed simple steps into art. He demonstrated how to:
- Use the heel of your hand to stretch dough without tearing
- Test fermentation readiness by pressing a finger into the ball
- Rotate pies in the oven using a wooden peel like a conductor’s baton
“Your tools are extensions of your senses,” he remarked while shaping a portion that had proofed overnight. The large bowl we used wasn’t just a container – its wide rim allowed perfect airflow during rising.
Personal Insights and Practical Lessons
Three revelations changed my home practice:
- Cold-fermented dough develops deeper flavor in 48 hours than rushed batches
- A video of your shaping technique reveals flaws invisible in real time
- Blotting fresh cheese prevents sogginess better than any baking hack
I now keep a journal beside my mixer, noting hydration levels and room temperature. As Chef Marco advised:
“Recipes are maps, but you’re the driver – adjust for detours.”
For those craving growth, I recommend seeking local classes. The hands-on feedback I received in one afternoon solved issues I’d wrestled with for months. Sometimes, watching a master work is the shortest path to mastery.
Conclusion
My journey from dough disasters to golden-edged triumphs taught me one truth: great pies aren’t made – they’re cultivated. That first sticky ball of flour and water holds infinite potential, waiting for your hands to guide it.
Through countless trials, three pillars proved non-negotiable. A blazing pizza stone mimics brick-oven intensity. San Marzano tomatoes and fresh mozzarella sing in harmony when treated simply. Cold-fermented dough, shaped with patience, becomes your edible canvas.
I’ve burned pies, over-sauced bases, and misjudged oven temps. But each mistake sharpened my instincts. Now, watching crust bubbles form under broiler heat feels like decoding nature’s secrets.
Your kitchen won’t become Naples overnight. But with quality tools, seasonal ingredients, and playful curiosity, every attempt inches closer to mastery. Remember: the best pies aren’t perfect – they’re alive with flour, fire, and care.
Grab your peel, dust the work surface, and let the dough tell its story. Somewhere between the salt and smoke, you’ll find magic waiting to rise.
FAQ
Why does my dough tear when stretching?
If your dough tears, it might need more gluten development. Let it rest at room temperature for 10–15 minutes to relax the gluten. Use your fingertips to gently stretch from the center outward, keeping the edges intact.
Can I use regular flour instead of 00?
While 00 flour creates that classic light, airy crust, all-purpose works in a pinch. Just note the texture will be denser. For best results, stick with Caputo “Pizzeria” 00 flour—it’s my go-to for Neapolitan-style recipes.
How do I prevent a soggy center?
Sogginess often comes from too much sauce or wet toppings. Spread a thin layer of sauce, leave a ½-inch border, and blot fresh mozzarella with paper towels. Preheating your pizza stone for 45+ minutes also helps crisp the crust fast.
What’s the ideal oven temperature?
Aim for 800°F+ if using a wood-fired oven. At home, crank your oven to its highest setting (usually 500–550°F) with the stone or steel on the lowest rack. A baking steel retains heat better than stone for home ovens, in my experience.
Do I need a pizza peel?
A wooden peel makes transferring dough easier, especially for beginners. Dust it with semolina or flour to prevent sticking. If you don’t have one, shape the dough directly on parchment paper and slide it onto the stone.
How long should dough proof?
I let mine ferment in a large bowl for 8–24 hours in the fridge. Cold proofing develops flavor without over-rising. Bring it to room temperature for 1–2 hours before shaping—this makes stretching smoother and avoids a tough crust.
Can I freeze leftover dough?
Absolutely! After the first rise, divide into balls, coat with olive oil, and freeze in airtight bags for up to 3 months. Thaw overnight in the fridge, then let it rest on the counter before using. Works great for quick weeknight meals.
Why add sugar to the dough?
Authentic recipes skip sugar, but a teaspoon helps activate yeast faster in cooler kitchens. I prefer honey or none at all—let time do the work. A slow rise with just water, sea salt, and yeast gives the best flavor, in my opinion.
How thin should the crust be?
Neapolitan-style crusts are about ¼-inch thick in the center, with puffy edges. Use your hands, not a rolling pin, to preserve air bubbles. If it’s too thin, the sauce might seep through—keep a bit of thickness near the edges for structure.
What’s your favorite sauce hack?
Crush San Marzano tomatoes by hand for a rustic texture. Simmer with garlic, basil, and a pinch of sea salt—no sugar needed. Let it cool before spreading to avoid overheating the fresh mozzarella during baking. Less is more here!


